Install the FRL
NOTE: We're continuously improving our products, so your machine may vary from the photos in our documents and videos. While the images may vary, the concepts still apply.
-
Clean the FRL to make sure that it's free of dust.
-
Remove and discard the plastic inserts from the FRL.
-
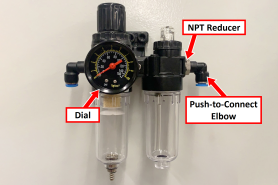
Identify the dial provided, and then put two layers of thread seal tape on its threads.
-
Attach the dial on the front of the FRL.
-
Identify the two push-to-connect elbows and the two NPT reducers provided. Connect the push-to-connect elbows to the NPT reducers.
-
Put two layers of thread seal tape on the threads of the NPT reducers.
-
Attach the NPT reducers to the valve housings on either side of the FRL.
-
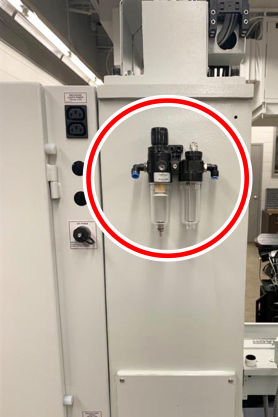
Identify the two holes on the back of the column. This is the mounting location for the FRL.
-
Install the FRL bracket on the machine with your own hardware.
-
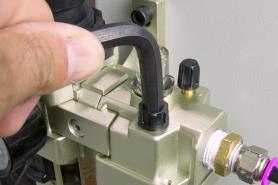
Connect the air lines to the quick-connect bushings.
Set Up the FRL
-
Open the fill port on the FRL with a hex wrench.
-
Fill the lubricator bowl with standard air tool oil with a small funnel. You must only use oil specifically designed for air tools.
-
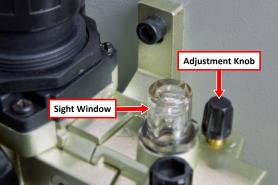
Turn the adjustment knob halfway toward the +.
-
Flush all air bubbles from the system.
-
Examine the sight window for air bubbles. When there are no air bubbles in the sight window, and a drop of lubricant is on the bottom of the stem, turn the adjustment knob one-quarter turn back.
-
Close the fill port on the FRL with your hand.
NOTICE! Don't use a hex wrench to close the fill port. If you do, you could over-tighten it and break the plastic cap.
Looking for more information?
This is a section of the 1100M operator's manual. To view the whole manual, go to Tormach document UM10540.
If you have additional questions, we can help. Create a support ticket with Tormach Technical Support at tormach.com/how-to-submit-a-support-ticket for guidance on how to proceed.