Spindle Tram Adjustment - PCNC 440
Background
This page covers adjusting spindle tram on a Tormach mill. Spindle tram being out is characterized by a step being evident between passes. Spindle tram is a measurement of how much the spindle angle is different from being perpendicular to the table. Since the measurement is an angle, the step seen will be larger if a larger tool such as a fly cutter used. This page is relevant for Tormach mills only.
NOTE: It is highly recommended to check machine leveling before adjusting spindle tram. Leveling and Squaring Your Mill
Tools
Indicator with resolution of .0005” or less
Magnetic base or indicator holder with rob able to be clamped in a tool holder
Metric hex wrenches
Shim set (plastic shims recommended)
123 or gauge block
Test Procedure
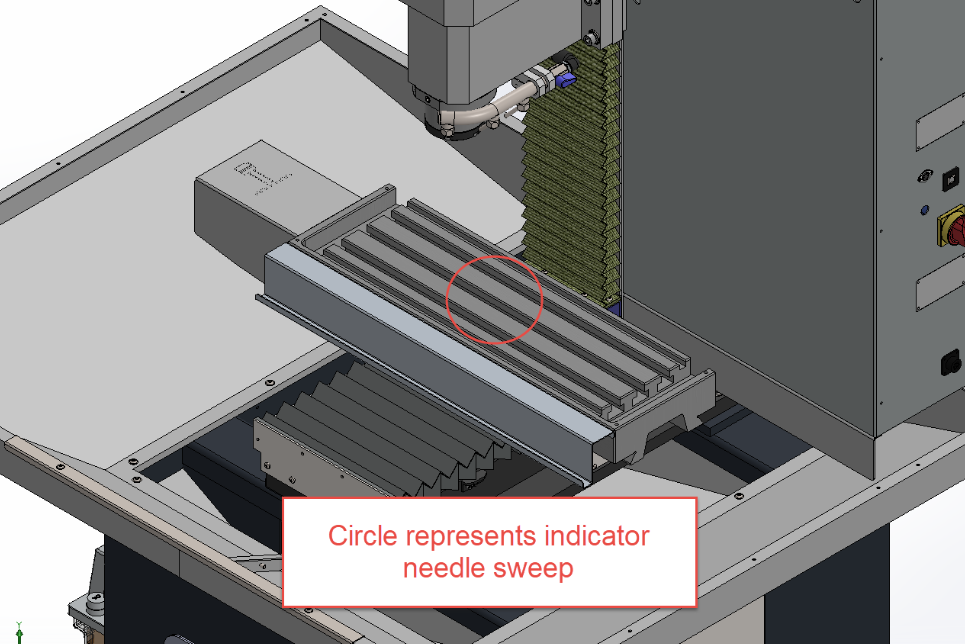
Mount the dial test indicator to the spindle such that rotating the spindle by hand rotates the indicator. Move the table to have it’s center in the Y axis positioned under the spindle centerline. Adjust the magnetic base of indicator rod such that when spun by hand the indicator needle reaches both edges of the table in the Y axis (sweeping the greatest circle possible).

Record the indicator readings at each of the positive and negative most points of the X and Y axis. Different indicators will reach either positive high or positive low, but positive high will be most common.
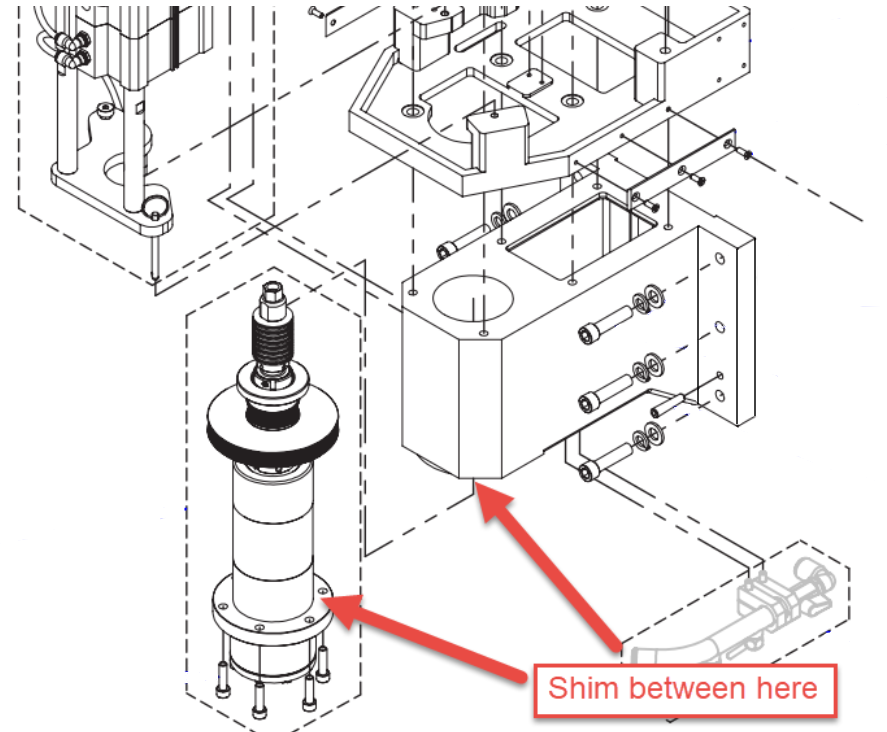
“Positive high” is indicated by the indicator needle reading high when the surface rises. If your indicator reads positive high, a shim will be placed opposite the position with the low reading. The shim thickness will differ based on the exact diameter of the measured circle and the reading; inserting a shim the thickness of the indicator reading is recommended.
Shimming

![]() DO NOT READ THE INDICATOR OFF OF A FIXTURE PLATE OR ANY COMPONENT EXCEPT THE MACHINE TABLE
DO NOT READ THE INDICATOR OFF OF A FIXTURE PLATE OR ANY COMPONENT EXCEPT THE MACHINE TABLE
To insert the shim, remove the indicator from the spindle, loosen the spindle belt tension, then loosen the spindle flange bolts, but do not remove them. Ensure that the flange drops enough to insert a shim of the needed thickness. If it does not drop, tap the drawbar or spindle pulley with a dead blow hammer, until it drops.
After inserting the shim in the desired location, tighten the flange bolts, then take another reading with the indicator. Repeat the procedure until the indicator needle shows less than .0005” movement in at least a 6” circle.
