Background
As motors rotate and the machine cuts, vibrations are created. While these are normal, they can resonate, making it sound like something is wrong. Loose sheet metal won’t affect your machine performance, but there are other electrical and mechanical components that should be inspected if the noise doesn’t subside.
Tools
-
Small flat-bladed screwdriver
Secure Loose Sheet Metal
Reason: There is loose sheet metal.
-
Feel for vibration on the sheet metal by placing your hand on the enclosure, outside of the electrical cabinet, chip tray, or any other location you think is practical.
If the vibration dissipates then the problem is not with the motors.
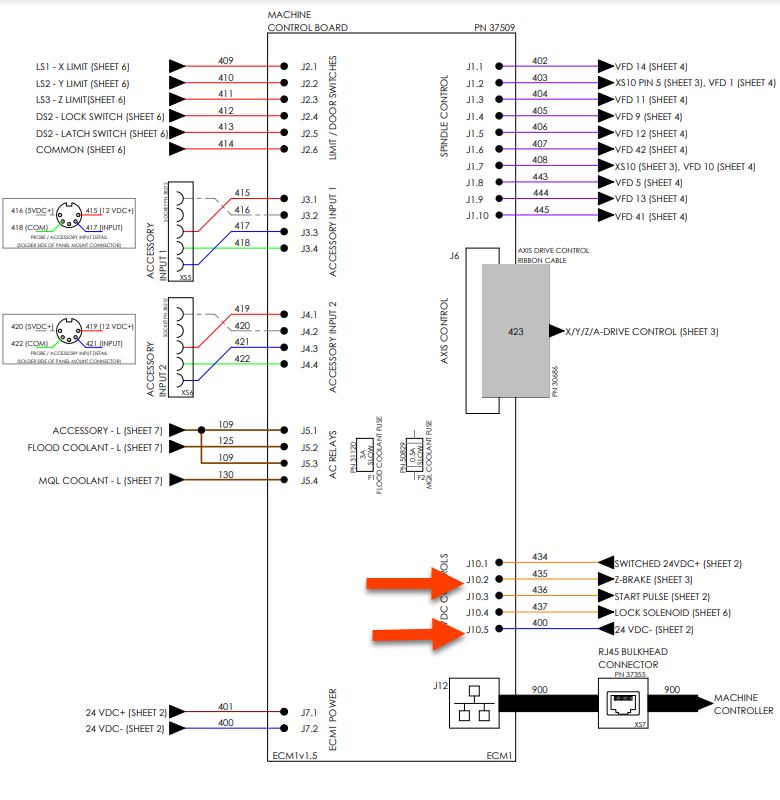
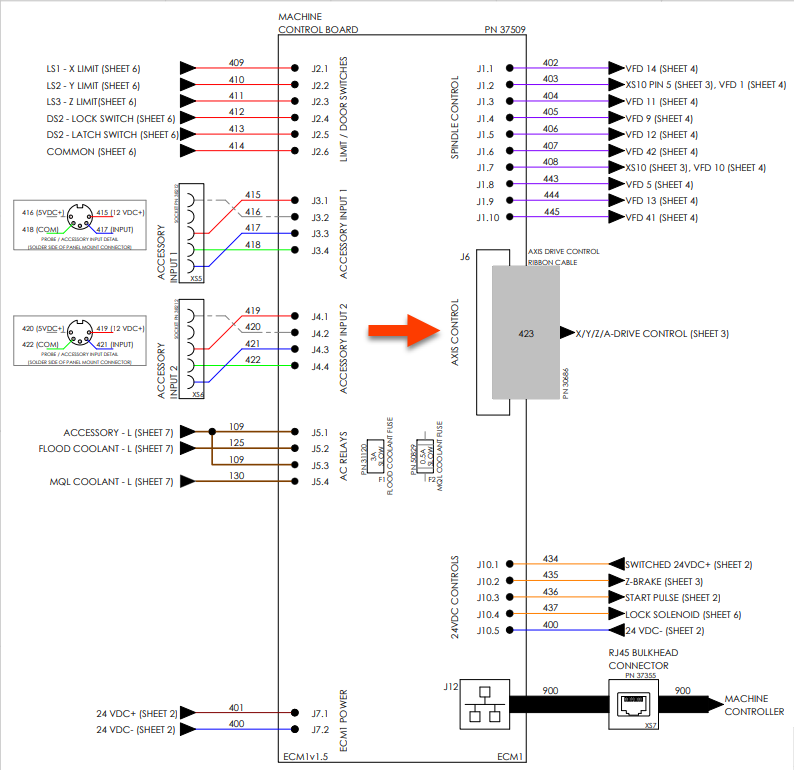
Reseat the Connectors on the ECM Board and Motors
Reason: Control signals aren't reaching the electronic driver modules.
-
Power off the machine.
-
Examine the data cable at the machine control board and the axes drivers.
-
Machine control board: 26 pin IDC (ribbon cable); J6
-
Stepper driver controllers: 10 pin IDC (ribbon cable)
-
423.1 (X-axis)
-
423.2 (Y-axis)
-
423.3 (Z-axis)
-
-
-
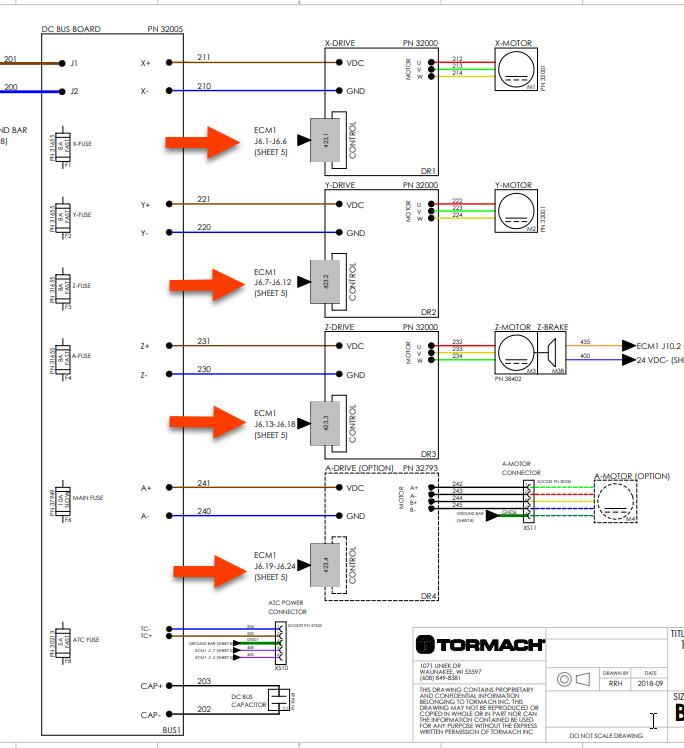
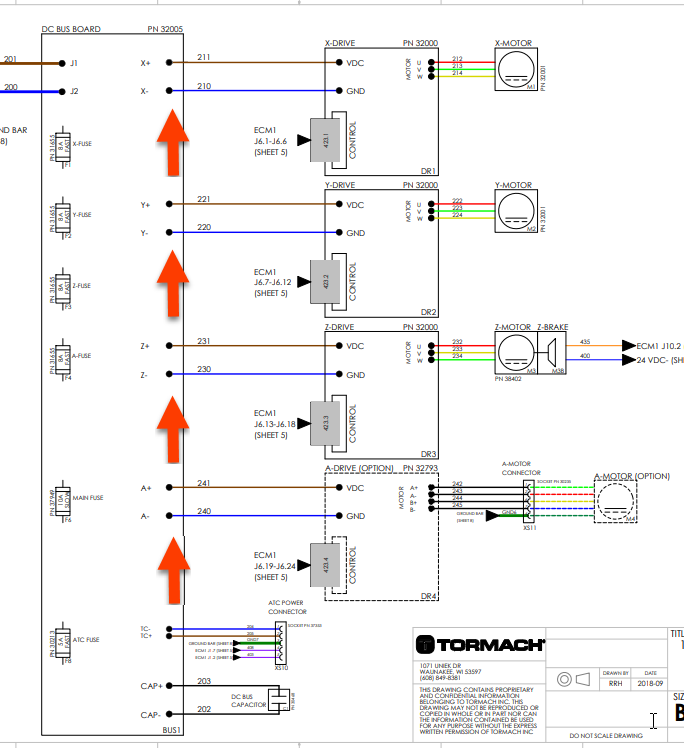
Examine the power and control cables at the DC-BUS and the stepper driver controllers removing, inspecting, and re-connecting them to ensure they are seated.
-
DC-Bus/Stepper driver controllers: Spade connectors/Degson style
-
210/211 (X-axis)
-
220/221 (Y-axis)
-
230/231 (Z-axis)
-
-
-
If there is any discoloration, replace the cable and driver.
-
Continue to the next troubleshooting topic.
Inspect the Stepper Driver Controller
Reason: There's a defective axis driver module.
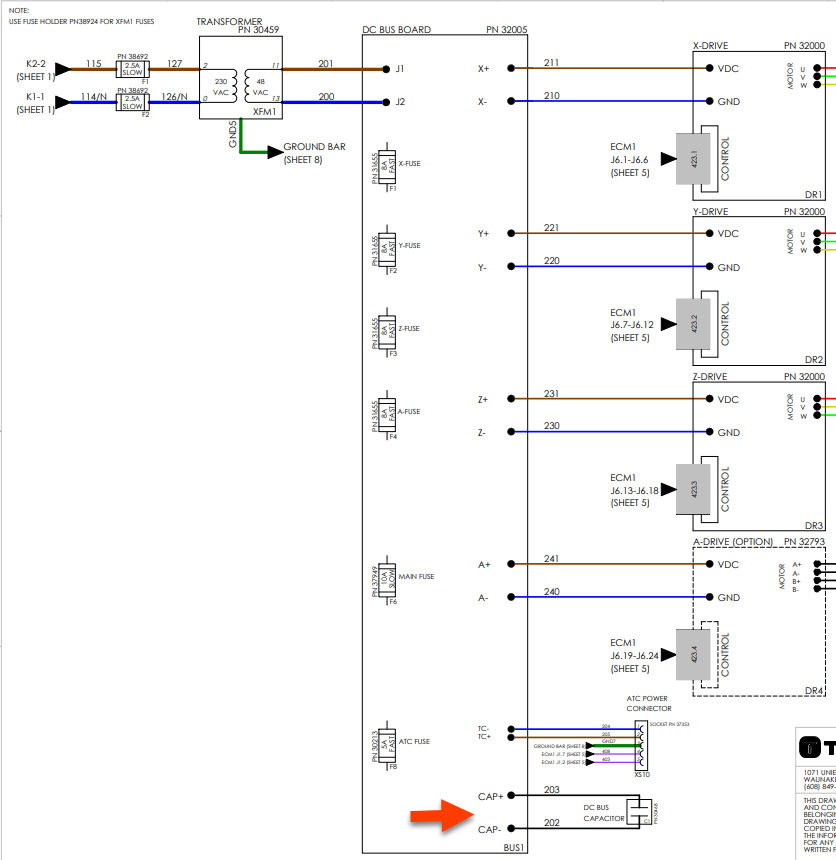
Inspect the DC-BUS Capacitor (C1)
Reason: The C1 (DC-BUS) capacitor is defective.
-
Power off the machine. Then, unplug the green power connectors on all of the axis drivers (X, Y, Z, and A).
-
With the electrical cabinet door open, power on the machine.
-
Examine the green LED on the DC-BUS board, and then twist out the Emergency Stop button and press the Reset button. The green LED should come on.
-
Push in the Emergency Stop button.
-
If the LED goes out in two seconds or less, the capacitor is defective and must be replaced. If the LED takes five seconds or more to go out, the capacitor is OK.
-
-
If the results are not conclusive, power off the machine. Then, unplug the green power connectors from the axis drivers (if they're not already unplugged).
-
Power on the machine). Then, carefully measure DC voltage on wires 202 (common) and 203 on the DC-BUS board.
-
If there's a DC voltage of a nominal 65 Vdc (55-75), this indicates the capacitor is OK.
-
If there's a DC voltage of a nominal 40 Vdc (35-45), this indicates the capacitor is defective.
-
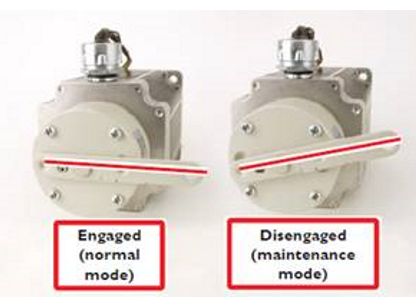
Inspect the Axis Brake
Reason: The axis brake is failing.
-
Ensure the machine is referenced. Put the brake into the maintenance position to manually disengage the brake. Check if the noise continues, if so proceed to the machine specific sections.
-
With a multimeter, check for 24Vdc between wires 435 and 400 on the ECM board.
-
If 24 Vdc is not present, the relay on the ECM board has failed and the ECM board needs to be replaced. If 24 Vdc is present, the brake has failed and needs to be replaced.