Deluxe Stand - PCNC 1100
Purpose
This document details the assembly and installation of the PCNC 1100 mill stand. This document includes seven sections including: (1) Receiving Stand; (2) Attaching Feet; (3) Installing Manual Oiler (4) Attaching Chip Pans; (5) Attaching Backsplash Guards; (6) Installing Coolant System; and (7) Installing Table Guard Kit.
IMPORTANT! PCNC 1100 mills with serial numbers 001-2097 require a PCNC 1100 Stud Kit (PN 35468).
Required Tools:
Multi-Purpose Grease
Carpenter’s Level
Phillips Screwdriver
Flat-blade Screwdriver
Adjustable Wrench
Metric Hex Wrench Set
PTFE (plumber’s) Tape
Deluxe Machine Stand with Coolant Kit | Qty. | PN |
Stand | 1 | — |
Left Chip Pan | 1 | — |
Right Chip Pan | 1 | — |
Coolant Tank | 1 | — |
Stainless Steel Wear Guard | 1 | — |
M6 x 10 mm Screw | 37 | — |
M6 Nut | 6 | — |
M12 Nut | 4 | — |
M12 Threaded Stud | 4 | 32648 |
M12 Flat Washer | 8 | — |
M12 Lock Washer | 4 | — |
Spacer | 4 | 35259 |
Feet | 4 | 32092 |
M5 x 20 mm Screw | 4 | — |
M6 x 12 mm Fixing Screw | 1 | — |
Left Table Guard Plate | 1 | — |
Right Table Guard Plate | 1 | — |
Table Guard Connecting Plate | 1 | — |
Polycarbonate Table Guard | 1 | — |
M5 x 12 mm Screw | 4 | — |
M5 x 8 mm Pan Head Screw | 2 | — |
Adjusting Rod | 1 | — |
M6 Flat Washer | 2 | — |
Left Backsplash Guard | 1 | — |
Right Backsplash Guard | 1 | — |
Coolant Pump | 1 | 32746 |
Butyl Tape | 1 | 34428 |
Chrome Armored Hose | 1 | 30725 |
1/4” Coolant Hose | 1 | 32833 |
Coolant Hose Adapter | 1 | 32832 |
Coolant Hose Mount Bracket | 1 | 31105 |
M12 x 50 mm Screw | 4 | — |
Receiving Stand
 WARNING! Transport and Lift Hazard: The transport, lifting, and moving of stand should be done by qualified professionals. Failure to do so may result in machine damage, serious injury, or death.
 WARNING! Sharp Objects: Wear gloves when uncrating mill. Failure to do so may result in serious injury.
The PCNC 1100 deluxe stand is delivered in two wooden shipping crates banded together with steel bands. Unpack smaller crate and set aside components.
Remove sides from larger crate; set aside Table Guard Kit and Coolant Tank. Smaller components are located within Coolant Tank.
Carefully tip Stand on its side; unbolt pallet.
Attaching Feet
NOTE: Attach Feet to Stand after pallet is removed and while Stand is still on its side (see Figure 1).
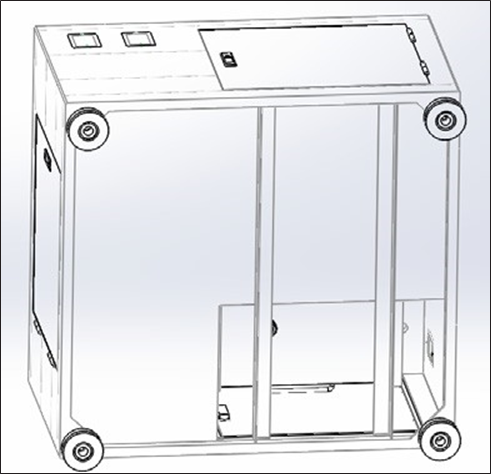
Figure 1
Apply multi-purpose grease to the locations indicated in Figure 2 and join them together.
Insert M12 Threaded Stud into each foot and slide on Spacers (see Figure 2).
Attach feet to Stand using assembly shown in Figure 2.
Carefully return Stand so it rests on feet and position at installation location.
If Stand is in its final location, level Stand using a carpenter’s level. Adjustments to Feet are made using Adjusting Rod to increase or decrease height on each corner (see Figure 2).
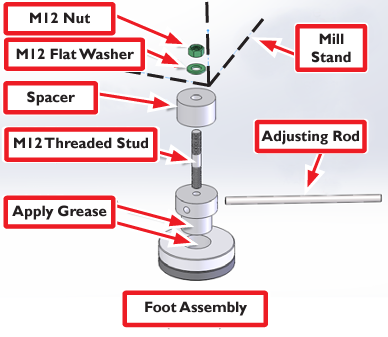
Figure 2
Deburr and grease four mill mounting pads to prevent rust (see Figure 3).
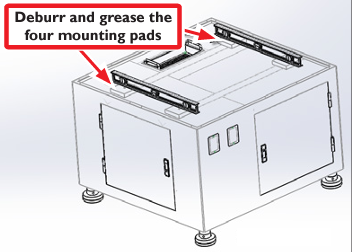
Figure 3
Lifting Mill onto Stand
 WARNING! Transport and Lift Hazard: The transport, lifting, and moving of mill should be done by qualified professionals. Failure to do so may result in machine damage, serious injury, or death.
 WARNING! Crush Hazard: Keep hands and body parts clear when lowering mill onto Stand. Failure to do so could result in serious injury or death.
There are several recommended ways to lift mill onto stand. For further information, refer to Unpack and Mount the Machine
Installing Manual Oiler
Route oil line (pre-installed at back of mill near Y-Axis motor) down back of stand and along left side as shown in Figure 4.
Mount manual oiler and tubing clips using pre-drilled holes (see Figure 4); connect oil line.
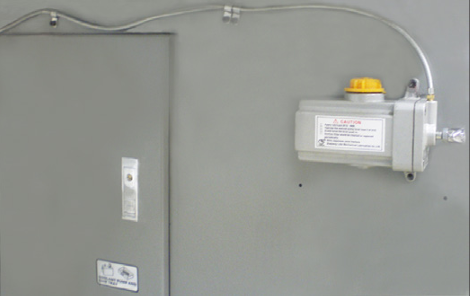
Figure 4
Fill manual oiler reservoir with ISO VG68 Machine Oil (PN 31386).
Retract and release plunger until oil is pushed through system. After that pull plunger:
Each time mill is powered on
Every four hours of operation
Attaching Chip Pans
NOTE: If using the optional Automatic Tool Changer (PN 32279) and/or Power Drawbar (PN 31706), installation is easier at this stage due to access issues that arise once the chip pans are installed.
Position chip pans near stand and test fit. Left Chip Pan and Right Chip Pan are different.
Seal joints between stand and chip pans with Butyl Tape as indicated in Figure 5 prior to installing Left Chip Pan and Right Chip Pan. It is best to apply Butyl Tape and install one chip pan at a time.
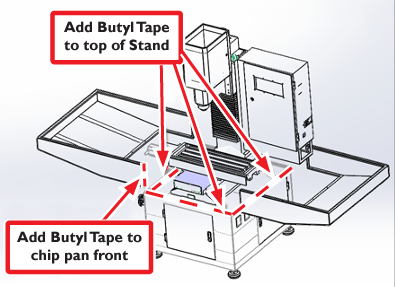
Figure 5
Use 11 M6 x 10 mm Screws to attach Right Chip Pan to stand.
Use 10 M6 x 10 mm Screws to attach Left Chip Pan to stand.
Add a strip of Butyl Tape where chip pans meet in front. Use two M6 x 10 mm Screws and two M6 Nuts to join together chip pans.
After chip pans are installed, use two M6 x 10 mm Screws, two M6 Flat Washers, and two M6 Nuts to attach Stainless Steel Wear Guard across front (see Figure 6).
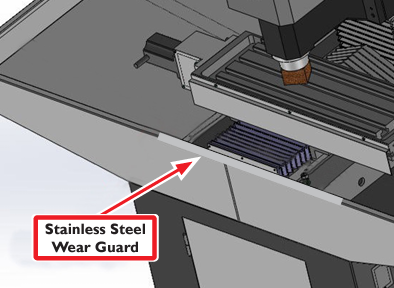
Figure 6
Attaching Backsplash Guards
Position backsplash guards near stand and test fit; Left Backsplash Guard and Right Backsplash Guard are different (see Figure 7).
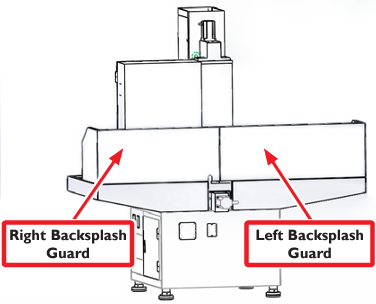
Figure 7
Use five M6 x 10 mm Screws to attach Right Backsplash Guard to Right Chip Tray.
Repeat step 2 for Left Backsplash Guard.
Use two M6 x 10 mm Screws and two M6 Nuts to connect two backsplash guards at rear joint.
NOTE: Do not use Butyl Tape for the joint between the backsplash guards or between the backsplash guards and chip pans.
NOTE: If any holes on the backsplash guards do not line up, loosen surrounding screws as needed. Once all screws are started, tighten to approximately 3 ft-lbs of torque.
Installing Coolant System
Remove all parts from inside Coolant Tank (see Figure 8).
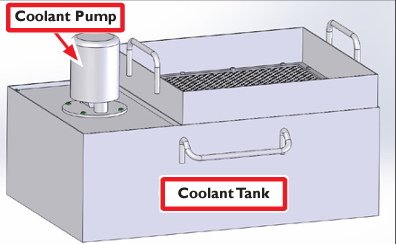
Figure 8
Using four M5 x 12 mm Screws, mount Coolant Pump to Coolant Tank (see Figure 8).
NOTE: Coolant Pump is 115 VAC only.
NOTE: Wrap Elbow Adapter threads and Coolant Hose Adapter with thread seal tape (PTFE Tape).
Insert Nylon Washer into both ends of Chrome Armored Hose (see Figure 9).
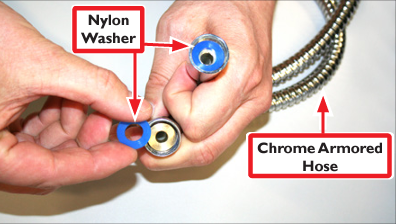
Figure 9
Insert Chrome Armored Hose through hole in Stand; connect to Elbow Adapter on Coolant Pump (see Figure 10 and Figure 11).
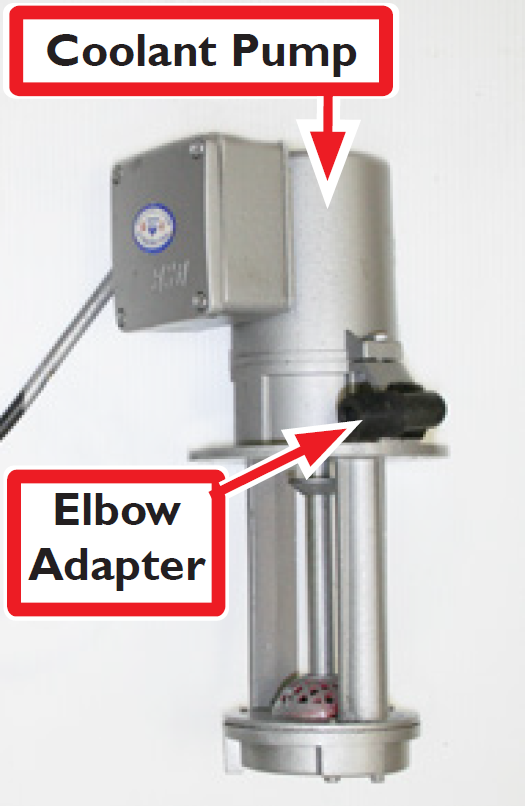
Figure 10
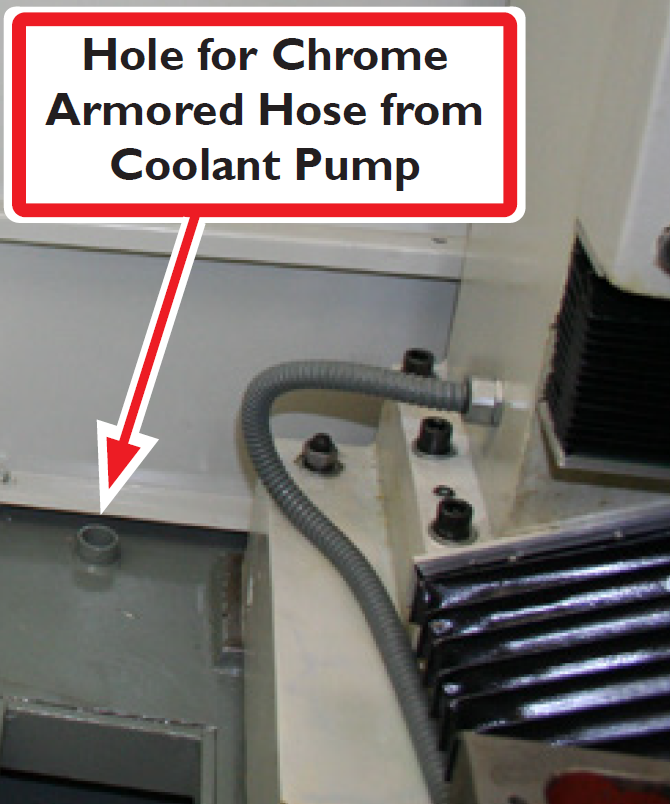
Figure 11
Connect 1/4” Coolant Hose to Coolant Hose Adapter; insert into Coolant Hose Mount Bracket (see Figure 12).
Connect Chrome Armored Hose to Coolant Hose Adapter.
Using two M5 x 8 mm Pan Head Screws, attach Coolant Hose Mount Bracket to mill head.
Using one M6 x 12 mm Fixing Screw, attach Coolant Hose Mount Bracket to Coolant Hose Adapter (see Figure 12).
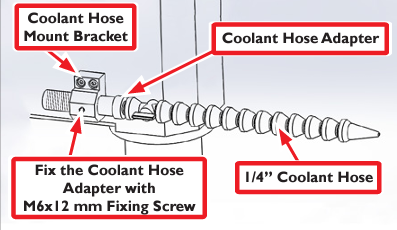
Figure 12
Connect Coolant Pump’s 3-prong plug into outlet shown in Figure 13.
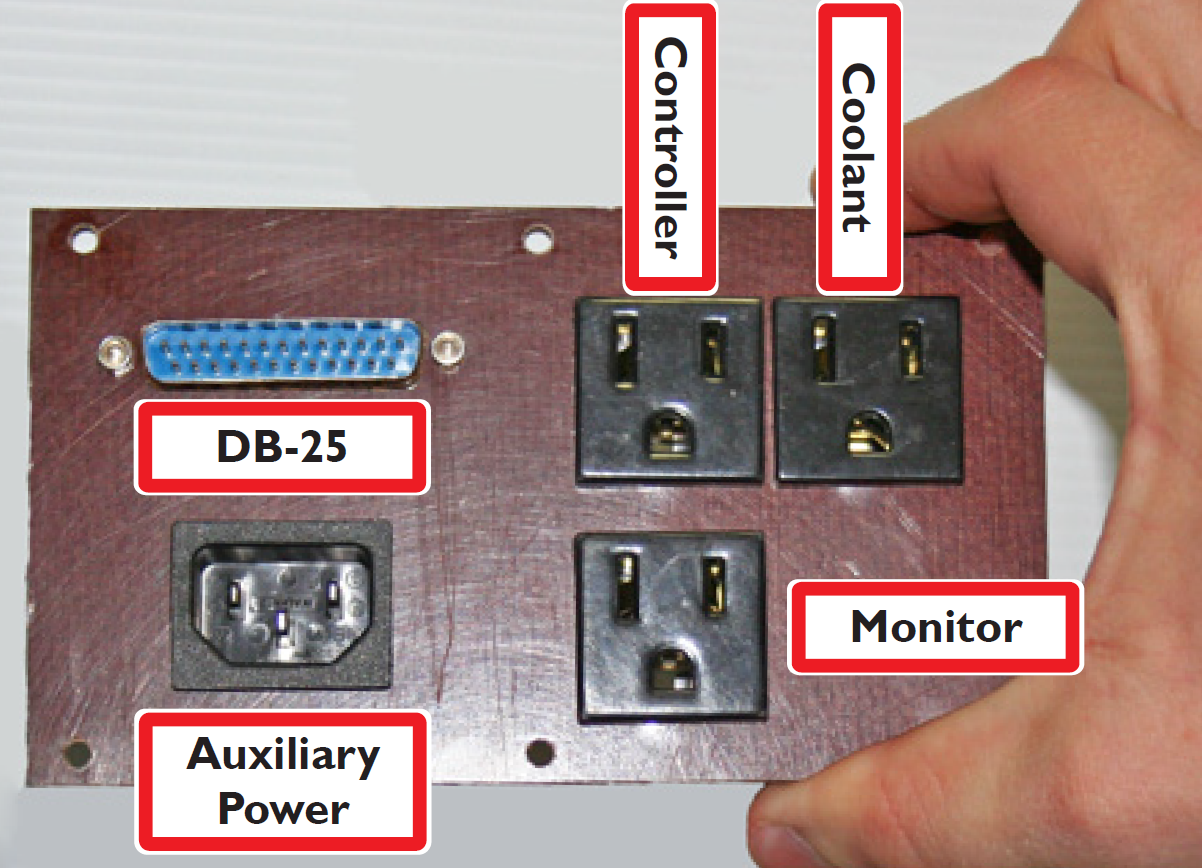
Figure 13
NOTE: Power Connection Panel is located on bottom of electrical cabinet.
Installing Table Guard Kit
Remove four set screws from the four corners of top of mill table and set aside.
Insert Left Table Guard Plate and Right Table Guard Plate inside Table Guard Connecting Plate; fasten with four M5 x 20 mm Screws as shown in Figure 14.
Slide Polycarbonate Table Guard into slots on guard plates (see Figure 14).
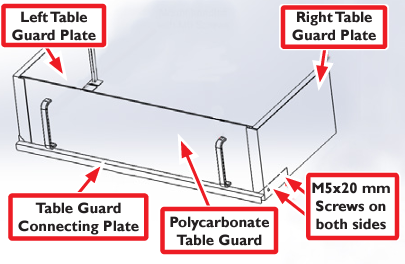
Figure 14
Using four socket head cap screws, attach Table Guard Kit assembly onto mill table (see Figure 15) and fasten at locations indicated in step 1.
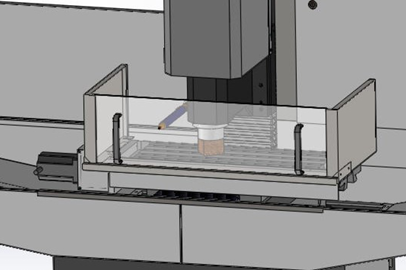
Figure 15
To view a PDF version of your manual, go to Tormach document TD10360.
If you have additional questions, we can help. Create a support ticket with Tormach Technical Support at tormach.com/how-to-submit-a-support-ticket for guidance on how to proceed.
