Product Information
|
Quantity |
Description |
|
1 |
4th Axis Main Unit |
|
1 |
5 mm Hex Wrench |
|
1 |
38 mm Wrench |
|
1 |
ER32 Nut |
|
1 |
ER32 - 16 mm Collet |
|
1 |
ER32 - 20 mm Collet |
|
1 |
ER32 - 1/2 in. Collet |
|
1 |
ER32 - 3/4 in. Collet |
|
1 |
ER32 Hook Spanner |
|
1 |
Setup Bar |
|
1 |
Setup Bar Tool |
|
1 |
Tailstock |
Specifications
-
Workholding: ER32 Collets
ER32 Spindle can hold workpieces up to 0.75 in. (19 mm) in diameter -
Tailstock: Adjustable for workpieces up to 8 in. (200 mm) in length
-
Pulley Ratio: 70:15
-
Centerline to Table: 1 in. (25 mm)
-
Position Referencing: Includes integrated homing switch
Before You Begin
IMPORTANT! To prevent damage to the machine's electronics, you must always power off the machine before connecting or disconnecting the 4th axis power cable (4 pin cable). This precaution is not limited to the installation procedure — anytime you connect or disconnect the 4th axis power cable, you must first verify that the machine is powered off.
Install the Rotary Axis
-
Jog the machine table forwards, so that it's at the front of the work envelope.
-
Power off the machine and the PathPilot controller.
-
Push in the machine's red Emergency Stop button, which removes power to motion control.
-
From the PathPilot interface, select Exit.
-
Turn the Main Disconnect switch to OFF on the side of the electrical cabinet.
NOTICE! You must power off the machine before connecting or disconnecting the 4th axis cable. Failure to do so could result in damage to the machine's electronics.
-
-
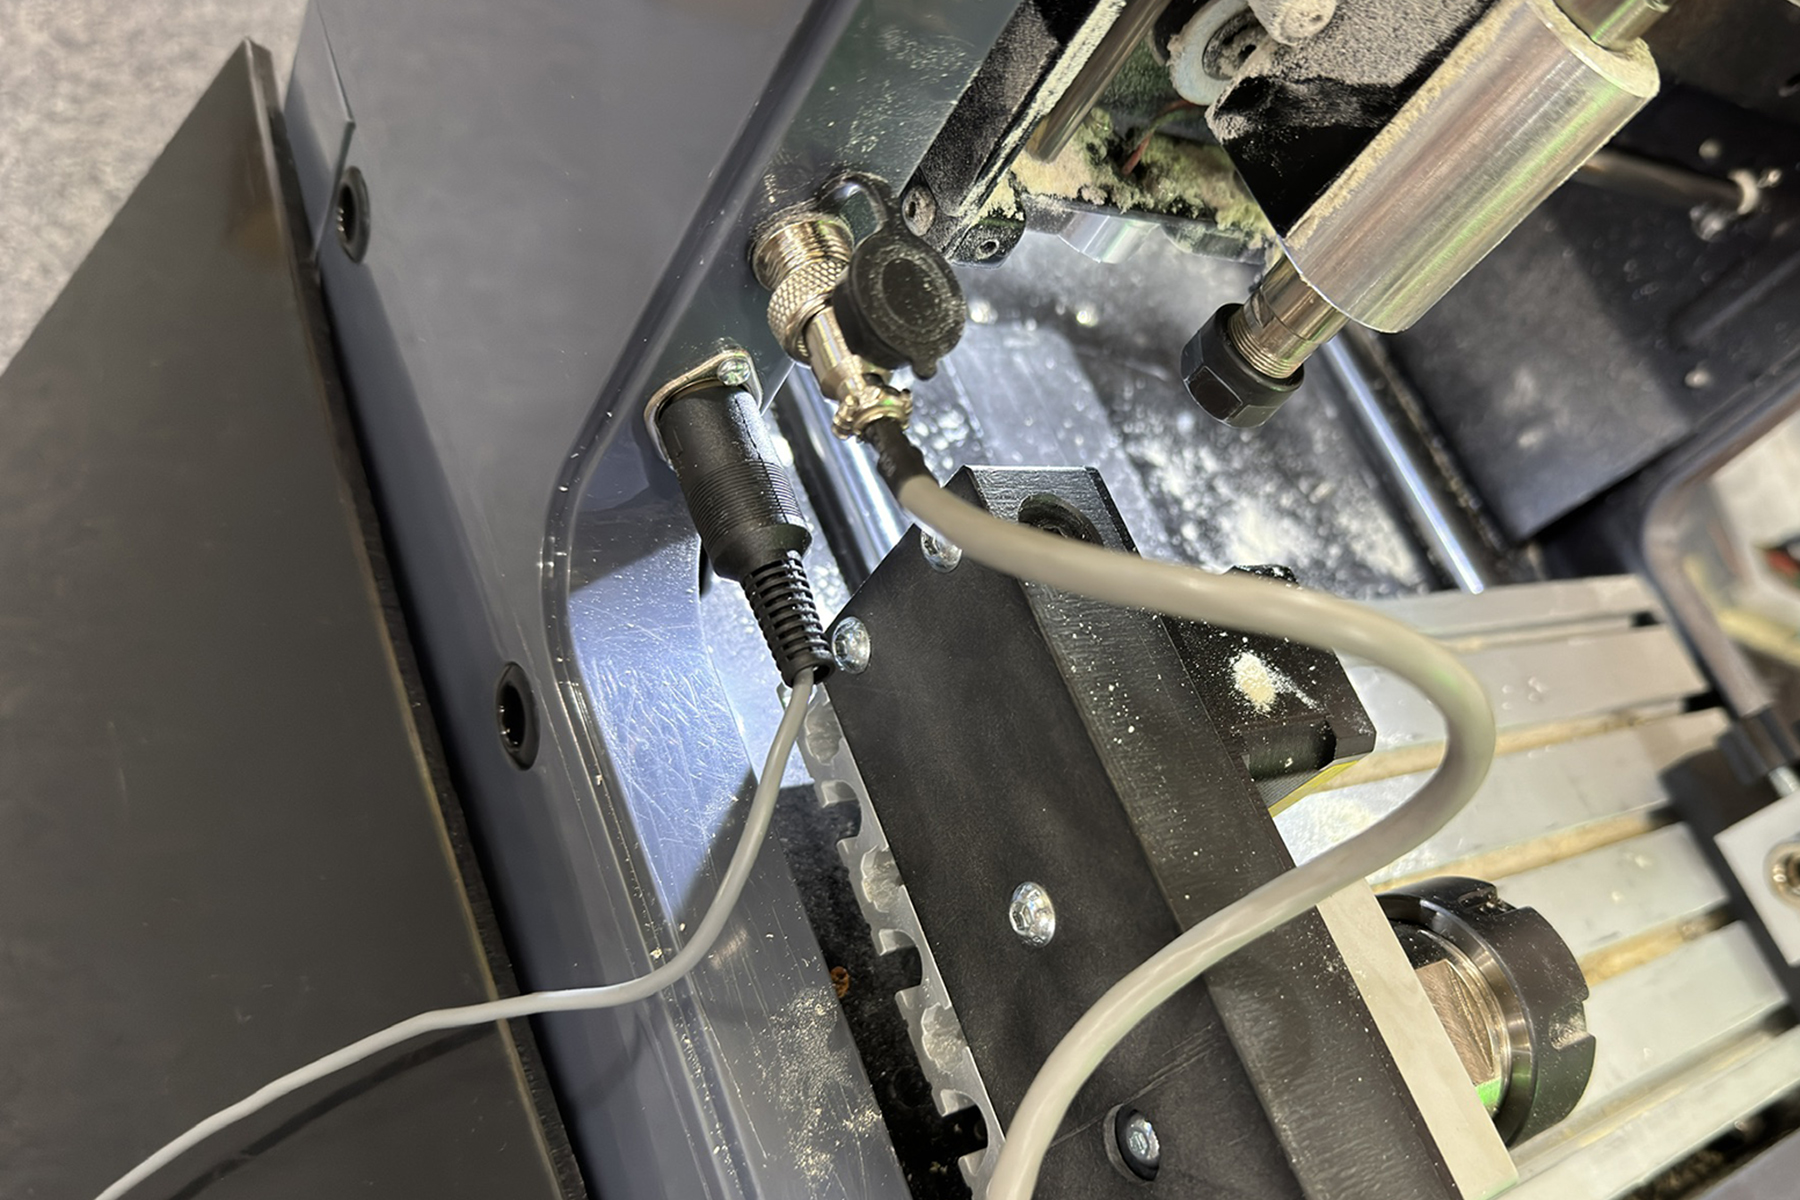
Connect the loose ends of both cables from the rotary axis to the 4- and 5-pin DIN connectors on the front of the xsTECH. Note: The 5-pin homing sensor should be unplugged after referencing the A-Axis.
-
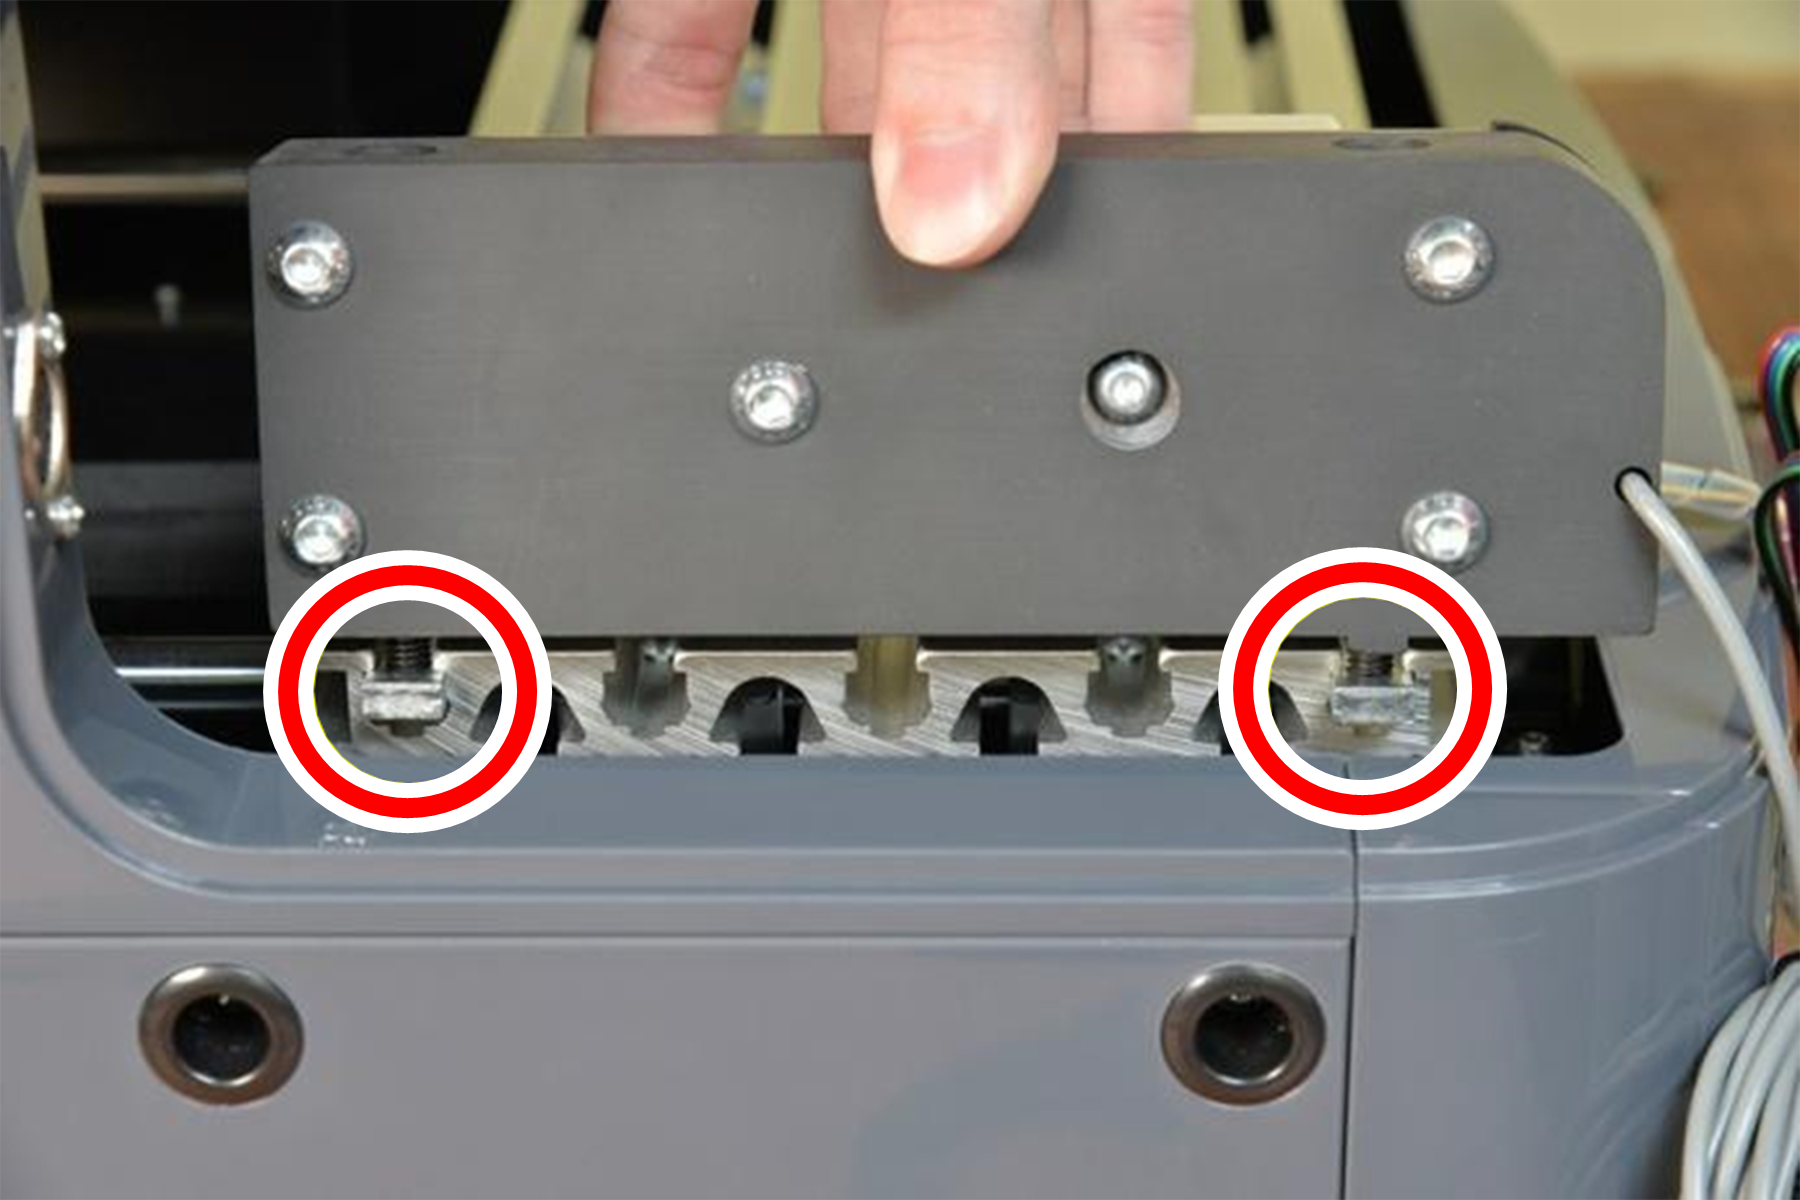
Slide the T-nuts on the bottom of the rotary axis into the T-slots on the left end of the machine table.
-
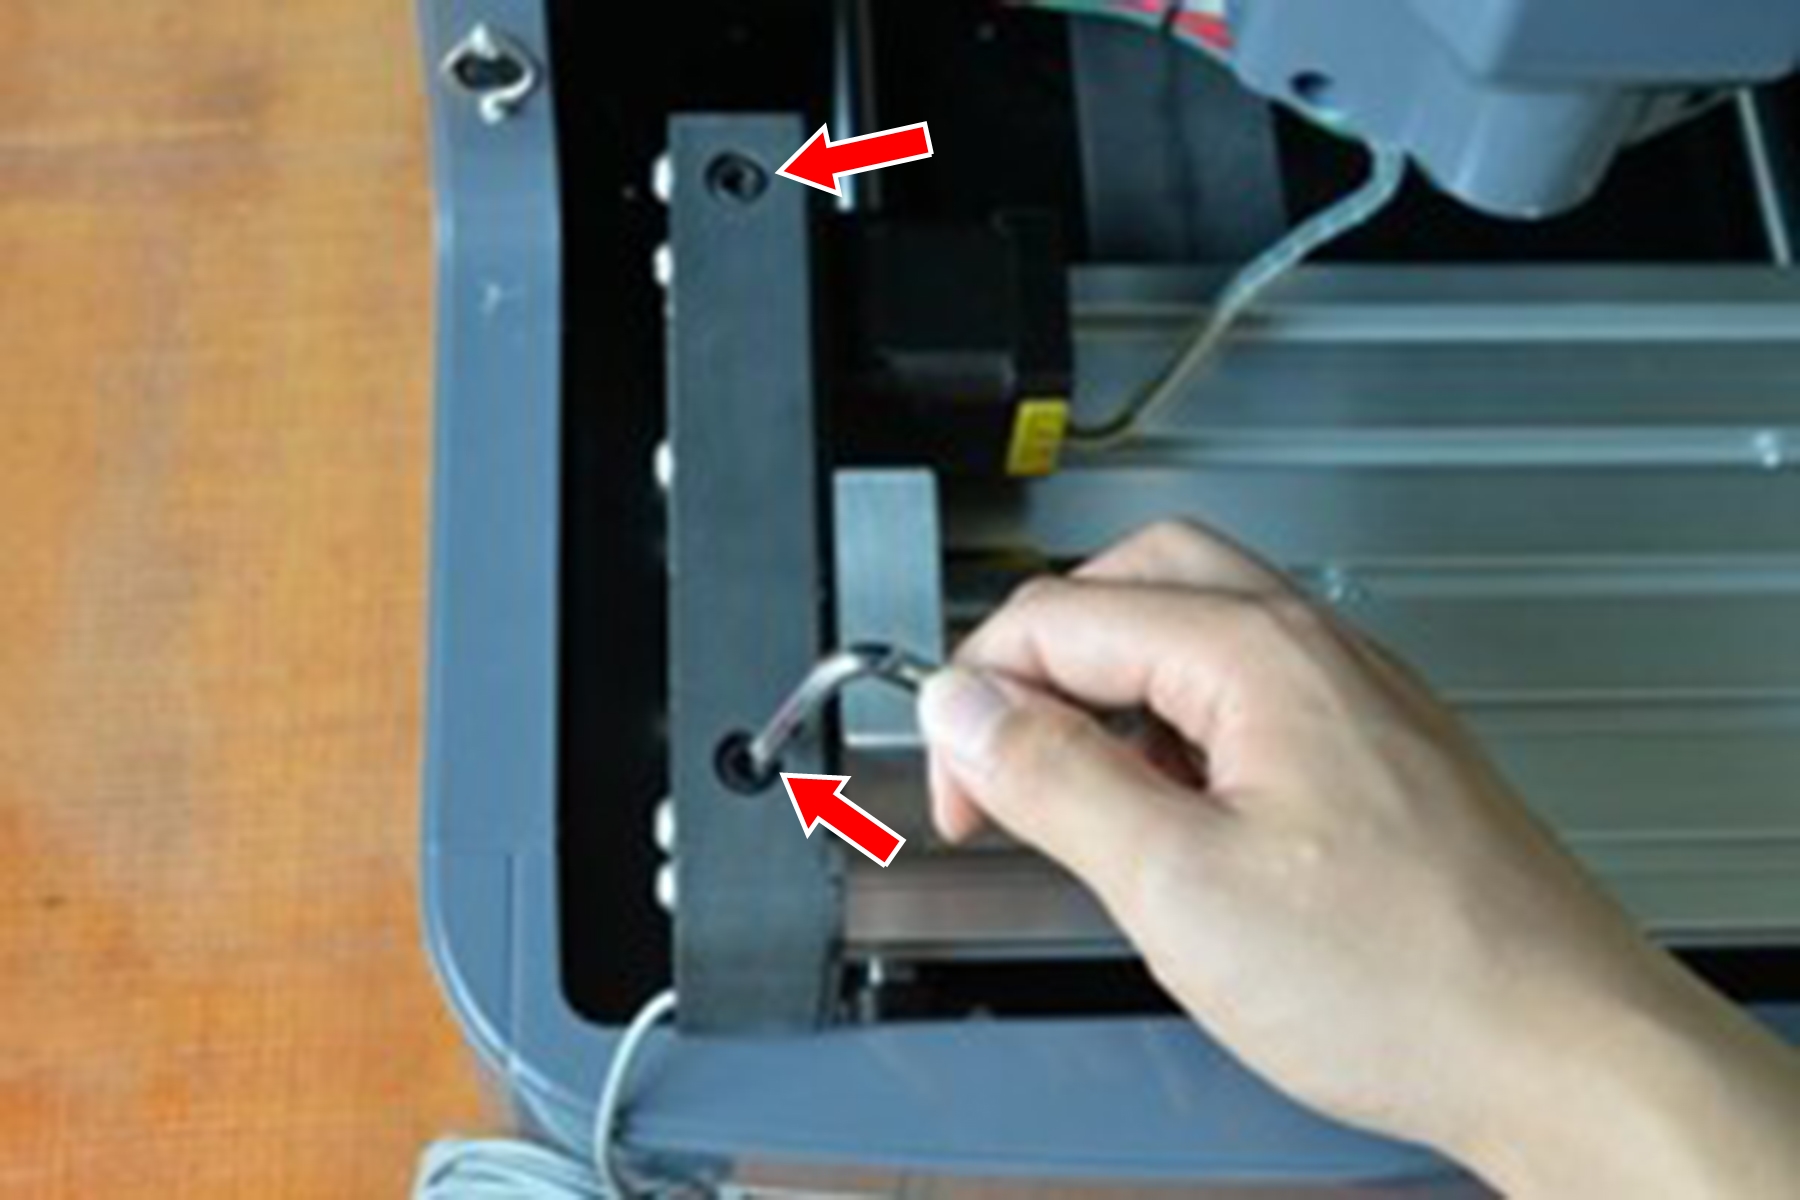
Tighten the two screws on the top of the rotary axis with the included 5 mm hex wrench.
-
Install the 16 mm collet and the ER32 collet nut into the rotary axis spindle:
-
Hold the collet at an angle, and then insert it into the collet nut as shown in the following image.

Figure 4: A collet inserted into the collet nut. -
Tilt up the collet to snap it into place.

Figure 5: The collet tilted into place. -
Loosely thread the nut on the spindle.
-
-
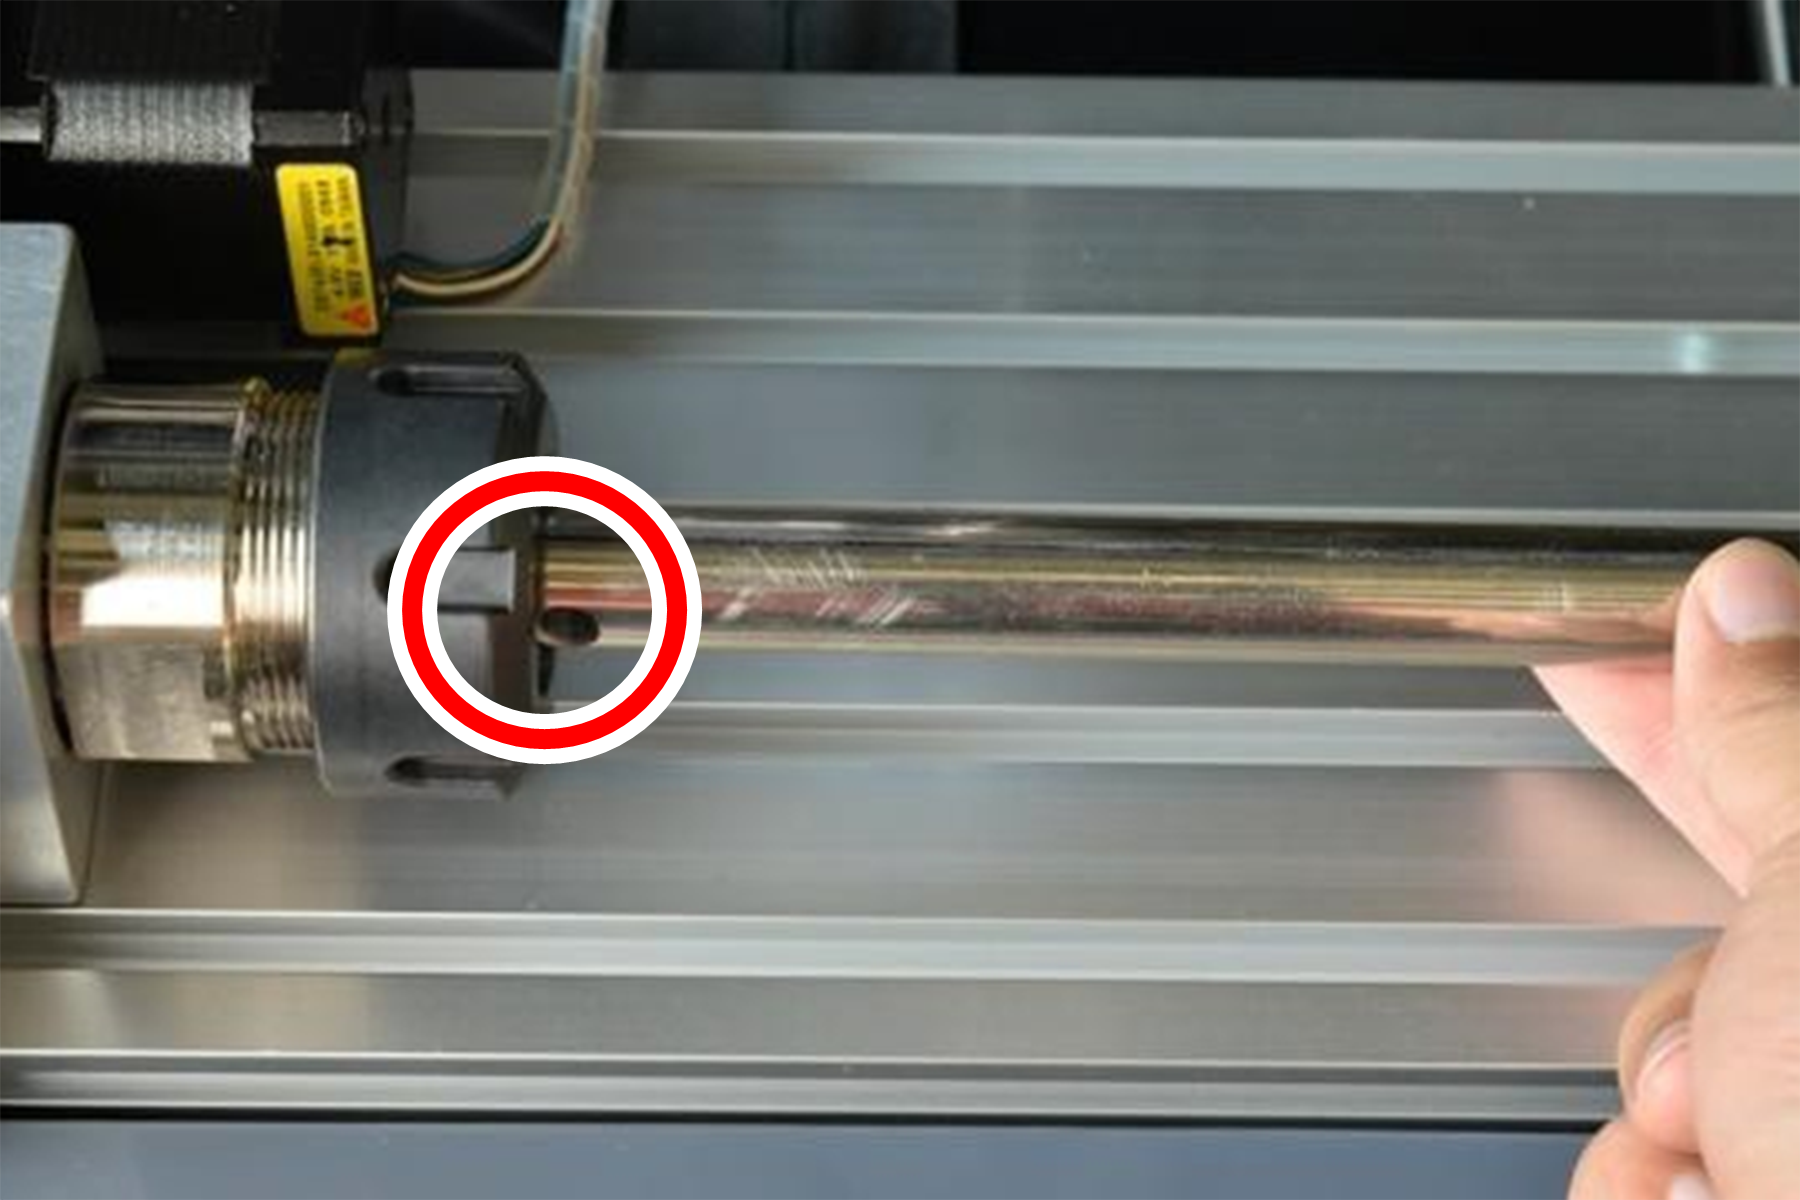
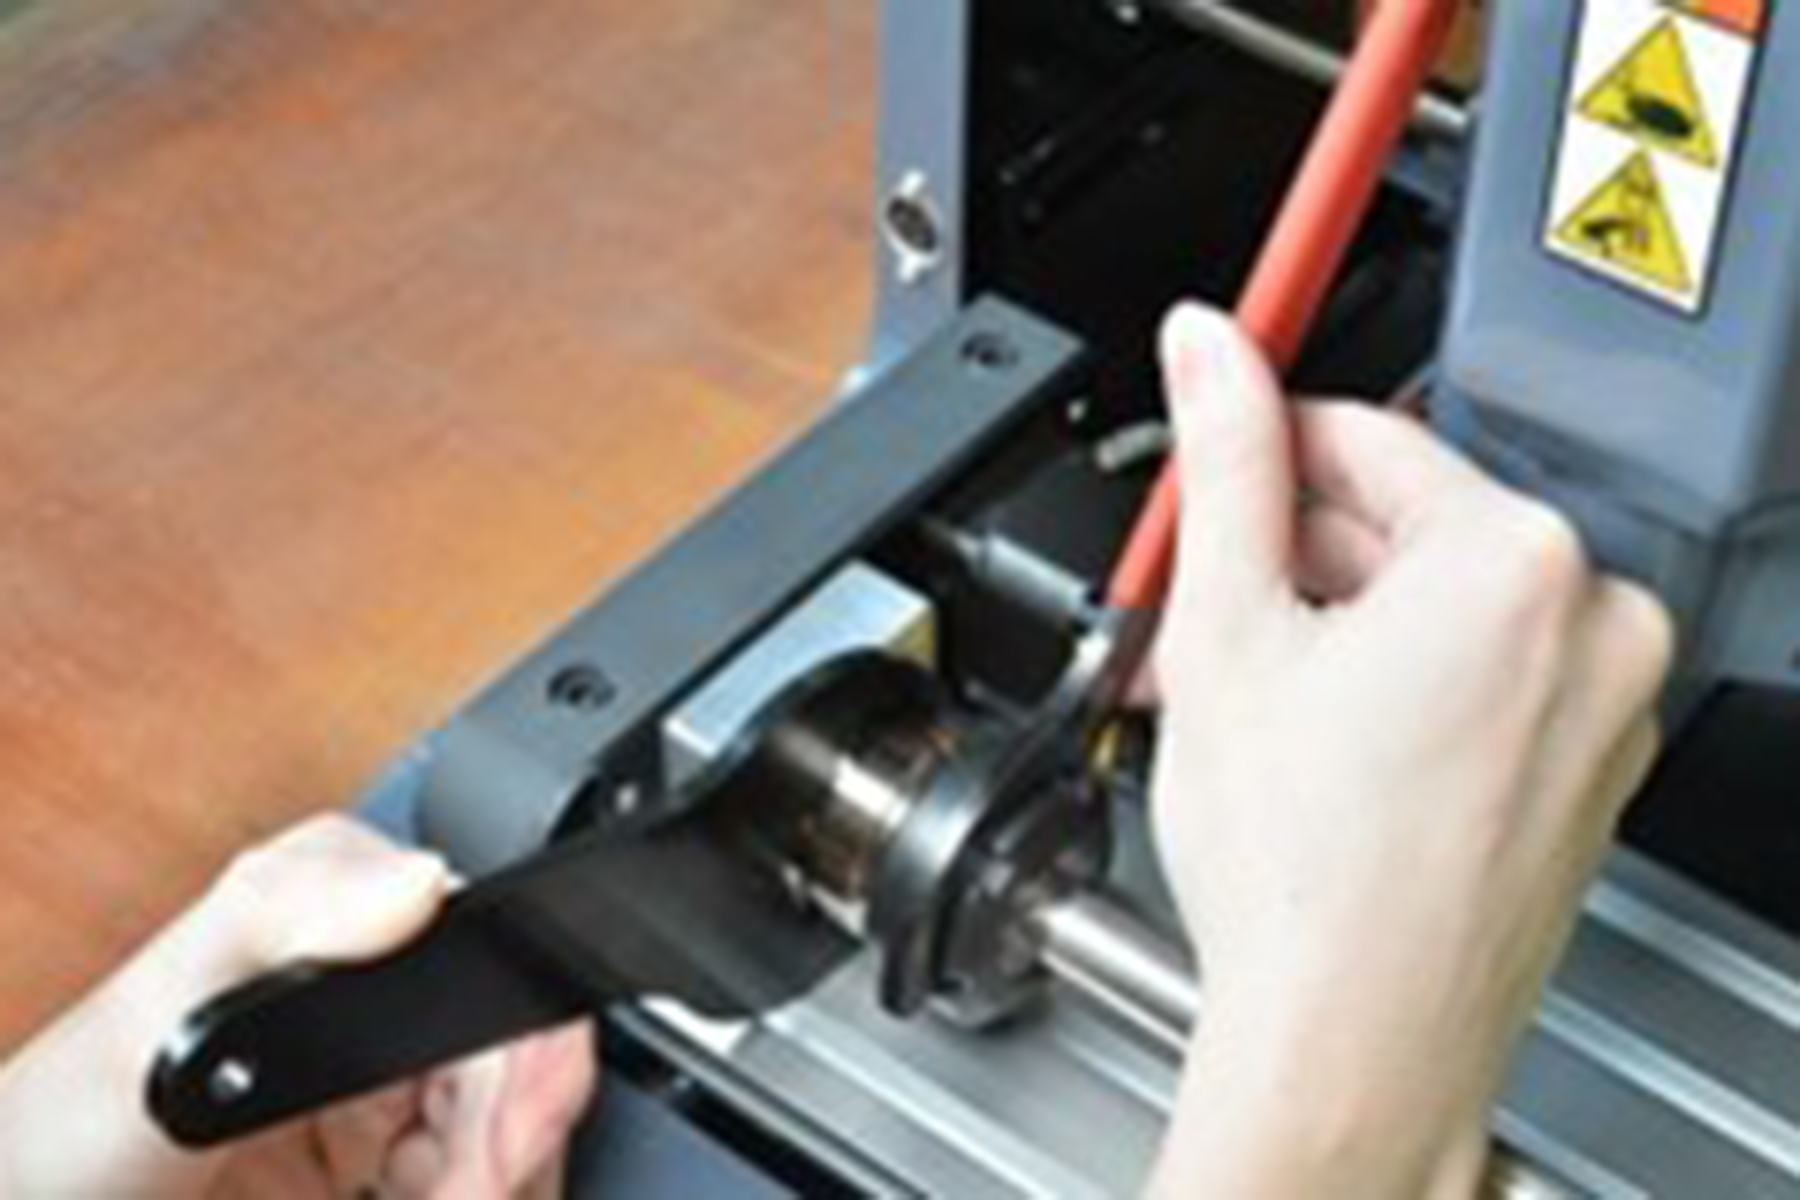
Identify the setup bar that's included with this kit. On one end, there's a small hole, which is used to align the tailstock with the spindle. Insert the setup bar into the spindle so that the hole is toward the right side of the machine table, and so that about 1/2 in. of the bar is inside the collet.
-
Use the two included wrenches to lock the setup bar in the spindle. If needed, manually rotate the chuck to align the flats with the wrench.
Install the Tailstock
-
Slide the T-nuts on the bottom of the tailstock into T-slots on the right end of the machine table.
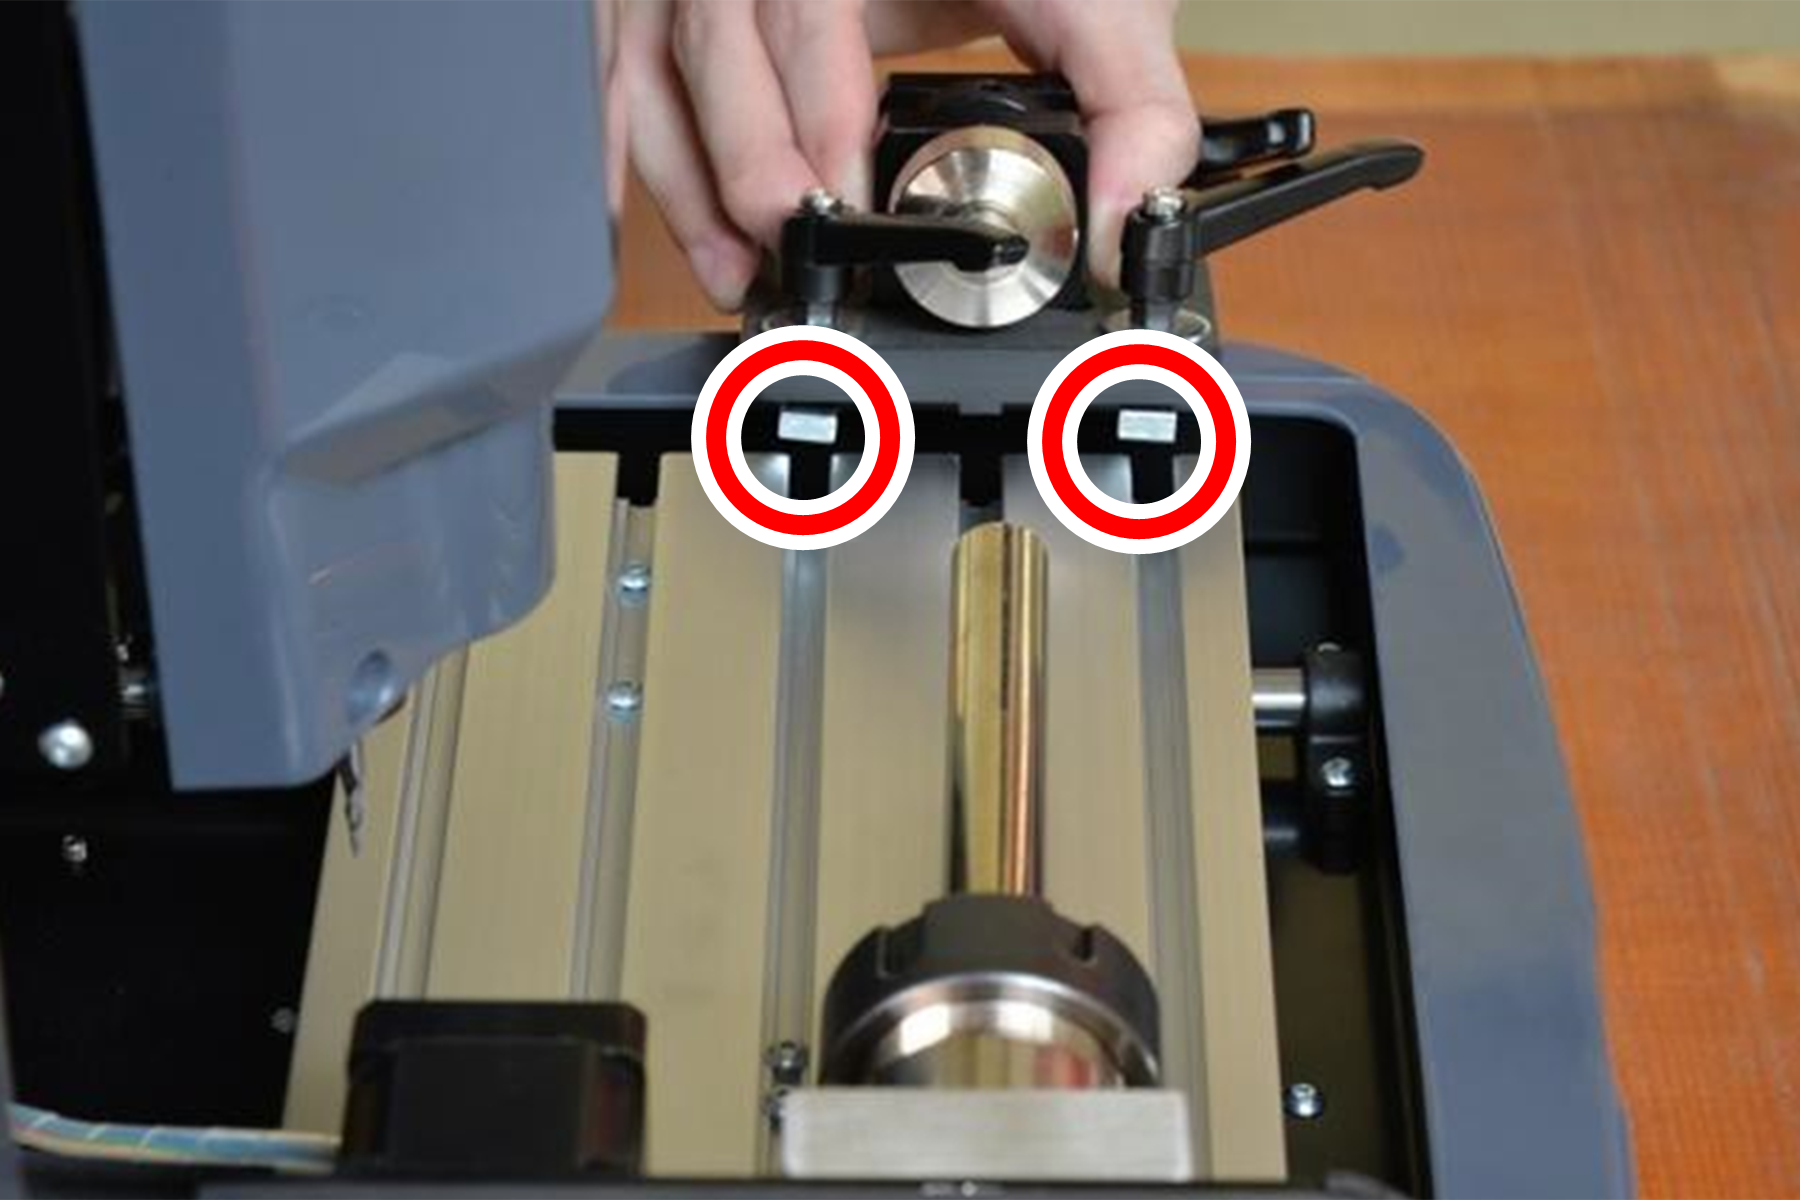
NOTE: If it's difficult to align the T-nuts with the T-slots, you can temporarily remove them from tailstock and slide them into the T-slots. Then, place the tailstock on the machine table over the T-nuts, and reinstall the T-nuts onto the tailstock.
-
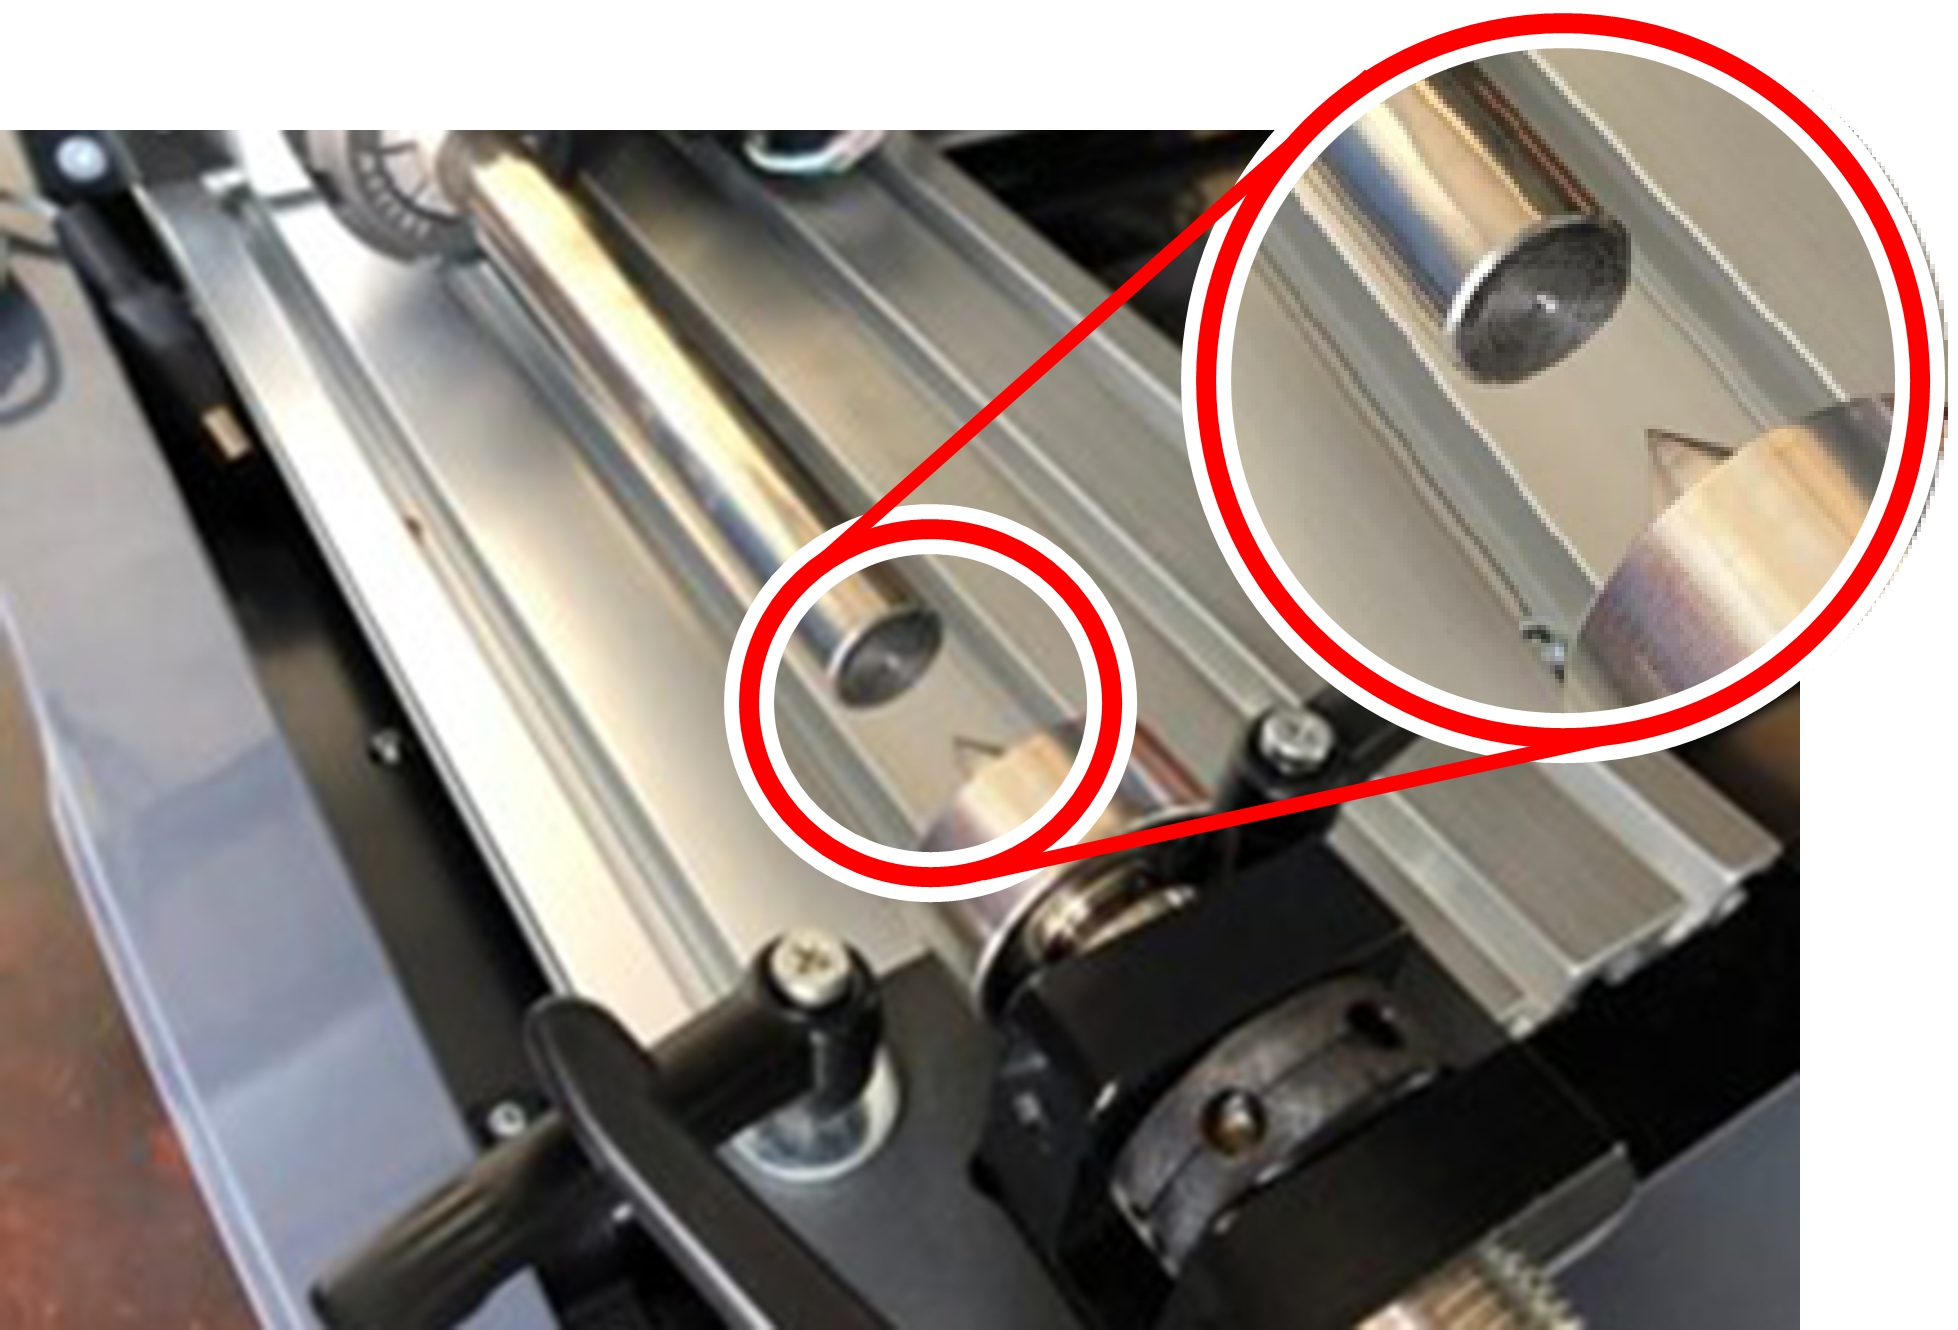
Align the hole on the setup bar with the tailstock.
-
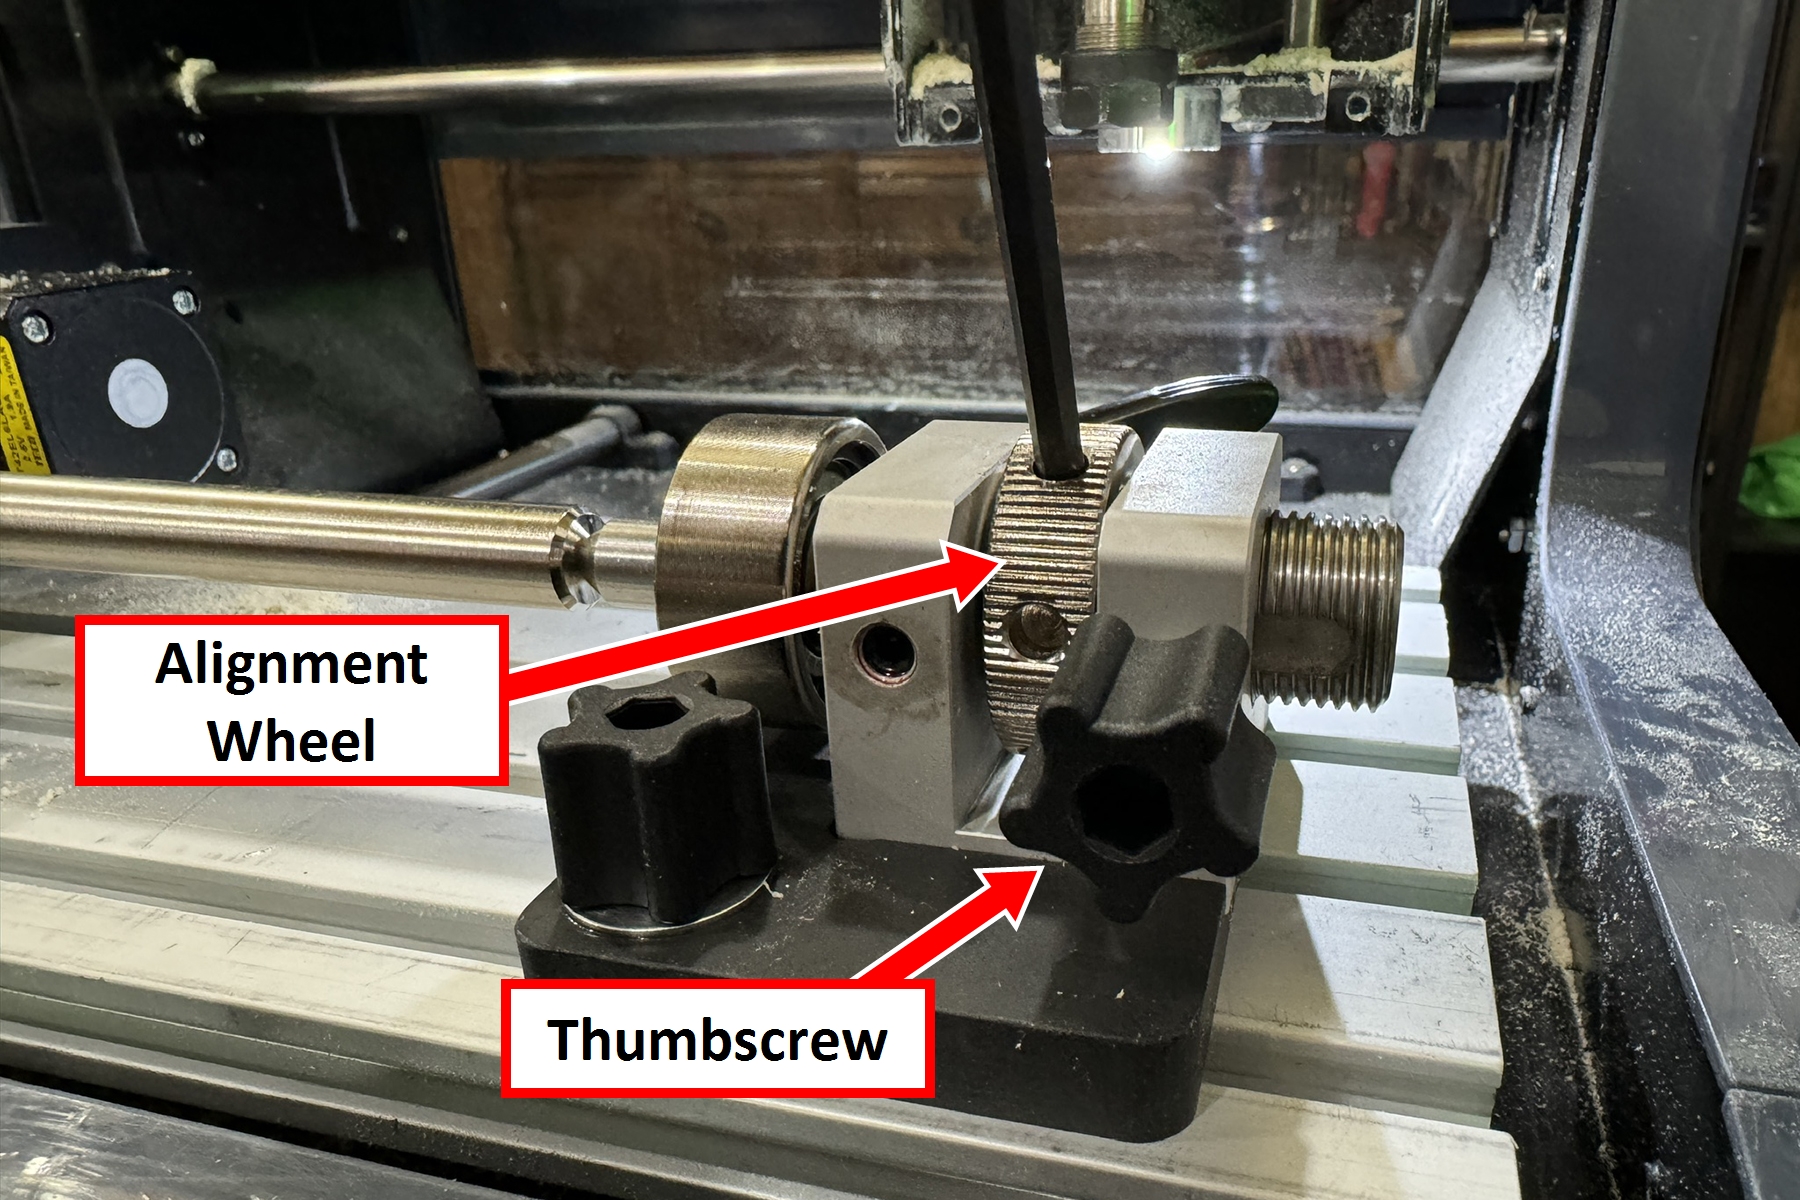
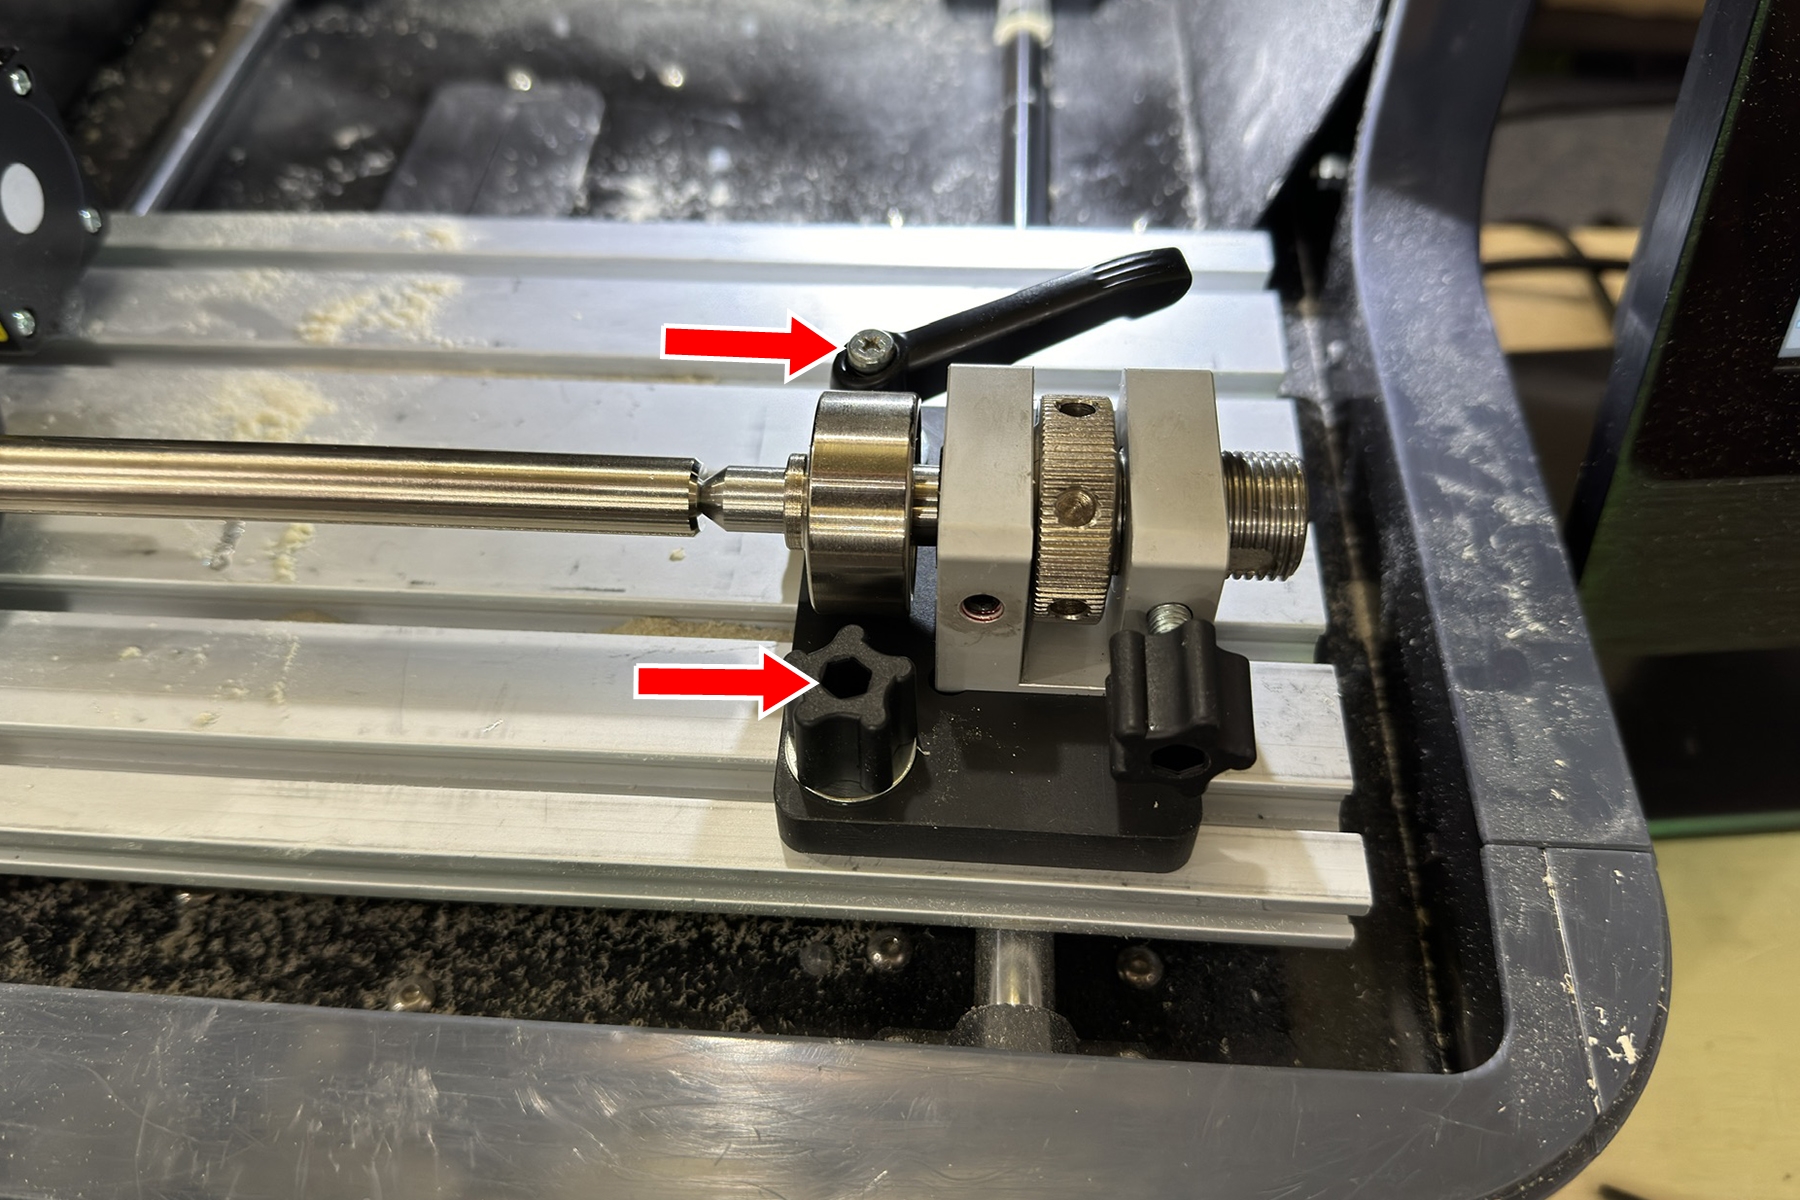
Using the setup bar tool, rotate the adjustment wheel to extend the tailstock center about 1/2 in. Then, move the tailstock itself toward the setup bar until there's no movement in the setup bar, and tighten the thumb screw.
-
Tighten the two handle screws on the tailstock with a Phillips screwdriver.
-
Loosen the chuck, and rotate the tailstock's alignment wheel to move the tailstock center back about 1/2 in. Then, remove the setup bar from the spindle.
Configure PathPilot
You must verify that the PathPilot controller is updated to version 2.9.6 or later. To download the update and watch a video on how to install it, go to the PathPilot support center.
To configure PathPilot:
-
Power on the machine and the PathPilot controller.
-
Turn the Main Disconnect switch to ON on the side of the electrical cabinet.
-
Twist out the machine's red Emergency Stop button, which enables movement to the machine axes and the spindle.
-
Press the Reset button.
-
-
From the Settings tab, select the 4th Axis Rotary tab.
-
From the 4th Axis Type drop-down menu, select xsTech 4th Axis. Select the 4th Axis Homing (PN 31921) checkbox.
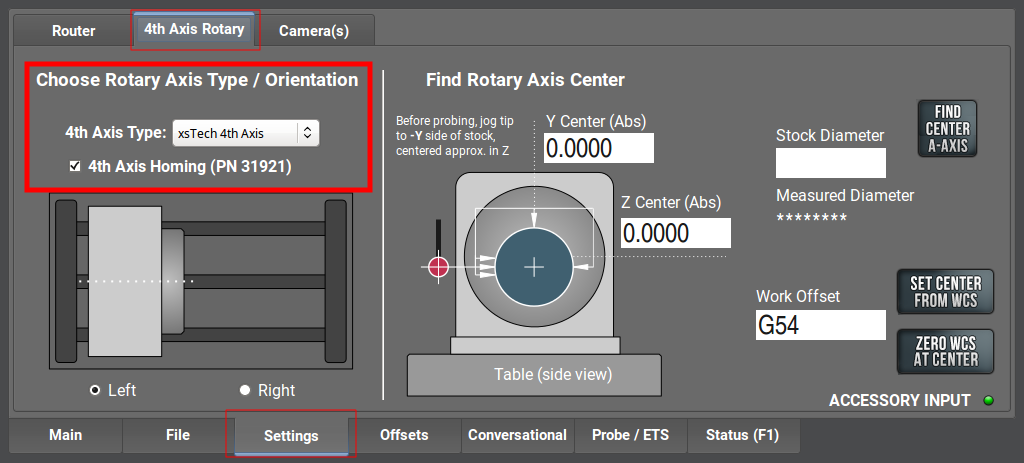
Figure 12: 4th axis tab. -
Select Reference A to reference the A-axis.

Figure 13: Reference A button. The spindle rotates to find the homing switch.
NOTE: If the spindle doesn't rotate to find the homing switch, go to Step 3 to verify that homing is enabled. -
Test the rotation of the spindle with either the keyboard or jog shuttle, if present. On the keyboard, select the Period key to rotate the spindle clockwise, and select the Comma key to rotate the spindle counterclockwise.
-
Spindle Rotates as Expected: To ensure accuracy, command a full 360-degree rotation and visually confirm that the spindle completes a full 360-degree turn. If everything matches, you've completed the installation and verification of the xsTech 4th axis.
-
Spindle Doesn't Rotate, or Rotation is Inaccurate: Examine the DIN connections to verify that they're seated. If the problem persists, we can help. Create a support ticket with Tormach Technical Support at tormach.com/how-to-submit-a-support-ticket for guidance on how to proceed.
-
NOTE: If you are not referencing the a specific location on the part or fixture in the 4th axis, make sure the 5-pin sensor is unplugged and 4th Axis Homing is unchecked. This will then reference the 4th axis where it sits. If you are referencing to a specific location on the fixture or part, make sure the 5-pin sensor is unplugged after referencing is complete.
