Background
The 1500MX features a locking door switch and a door unlock button. Pressing the button energizes a solenoid in the locking door switch, unlocking the enclosure door if it is closed. Inside the locking door switch, a microswitch sends input to the PathPilot control software to indicate whether the enclosure door is open or closed. This input prevents the operator from performing certain actions, such as starting a g-code program when the door is open.
Troubleshooting
Troubleshooting Tips
-
During these tests. The operator will need to lock and unlock the enclosure door multiple times. If the door doesn’t unlock when the Door Unlock button is pressed. Then the operator will need to manually unlock the door. To manually unlock the enclosure door:
-
Open the right side enclosure window and lock it open with the provided window pins.
-
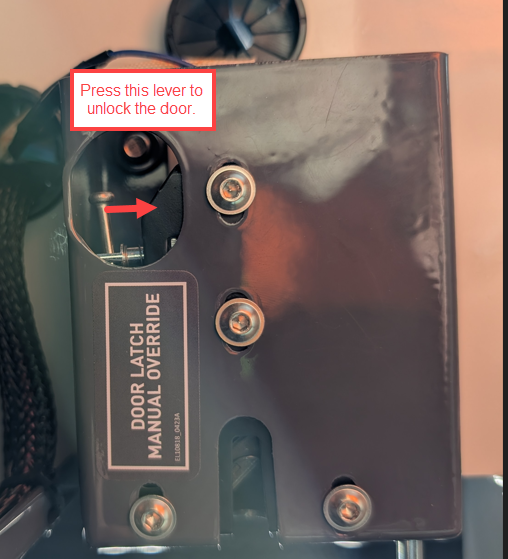
The door can be unlocked using the Door Latch Manual Override on the back of the locking door switch
-
Prepare the Machine for Testing
-
Close the enclosure door.
-
Press the Emergency Stop button.
-
Open the electrical cabinet door.
-
Twist and release the Emergency Stop button.
-
Press the physical Reset button on the operator console and then the Reset button in the PathPilot interface.
Test the Door Switch Input into PathPilot.
-
Close the enclosure door and ensure that it is latched into the locked position.
-
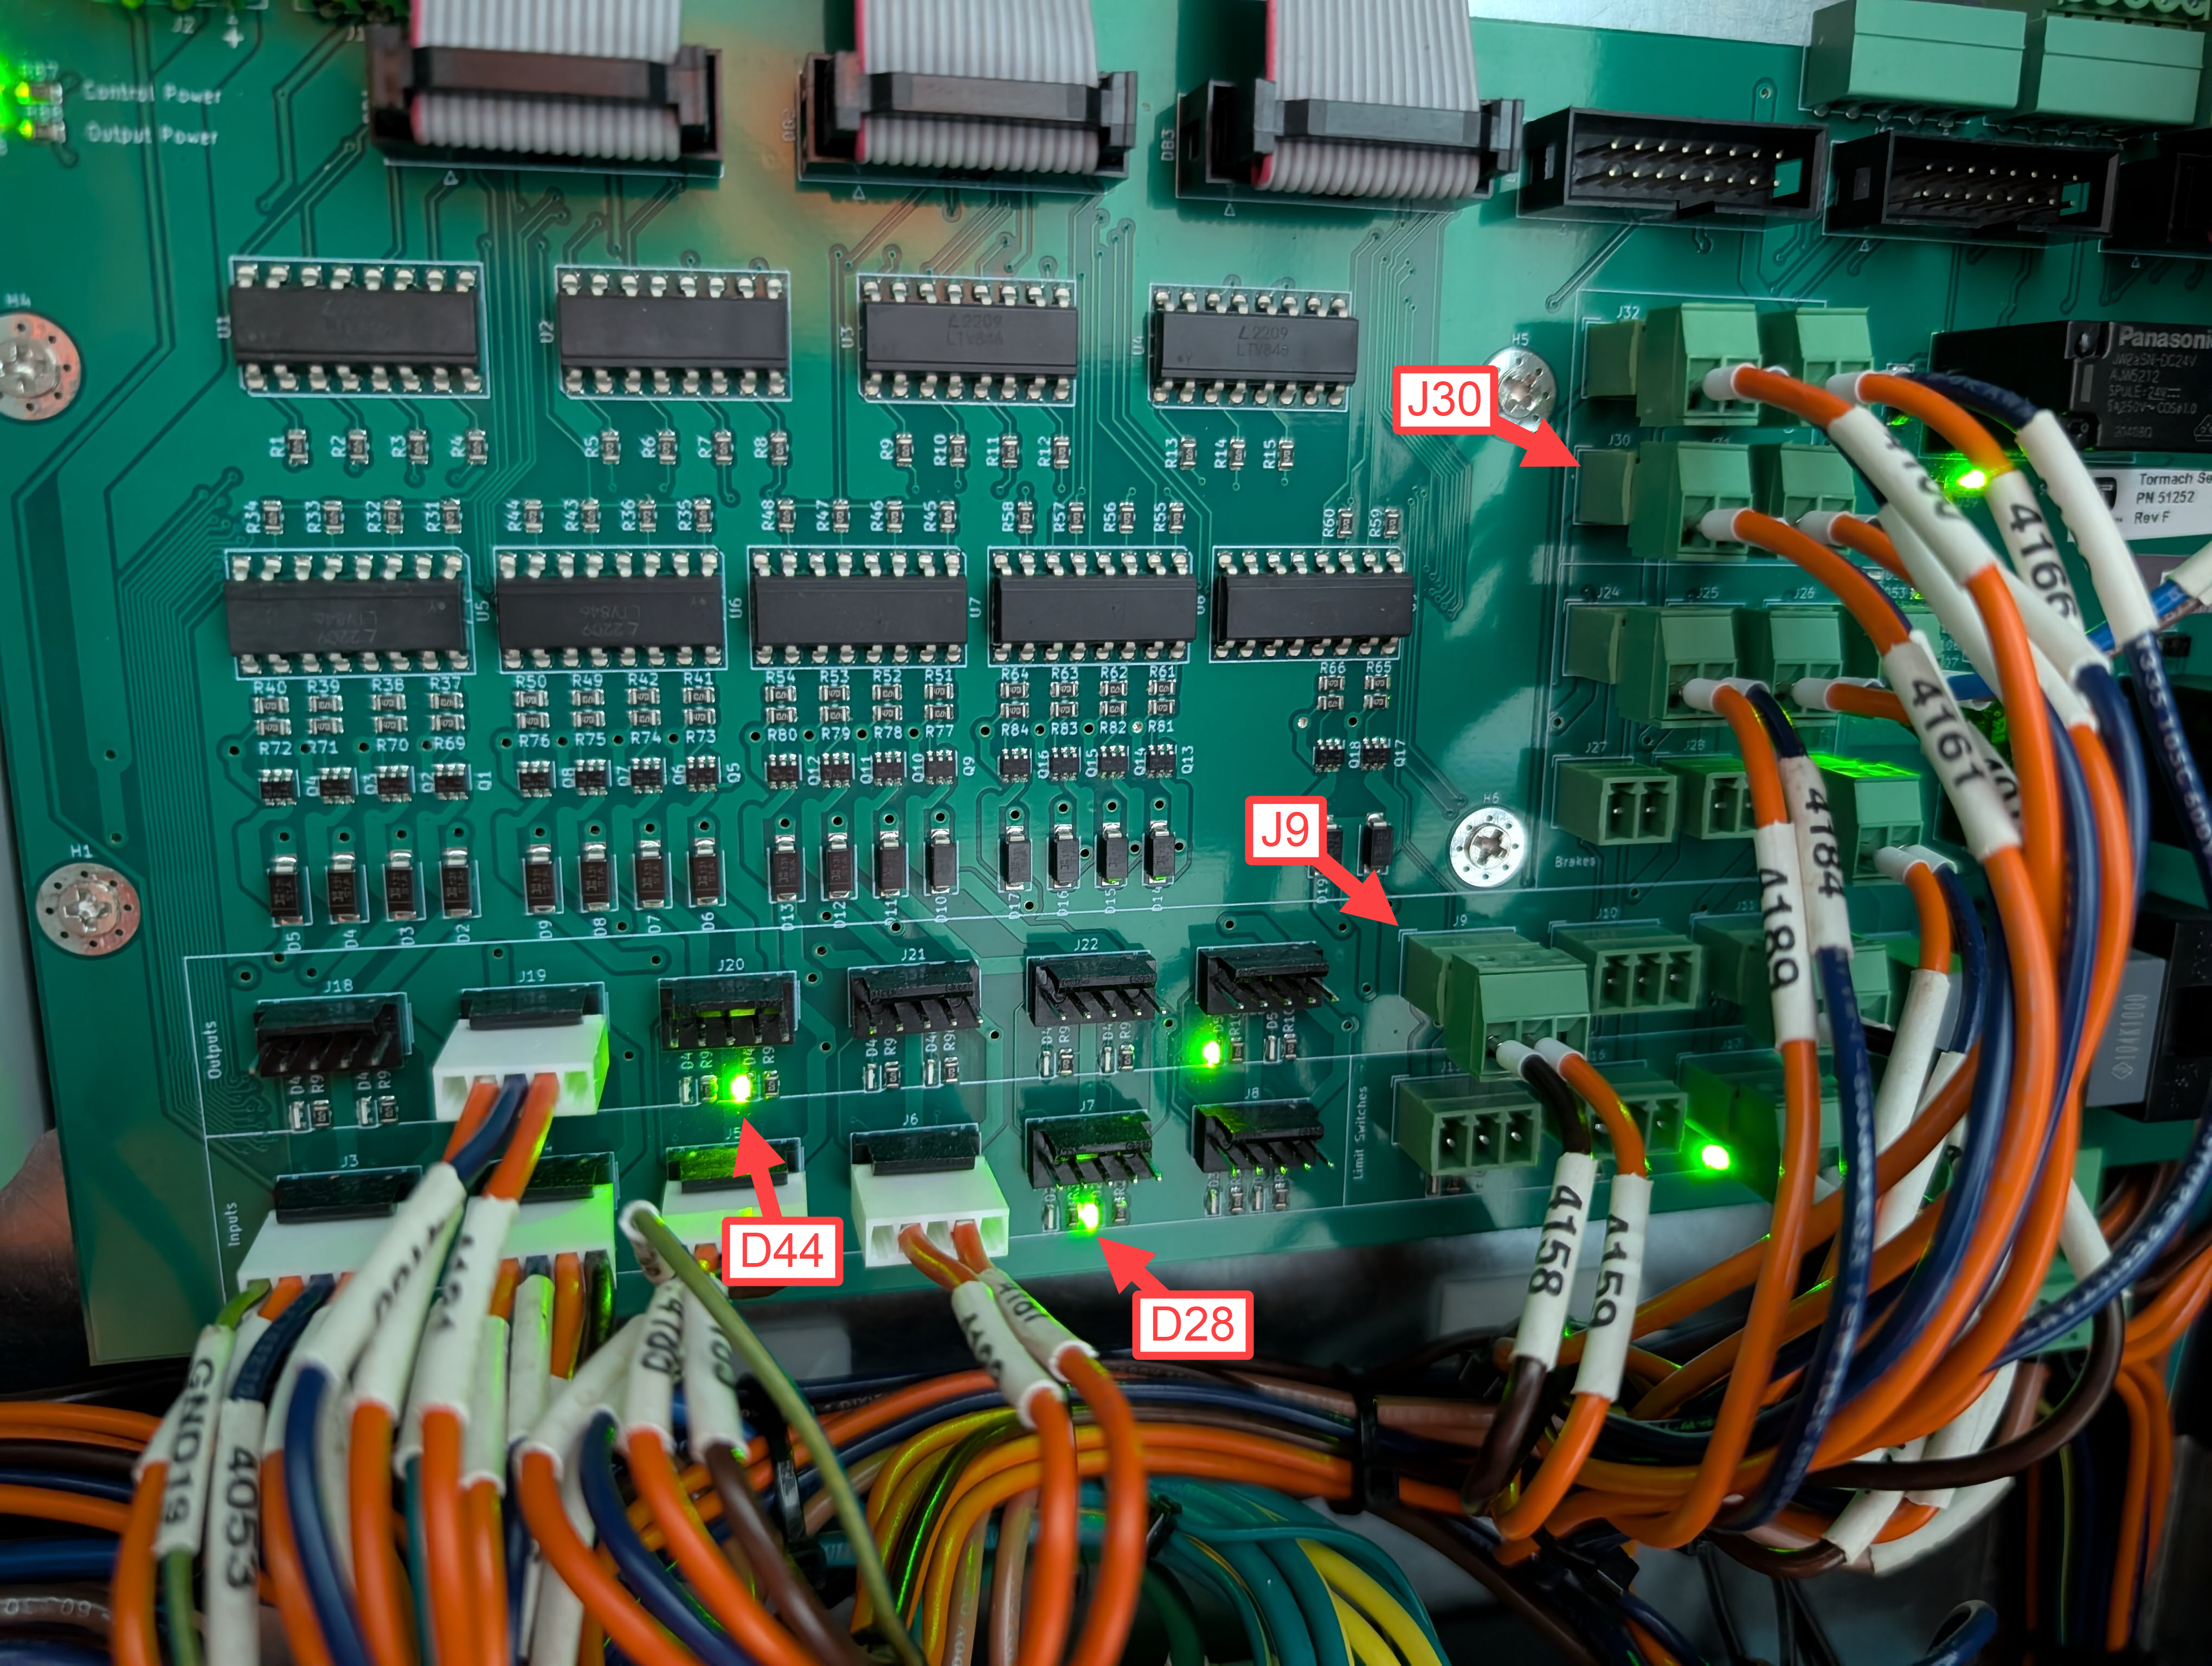
Go to the electrical cabinet. Identify and record the status of the D28 - Enclosure Lock Switch State LED on the IO Control Board.
This LED should be ON. -
Open the enclosure door. Then check the status of the D28 - Enclosure Lock Switch State LED
The LED should be OFF
-
Based on your test results do one of the following.
-
Test Passed: You may skip forward to “Testing the Door Unlock Button".
-
Test Failed: The wires for the Door Switch Input need to be inspected.
-
-
There are a few connectors/sets of wires to inspect.
-
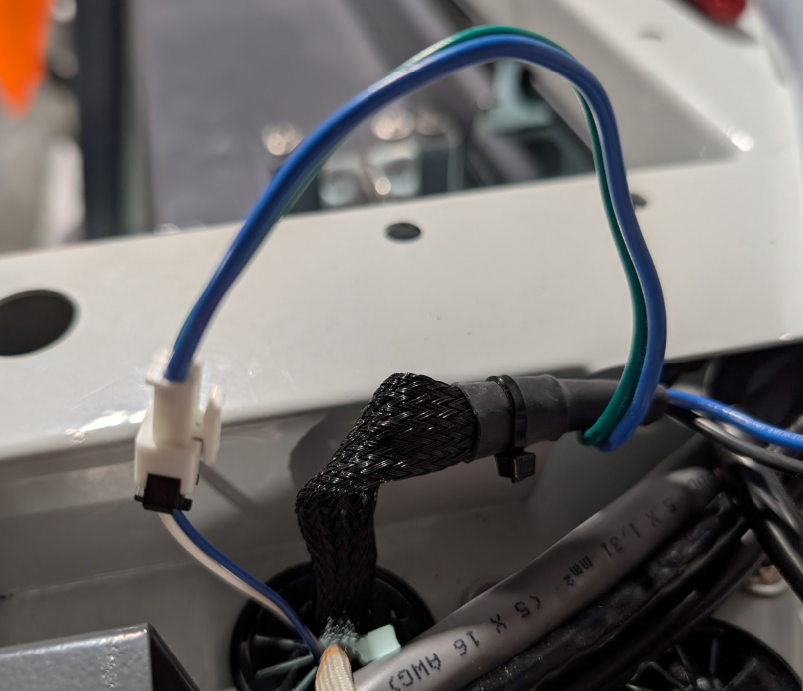
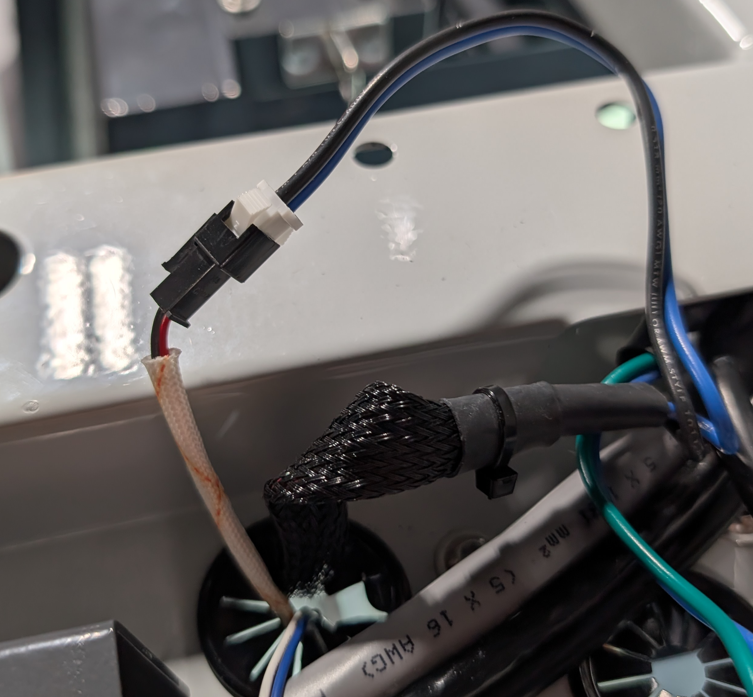
Inspect the connector and wires for the lock switch on top of the enclosure.
-
-
Inspect the connector and wires on the Connector Bulkhead in the electrical cabinet.
-
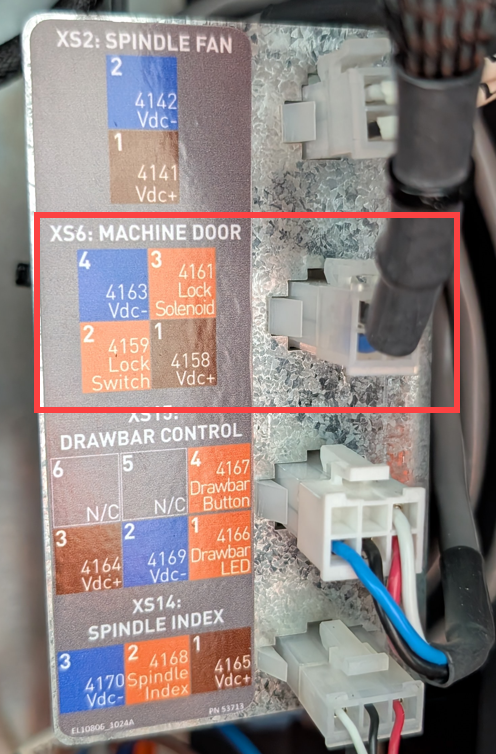
Wires 4158 and 4159 from XS6 inside cabinet to J9 connector on IO board. (See image above)
-
If the wiring looks good. Then the micro-switch inside of the door lock switch has failed. Replace the Locking Door Switch (51328).
Test the Door Unlock Button LEDs
-
Close the enclosure door and ensure that it is latched into the locked position.
-
Check the LED Ring around the Enclosure Door Unlock Button. The LED Ring should be illuminated.
-
Pass: The LED Ring is illuminated. You may skip forward to “Test the Solenoid and Locking Mechanism”.
-
Fail: The LED Ring is not illuminated. Continue on to test the IO Board LED.
-
-
Go to the electrical cabinet. Identify and record the status of the D44 - Enclosure Door Unlock LED on the IO Control Board. The LED should be illuminated. (see image above.)
-
Pass: The LED is illuminated. Proceed to step 4.
-
Fail: The LED is not illuminated. PathPilot is not enabling the enclosure door unlock button. E-stop the machine and then bring it out of reset. Then repeat steps 1-3 of this test.
If this test fails multiple times. There may be an issue with the EtherCat IO Board or a software bug. Contact Tormach Technical Support.
-
-
To inspect the door unlock button wiring.
-
Inspect the connector and wires for the lock solenoid on top of the enclosure.
-
-
Inspect the wires connected to the back of the door unlock button.
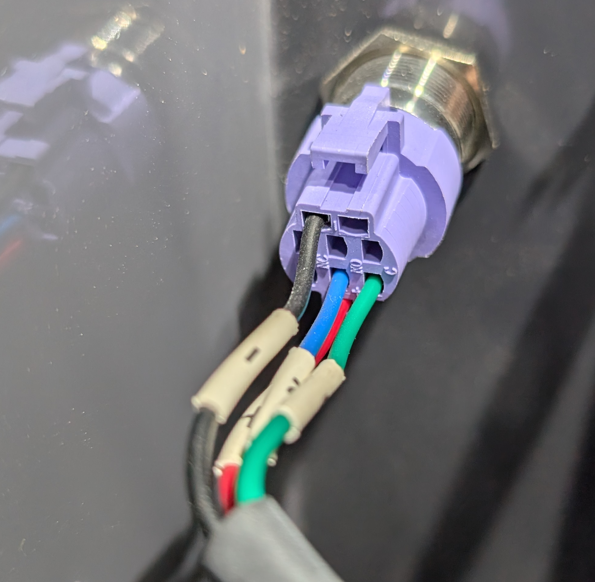
-
Inspect the wires 4161 and 4163 connected to the J30 connector on the IO board. (See image above)
-
If the wiring looks good. Then the Door Unlock Button (51239) has failed and should be replaced.
Test the Solenoid and Locking Mechanism
-
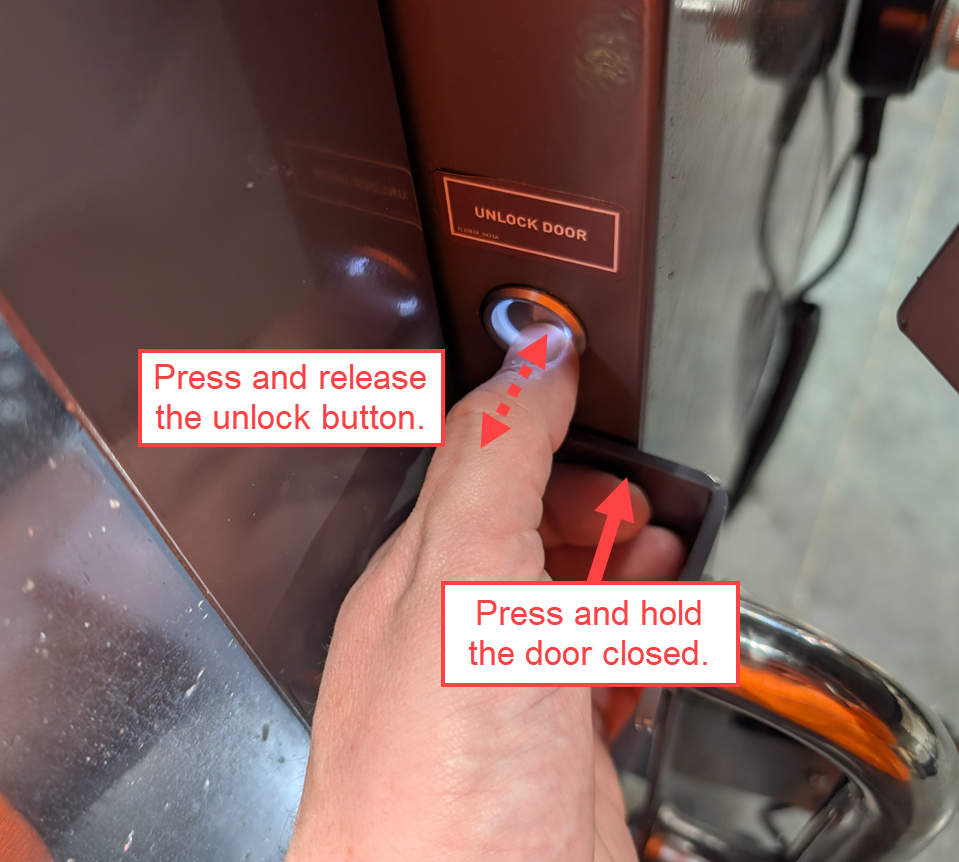
Close the enclosure door and ensure that it is latched into the locked position.
-
While pressing the enclosure door shut. Press and release the Door Unlock button. The solenoid in the lock switch should actuate the manual override lever and make a clicking noise.
-
Did the solenoid actuate the latch override lever and make a noise?
-
Pass: The latch override was making a clicking noise. The door latch is functioning as intended.
-
Fail: The latch override was not making a clicking noise. The solenoid is failing to actuate the latch override lever. This may be caused by a sticky latch or a failing solenoid. Proceed to next step to inspect the latch override lever.
-
-
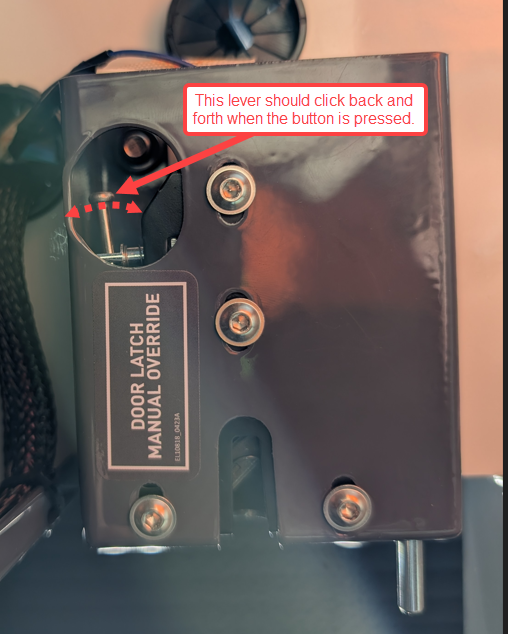
With the enclosure door open. Actuate the latch override lever by hand. The lever should move smoothly and freely. If the lever appears to be sticky. Use some compressed air to blow out the latch and then use some spray lubricant to loosen up the latch. Then repeat the test in step 3.
-
Did the solenoid actuate the latch override lever and make a noise?
-
Pass: The latch override was making a clicking noise. The door latch is functioning as intended.
-
Fail: The latch override was not making a clicking noise. The solenoid is failing to actuate the latch override lever. If the latch is still failing to unlatch after lubrication. Then the solenoid has failed or in the process of failing. Replace the Locking Door Switch (51328).
-
-
To order part numbers not listed on http://Tormach.com, email orders@tormach.com!