Automatic Operation
Use Automatic Mode
To use the bandsaw in automatic mode:
-
Confirm that the blade is appropriate for the material. For more information, check with your blade manufacturer for application usage.
If the blade is not appropriate for the material, you must first change it. Go to “Change a Blade”. -
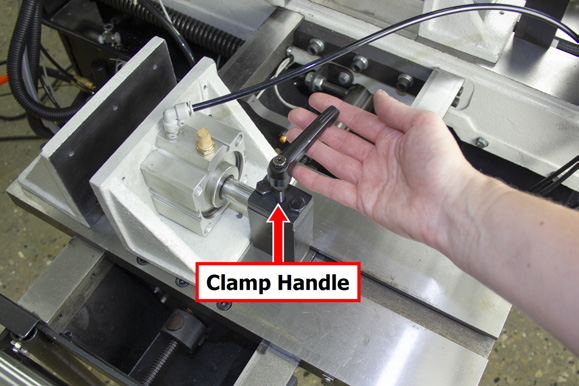
Open the clamps on both vises with the handwheel and the clamp handle. Then, load the material between the vises.

-
Push the material up to the back of the blade.
-
On the infeed table, identify the horizontal quick-adjustment nut. Press the button on the quick-adjustment nut to loosen it. Then, move it away from the blade and past the desired length of cut.
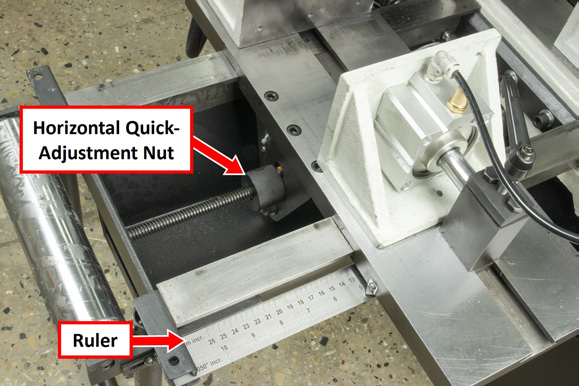
The horizontal quick-adjustment nut controls the length to which the infeed table moves.
NOTE: Use the ruler to determine how far to move the components to achieve the desired cut.
-
Adjust the infeed table until the back edge of the table is just past the desired length of cut on the ruler.
-
Rotate the horizontal quick-adjustment nut to make fine adjustments to the infeed table until the back edge of the table is aligned with the desired length of cut on the ruler.
If the length needed is longer than a full stroke can move, use the stroke multiplier on the control panel to achieve the required length. For more information, go to “Set the Number of Cycles”. -
Use the handwheel to close the fixed vise clamp until it is approximately 1/8 in. from the material.
-
Remove any backlash: pull the fixed vise by hand toward the handwheel. Then, verify that there's still approximately 1/8 in. gap between the vise and the material.
-
Loosen the clamp handle to close the feeding vise clamp until it is approximately 1/8 in. from the material.
-
Tighten the clamp handle to lock it in place.
-
Remove any backlash: pull the feeding vise by hand toward the clamp handle. Then, verify that there's still approximately 1/8 in. gap between the vise and the material.
-
Adjust the clamping pressure to the desired amount using the regulator (mounted by the gearbox).
-
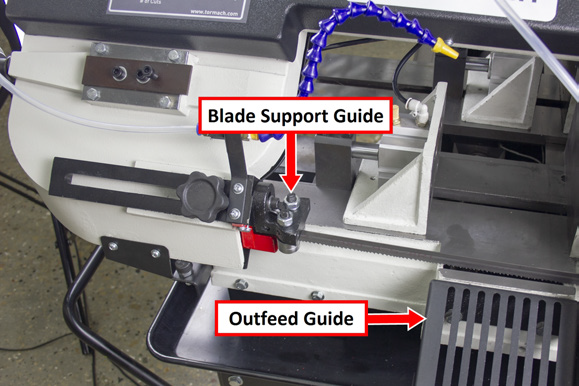
On the front of the machine, locate the blade support guide. Move the blade support guide until it is as close to the material as possible, but so that it's not past the outfeed guide.
-
Position the coolant nozzle so that it points at the blade ahead of the material.
-
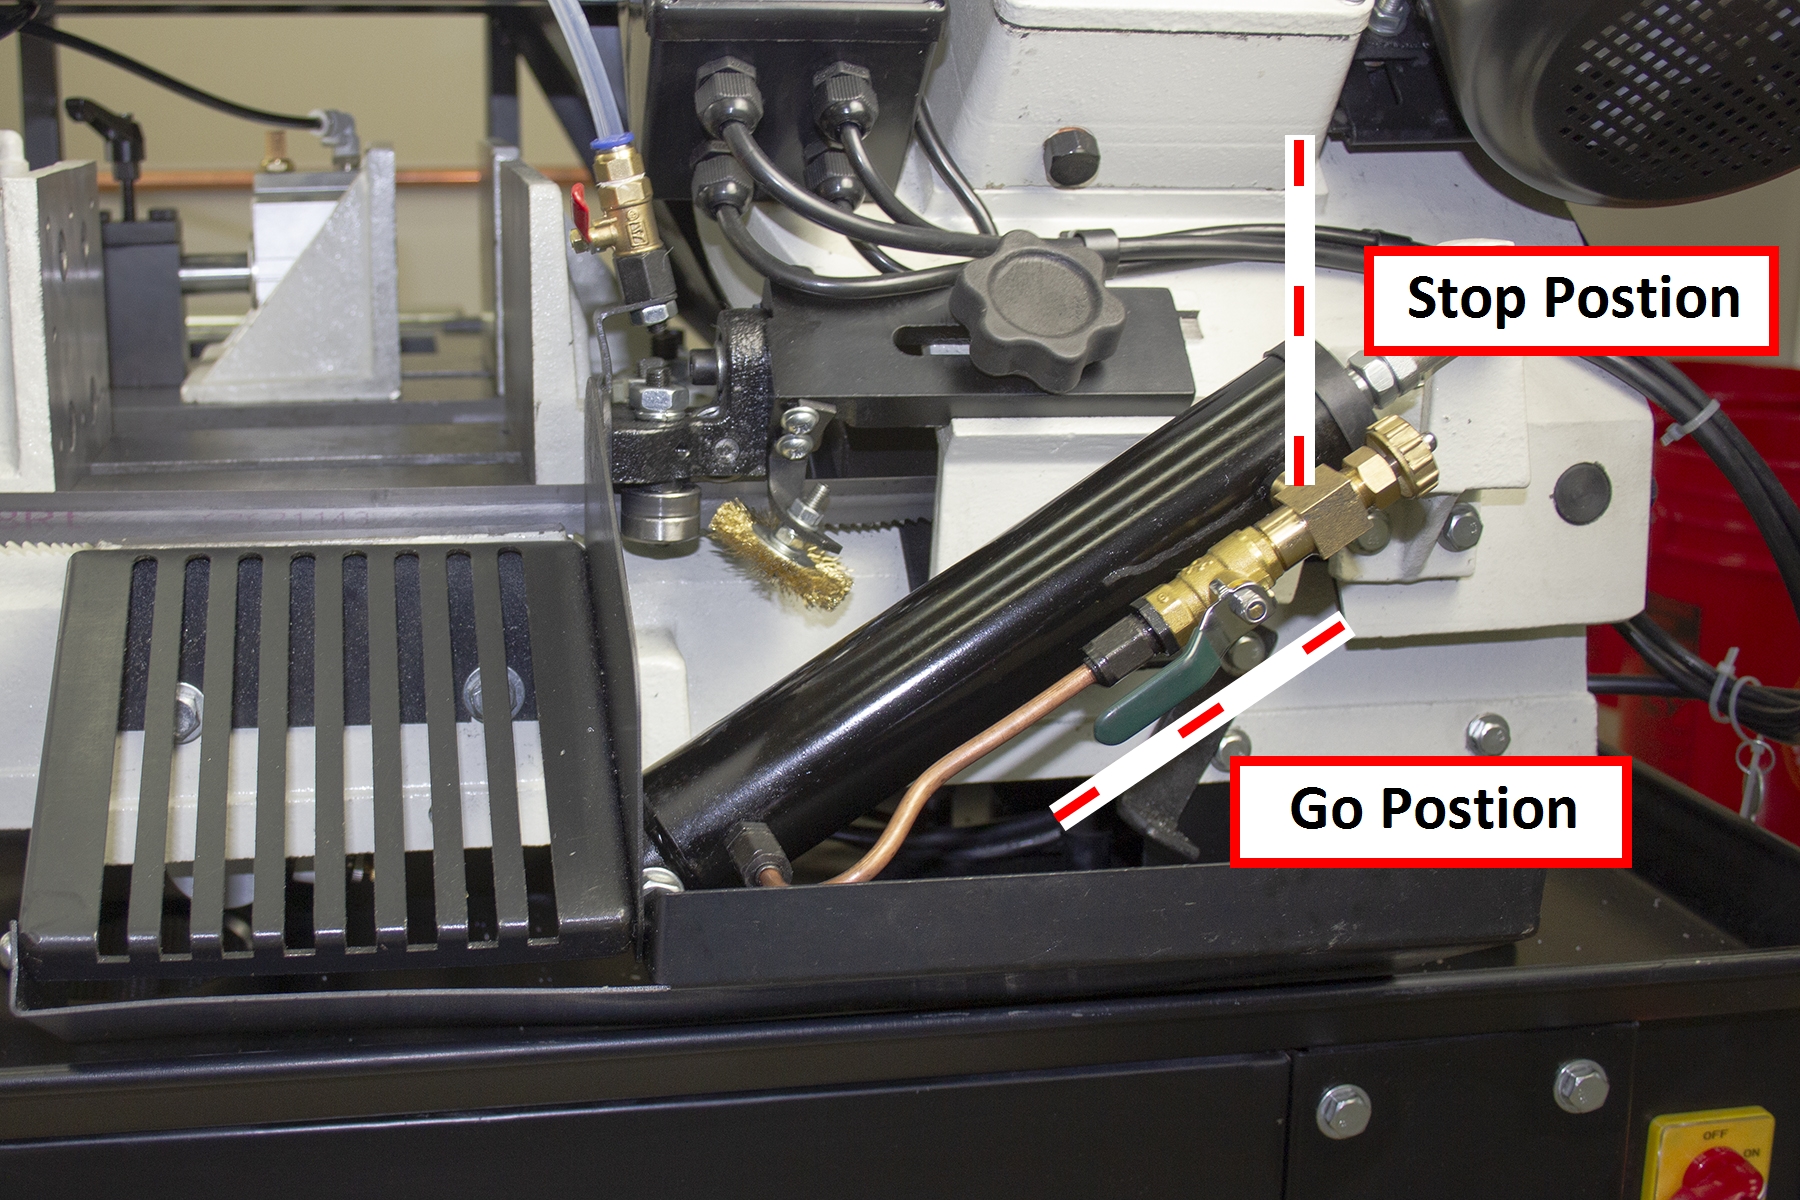
On the front of the machine, identify the blade feed lever, and then move it up.
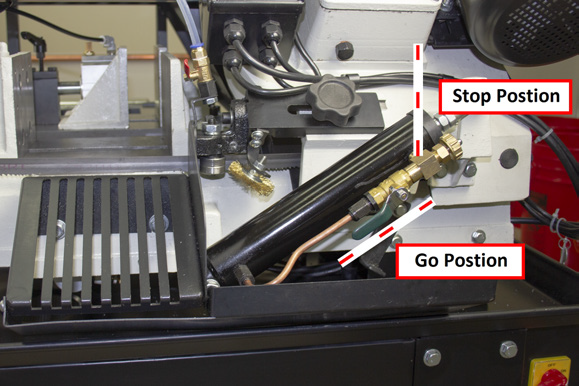
The blade feed lever is now in the Stop position. While in the Stop position, the saw head doesn't move down.
-
On the back of the machine, identify the vertical quick-adjustment nut. Press the button on the quick-adjustment nut to loosen it. Then, move it to the top of the threaded rod.
-
Lift the saw until the blade is about two inches above the material.
-
Press the button on the quick-adjustment nut to loosen it. Then, lower it until it meets the lift height sensor as shown in the following image.
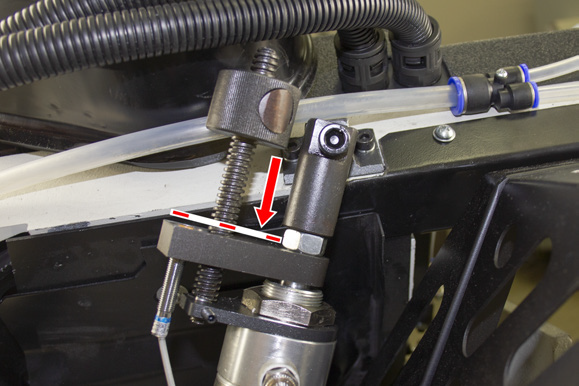
The vertical quick-adjustment nut controls the level to which the saw head lifts after completing one cut and before beginning another cut.
-
On the operator panel, twist out the Emergency Stop button, which powers on the control board.
-
On the control panel, do the following:
-
Use the Down Arrow and Up Arrow buttons to indicate the number of cuts desired.
-
Use the Stroke button to indicate the number of strokes desired.
-
On the operator panel, push the green Cycle Start (CS) button twice, which activates the blade.
-
Verify that the blade feed lever is down (in the Go position).
-
On the front of the machine, above the blade feed lever, locate the feed adjustment knob. Use the feed adjustment knob to set the cutting rate.
Manual Operation
Use Manual Mode
To use the bandsaw in manual mode:
-
Confirm that the blade is appropriate for the material. For more information, check with your blade manufacturer for application usage.
If the blade is not appropriate for the material, you must first change it. Go to “Change a Blade”. -
Open the clamps on both vises with the handwheel and the clamp handle. Then, load the material between the vises.


-
On the front of the machine, identify the blade feed lever, and then move it up.
The blade feed lever is now in the Stop position. While in the Stop position, the saw head doesn't move down.
-
On the back of the machine, identify the vertical-quick adjustment nut. Press the button on the quick adjustment nut to loosen it. Then, move it to the top of the threaded rod.

-
Lift the saw head up to its maximum allowed height.
-
Move the material forward until it is at the desired length for the cut.
-
Use the handwheel to close the vise until the material is secure.
NOTE: Only the front clamp is used in manual mode.
-
On the front of the machine, locate the blade support guide. Move the blade support guide until it is as close to the material as possible, but so that it's not past the outfeed guide.

-
Position the coolant nozzle so that it points at the blade ahead of the material.
-
On the operator panel, twist out the Emergency Stop button, which powers on the control board.
-
On the control panel, push the Down Arrow and the Up Arrow buttons at the same time.
The control board displays ---.
A display of - - - on the control panel indicates that the machine is in manual mode. -
On the operator panel, push the green Cycle Start (CS) button twice, which activates the blade.
-
Move the blade feed lever down (in the Go position), and adjust the feed as necessary.
-
On the front of the machine, above the blade feed lever, locate the feed adjustment knob. Use the feed adjustment knob to set the cutting rate.
Looking for more information?
This is a section of the AF50 Autofeed Bandsaw operator's manual. To view the whole manual, go to Tormach document UM10538.
If you have additional questions, we can help. Create a support ticket with Tormach Technical Support at tormach.com/how-to-submit-a-support-ticket for guidance on how to proceed.