Background
The xsTECH is an exceptionally easy machine to set up, and get to making chips. Below is a helpful guide to setting up your new xsTech!
Installing the xsTECH
-
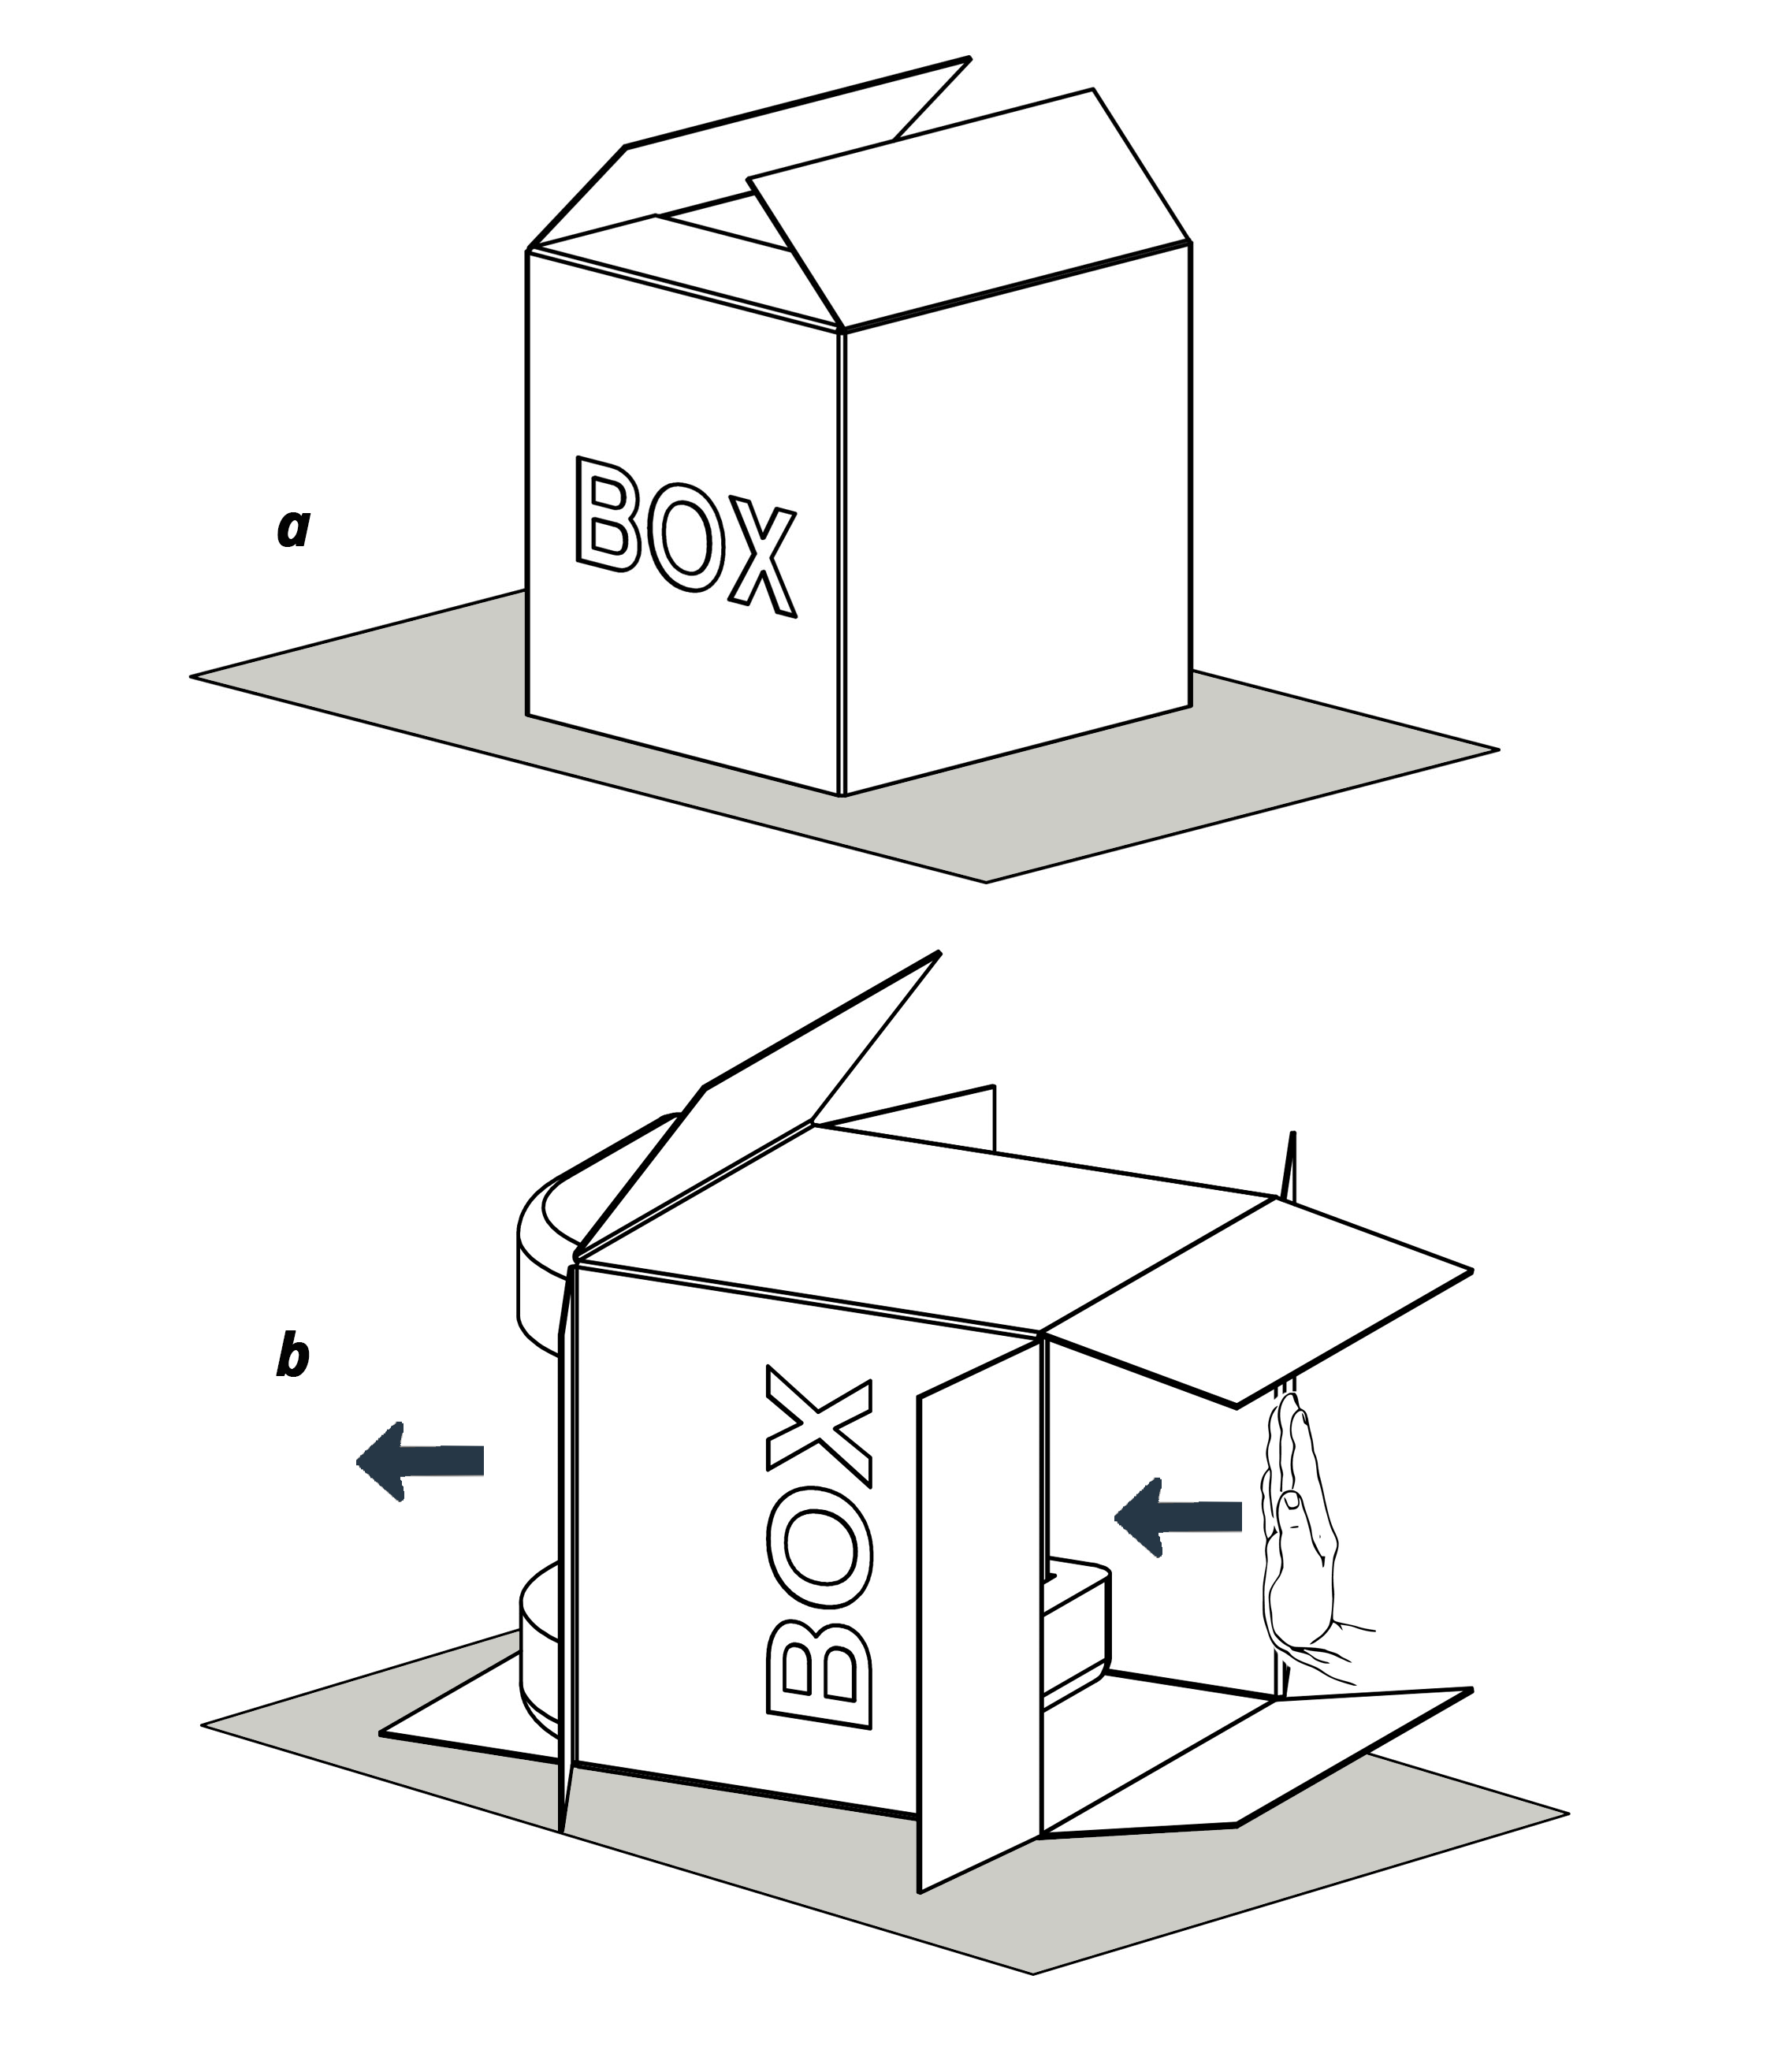
The xsTECH is packed tightly inside the box. You may find it easier to push the unit out from the bottom of the box, as shown below.
-
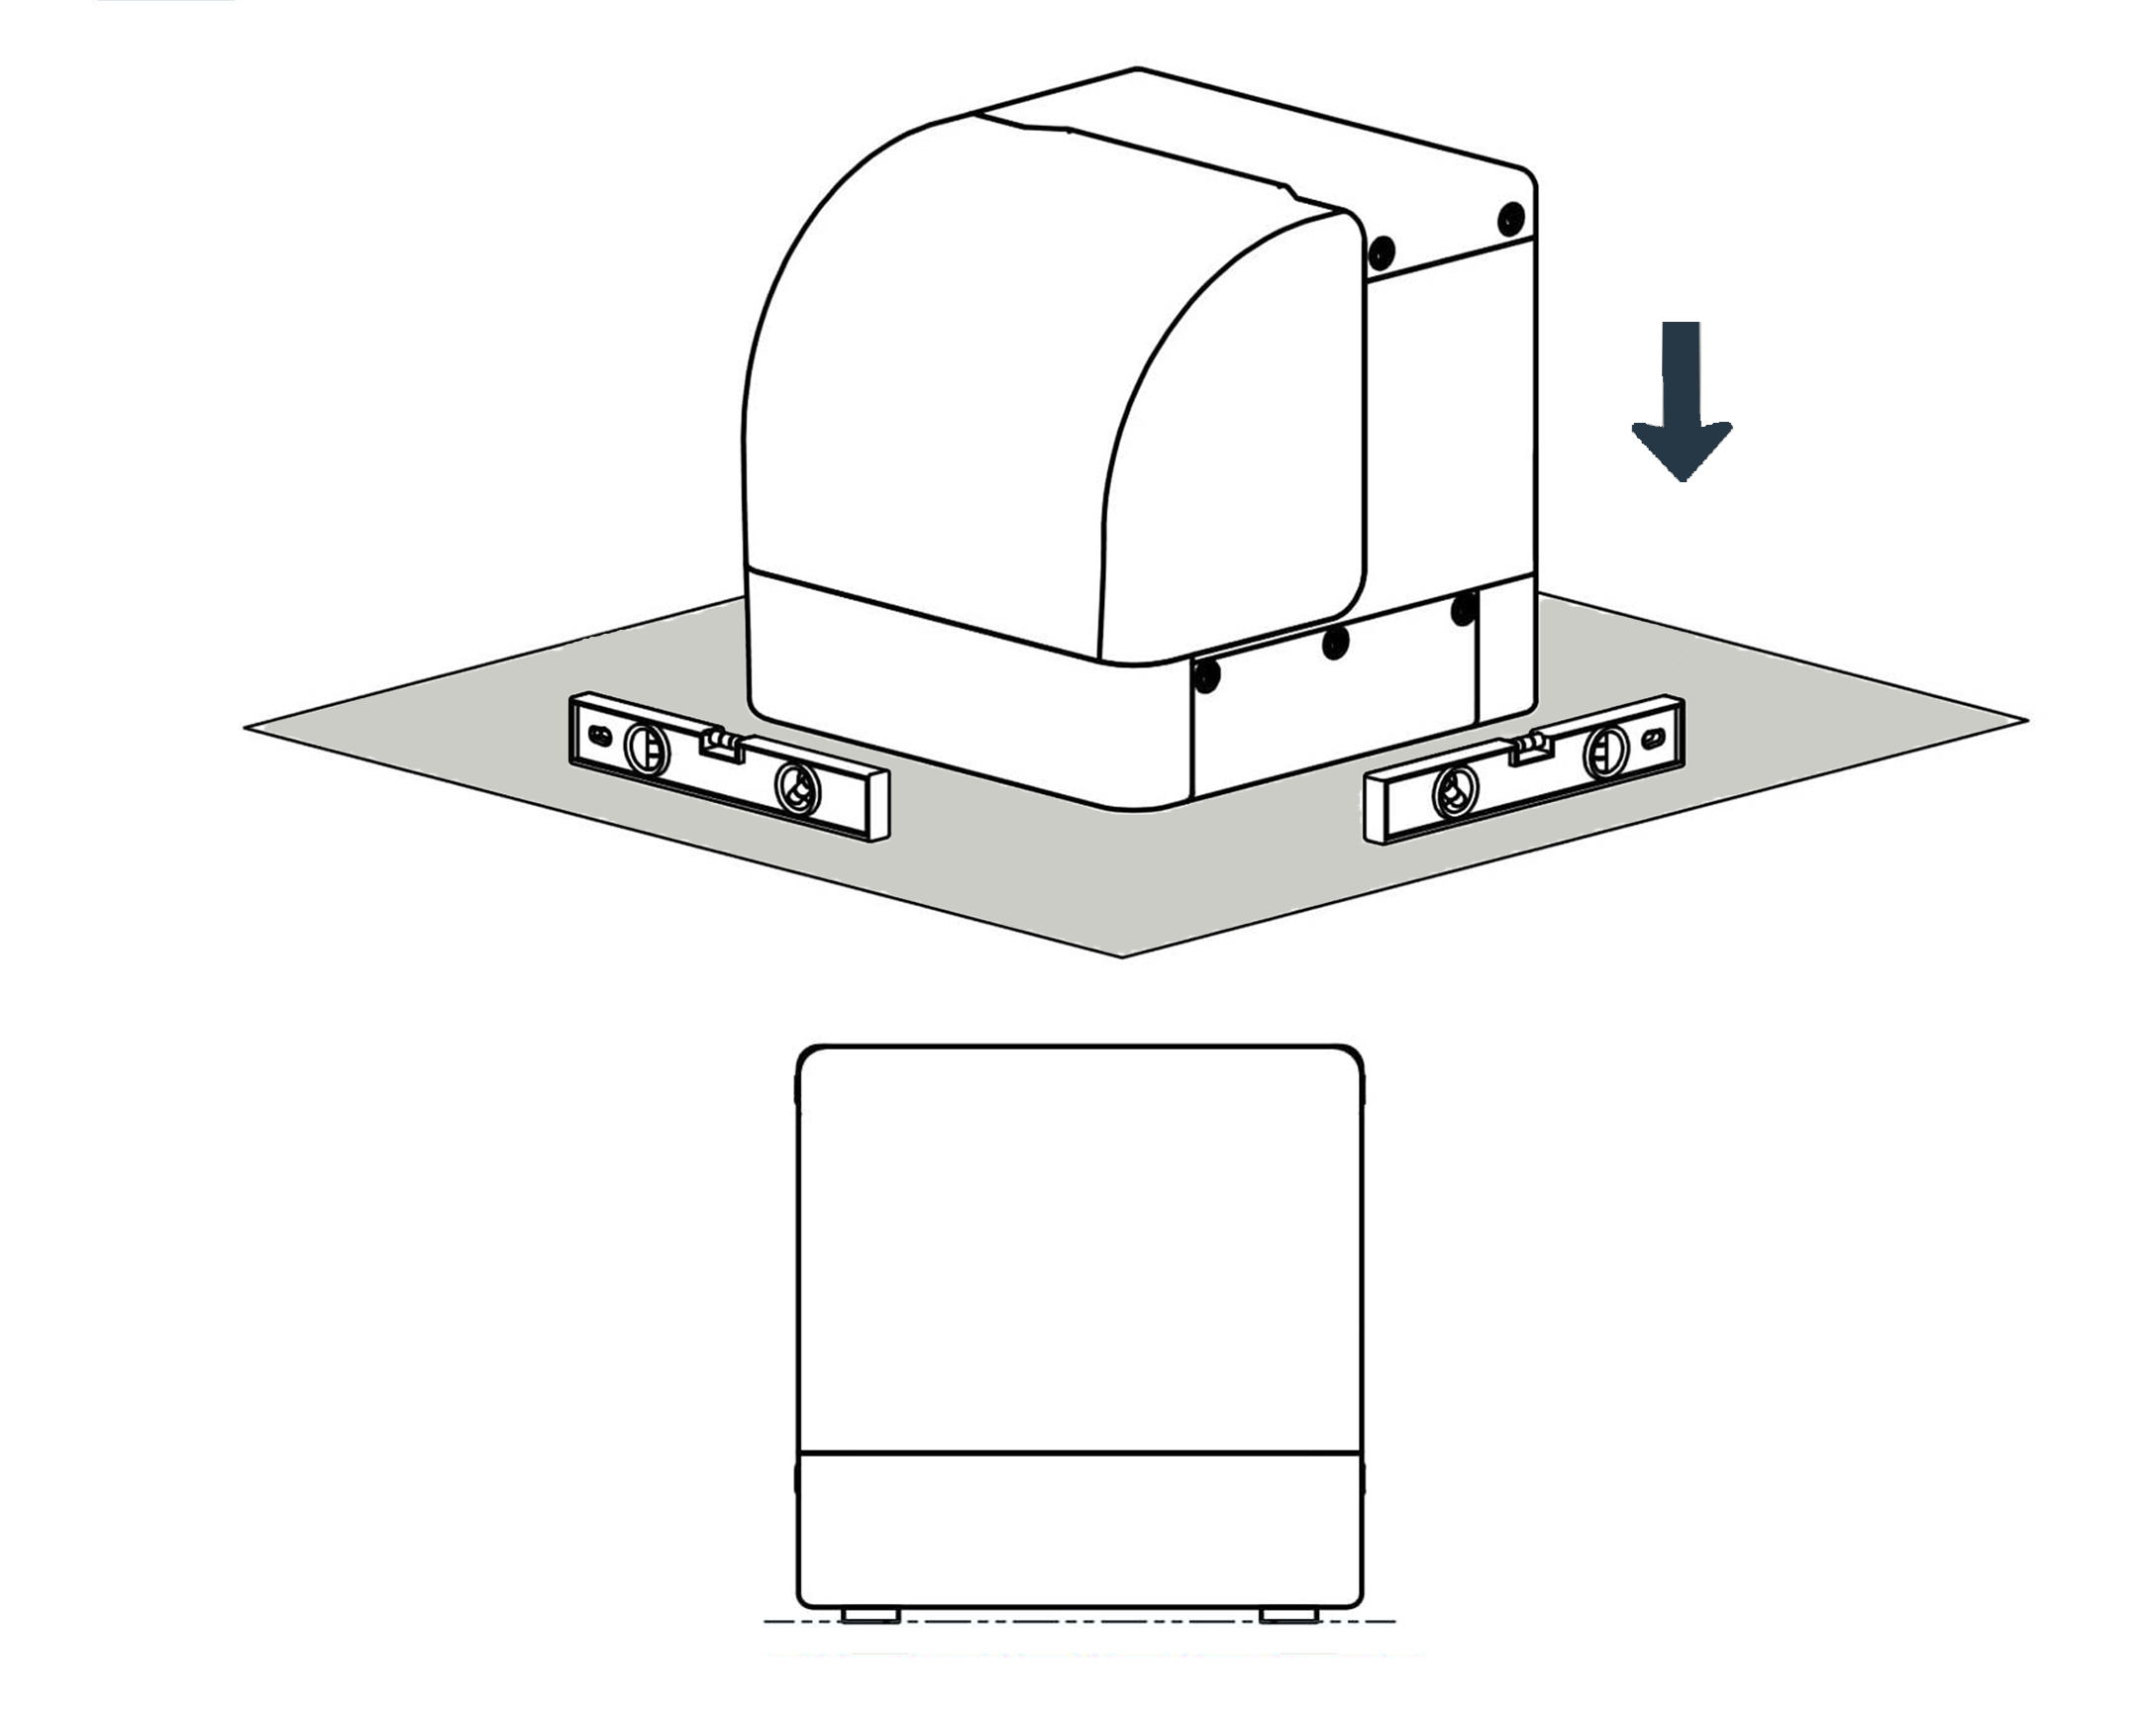
Place your xsTECH on a sturdy work surface. You can make minor adjustments by threading the feet in or out if required.
-
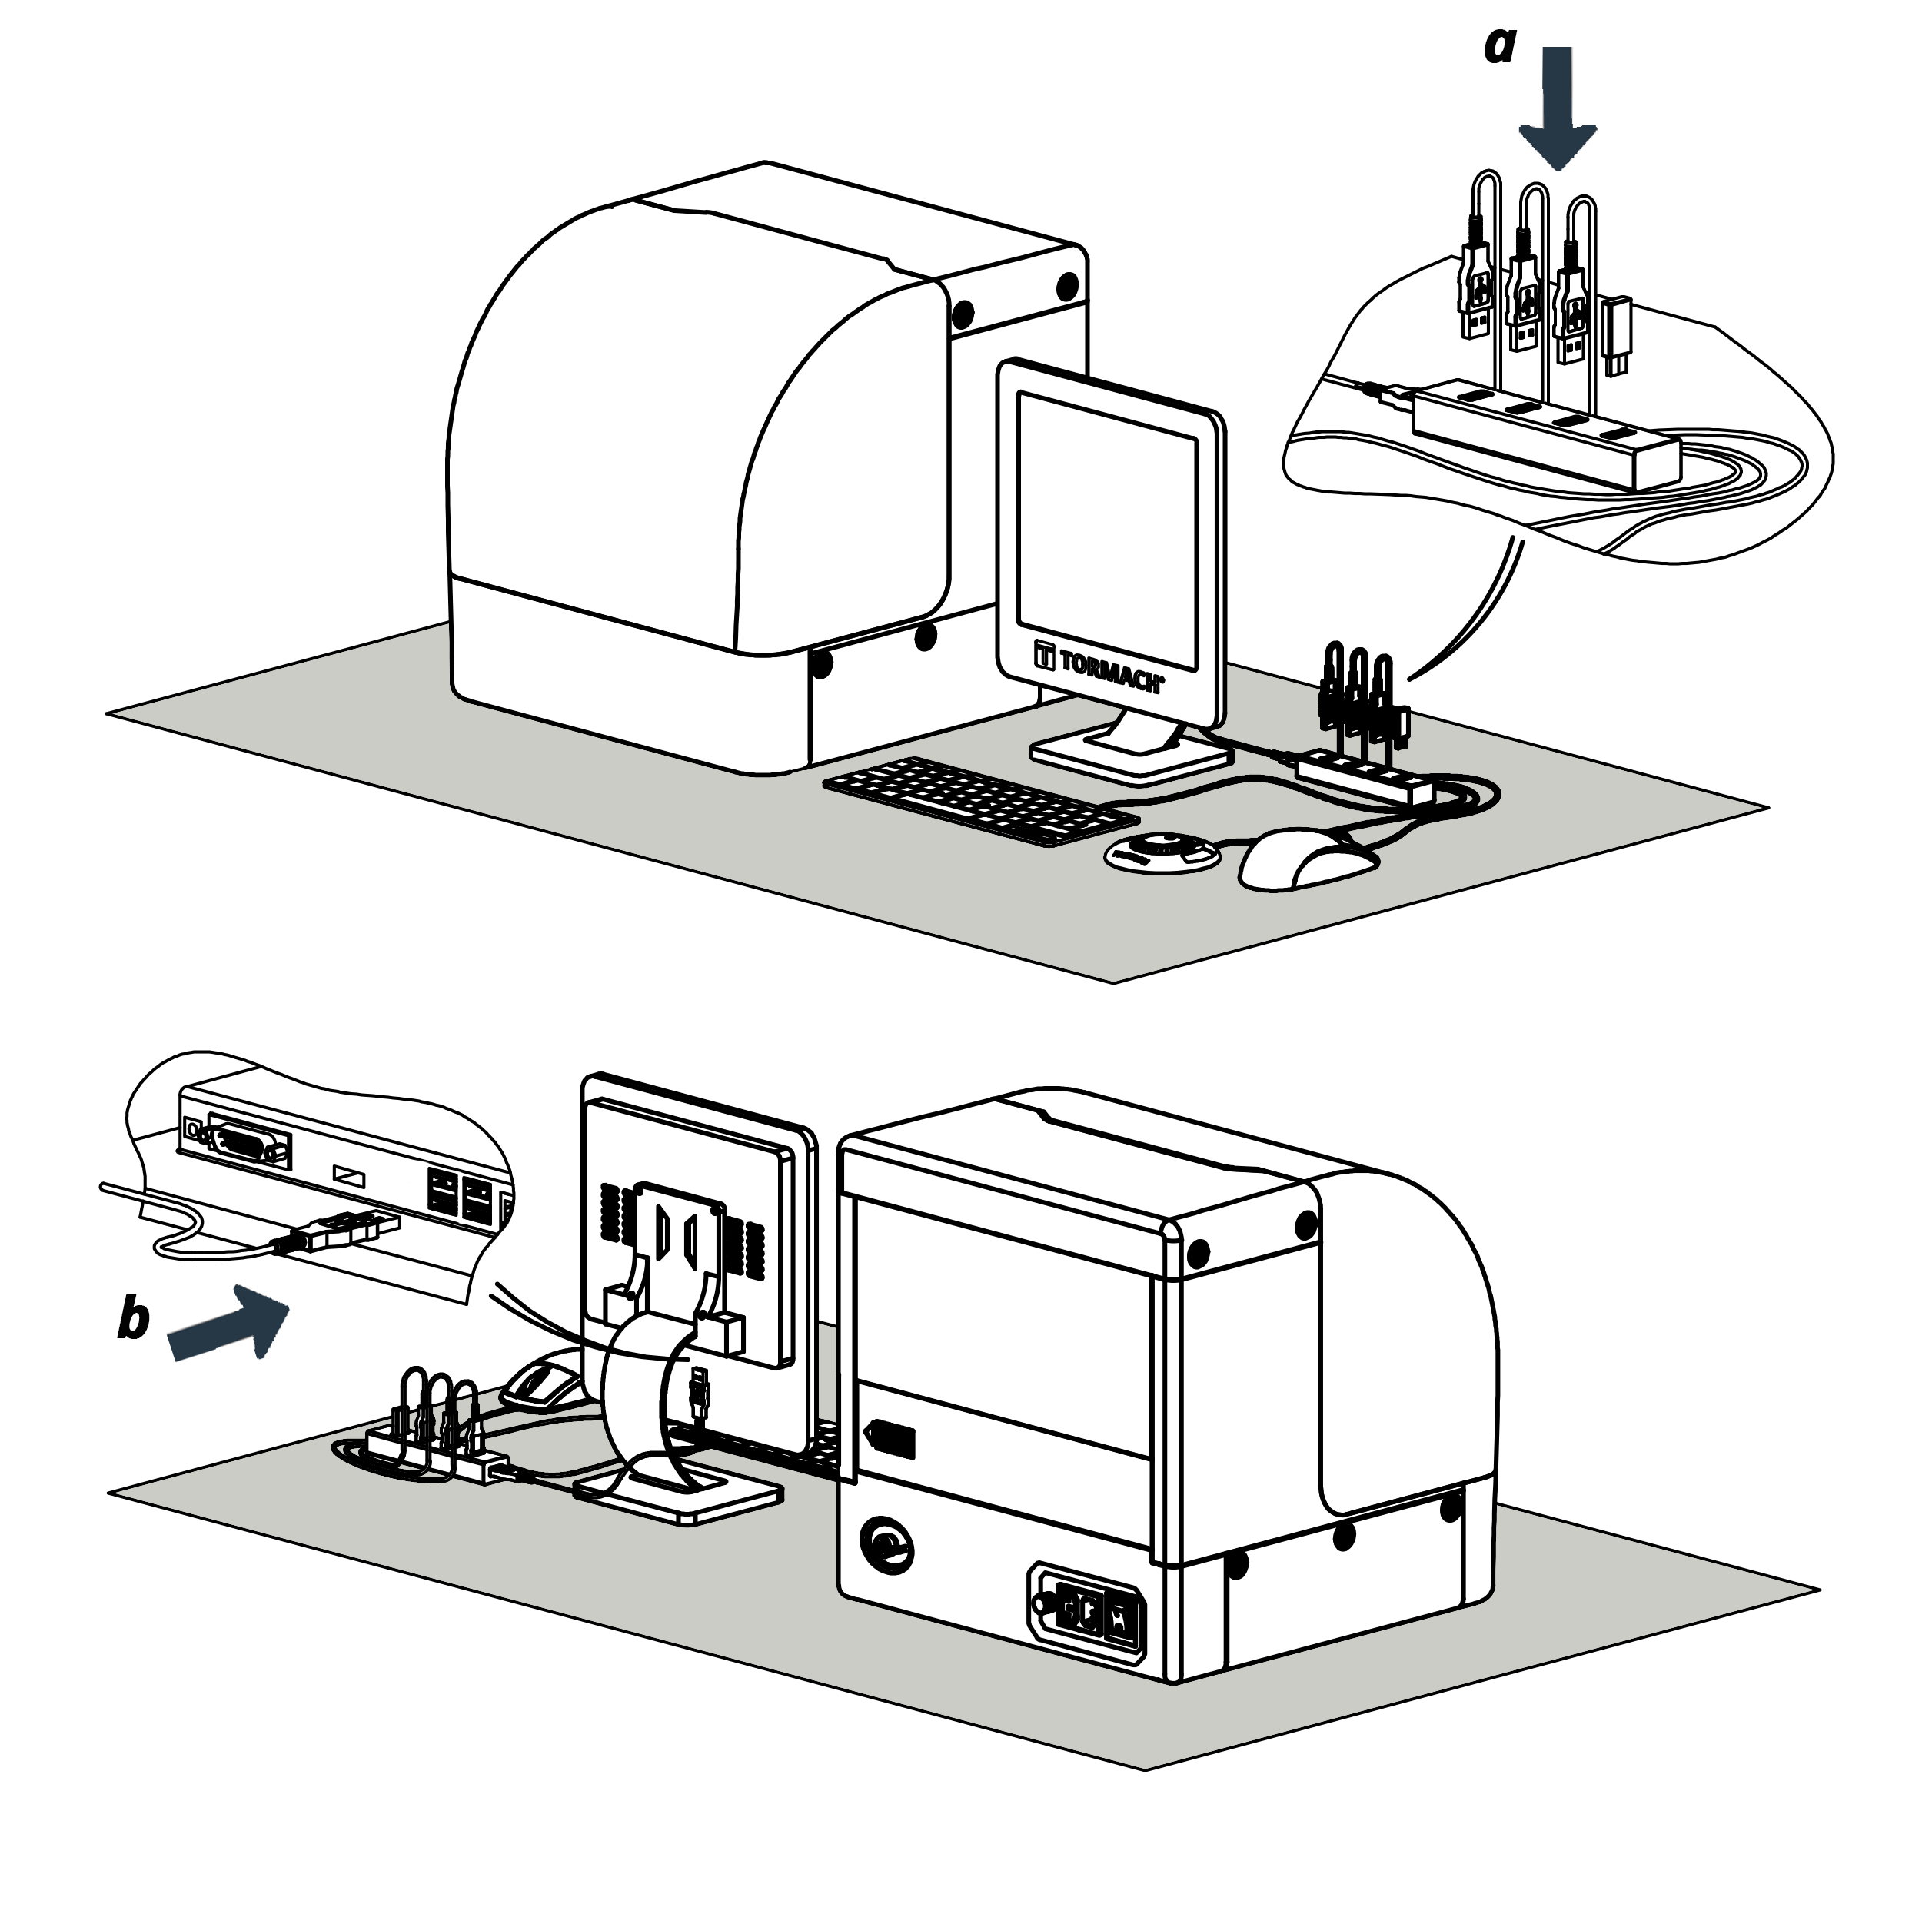
Plug the keyboard, mouse, jog shuttle, and WiFi adapter in the USB hub. Then, plug the USB hub into one of the USB connections on the underside of the controller.
-
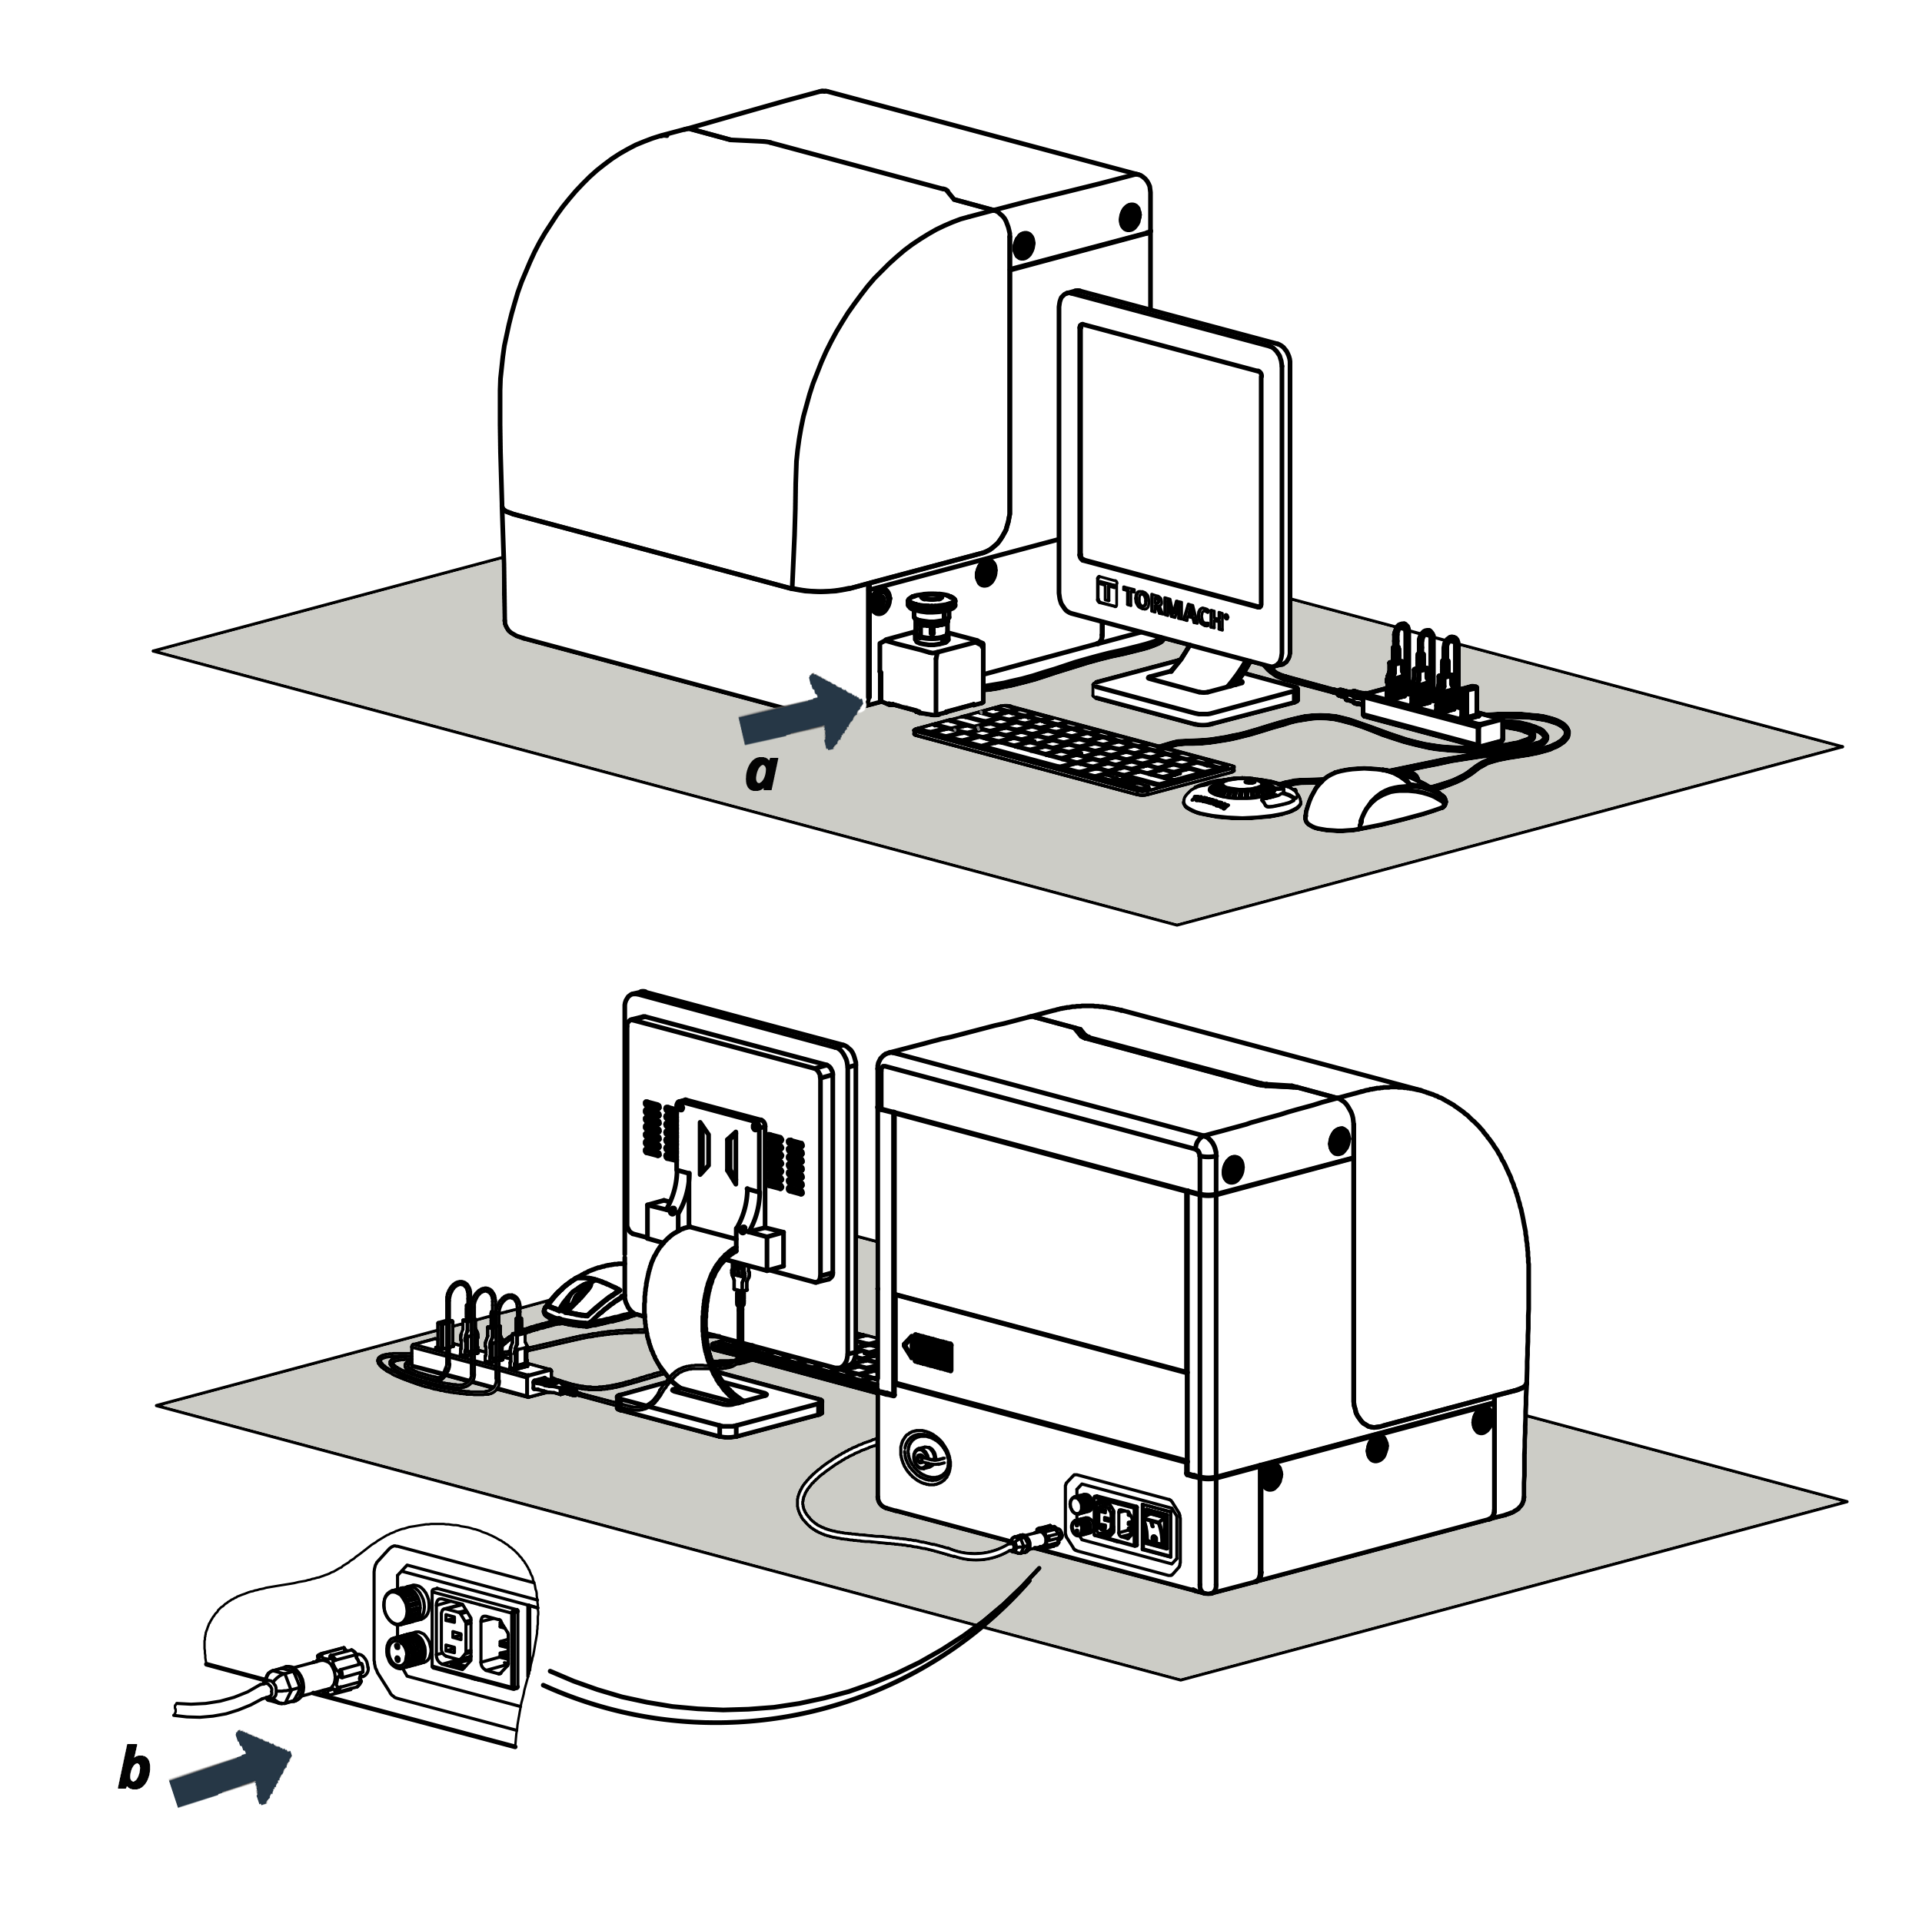
The E-stop connects to the rear of the xsTECH. Align the connector and screw into place to secure.
-
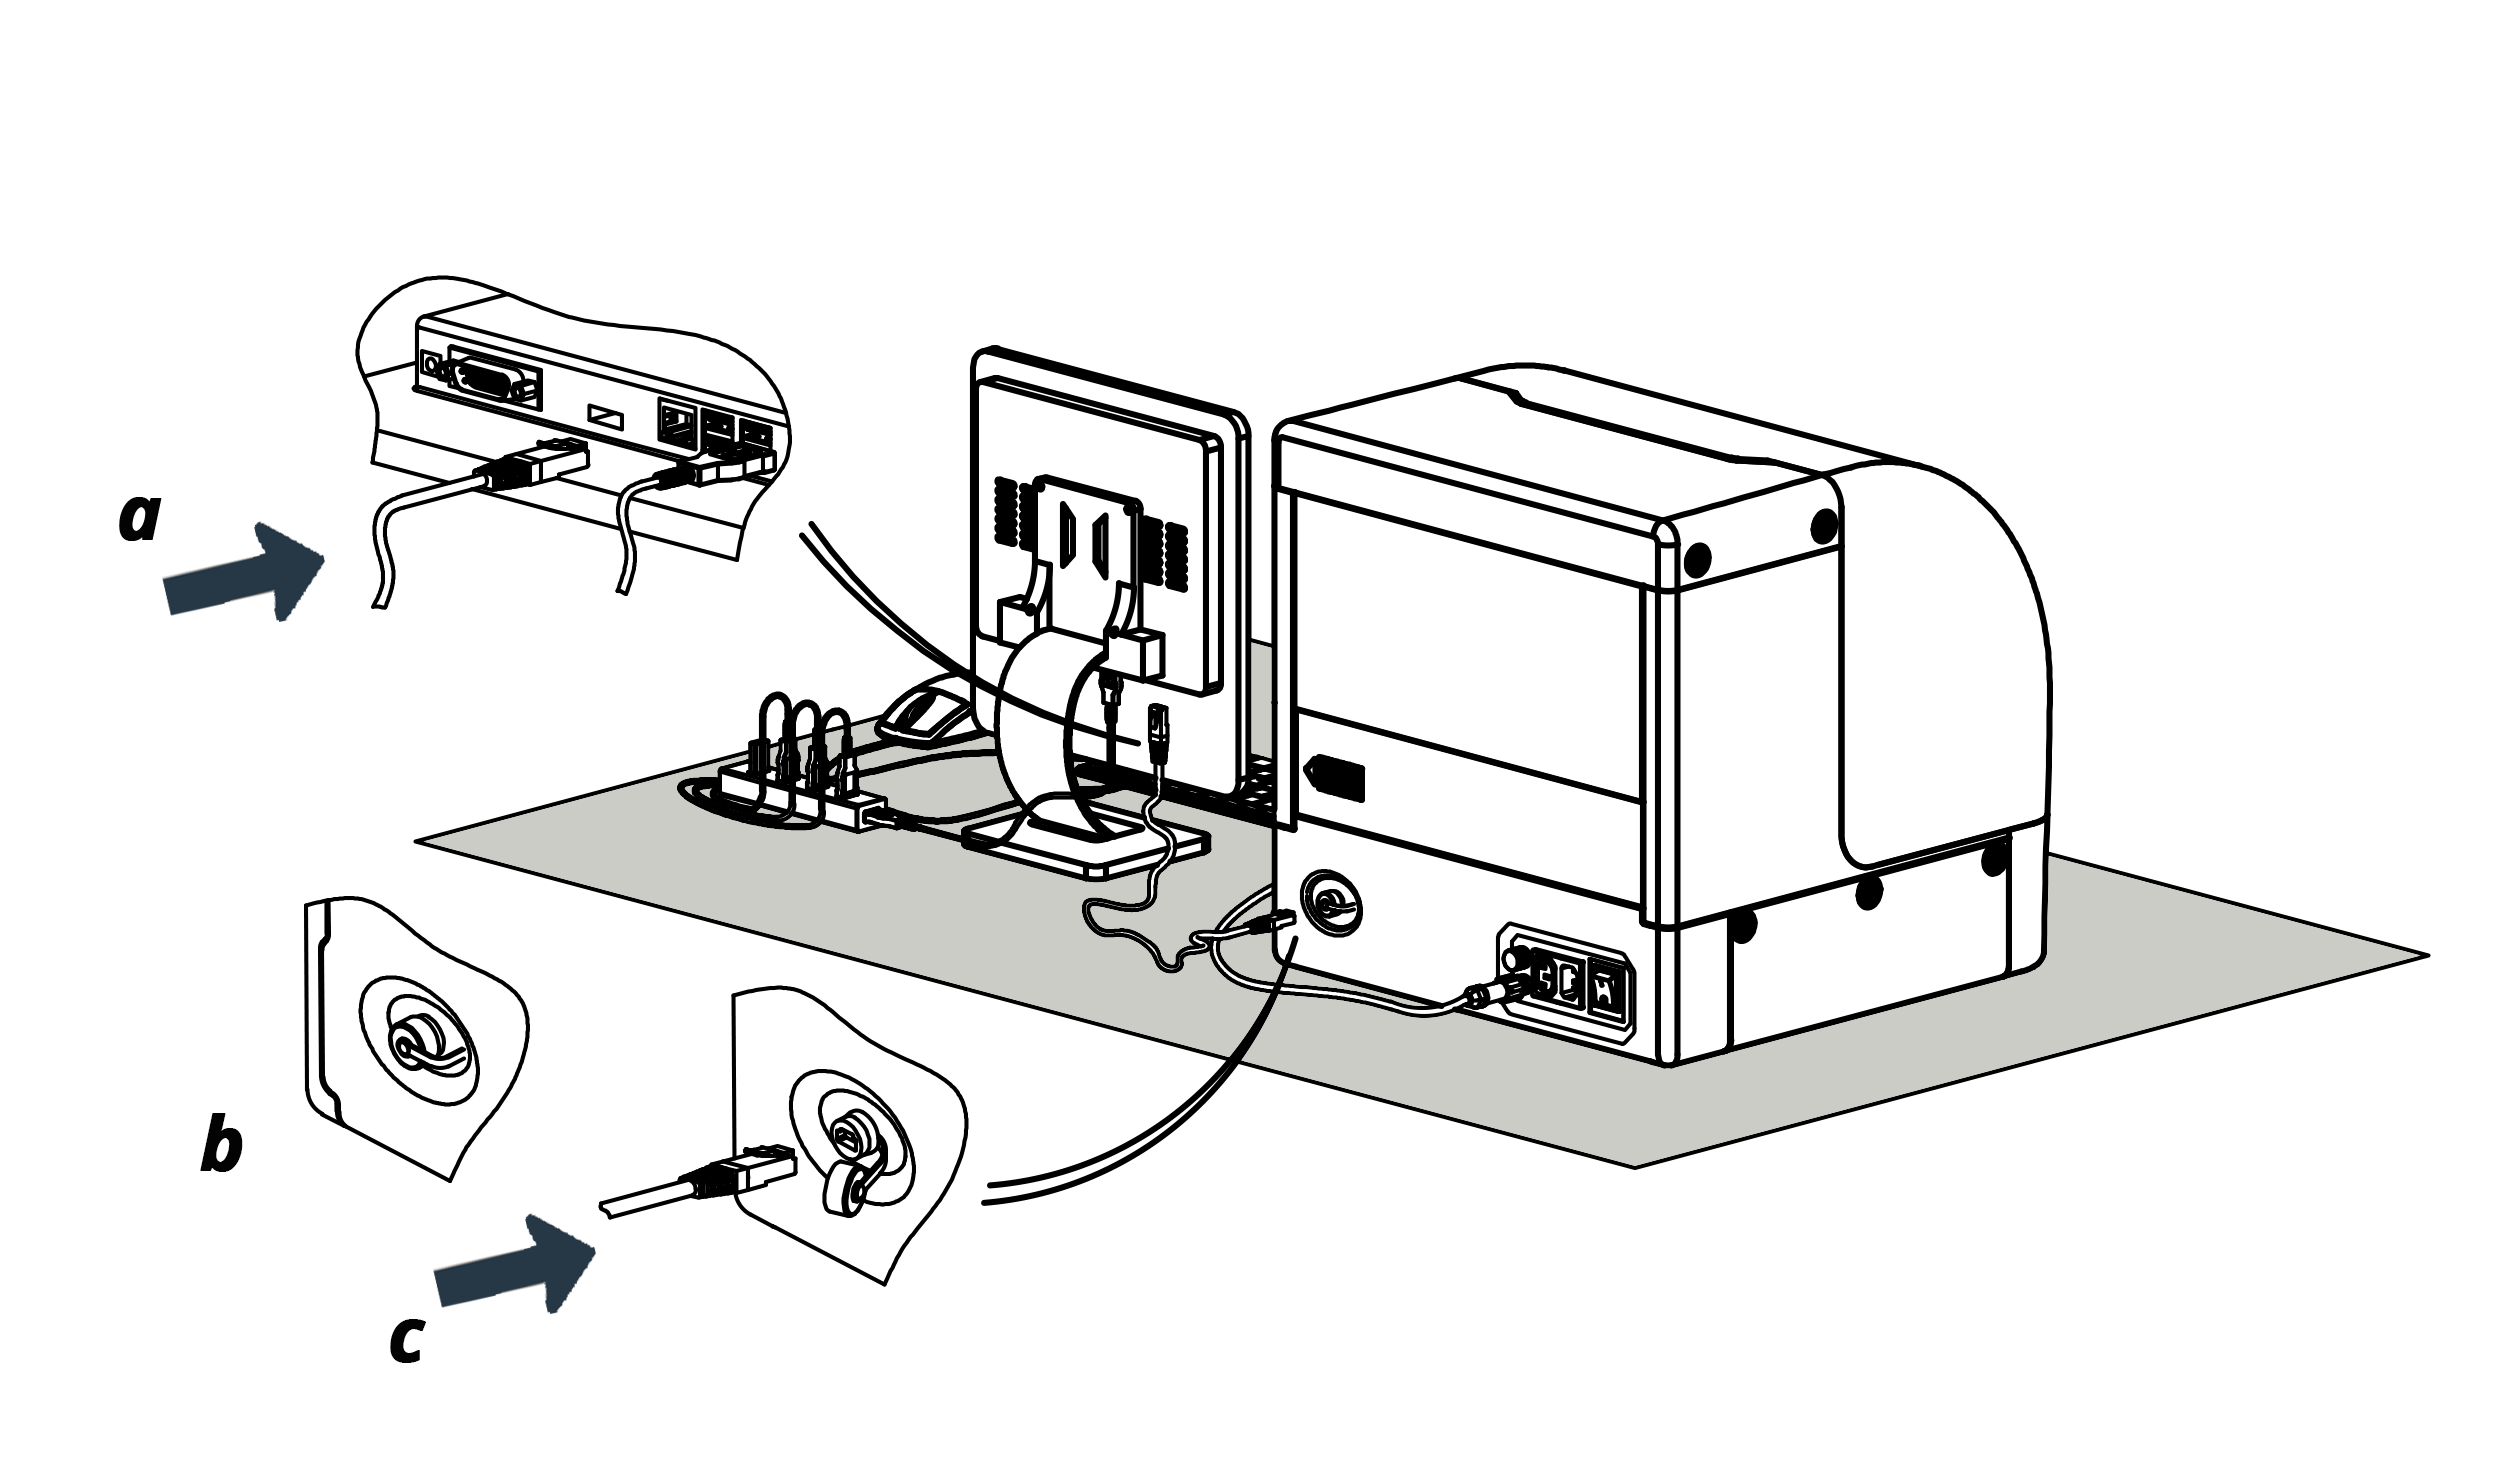
Connect the RJ-45 communication cable (also known as an ethernet cable) between the controller and the xsTECH as shown below.
-
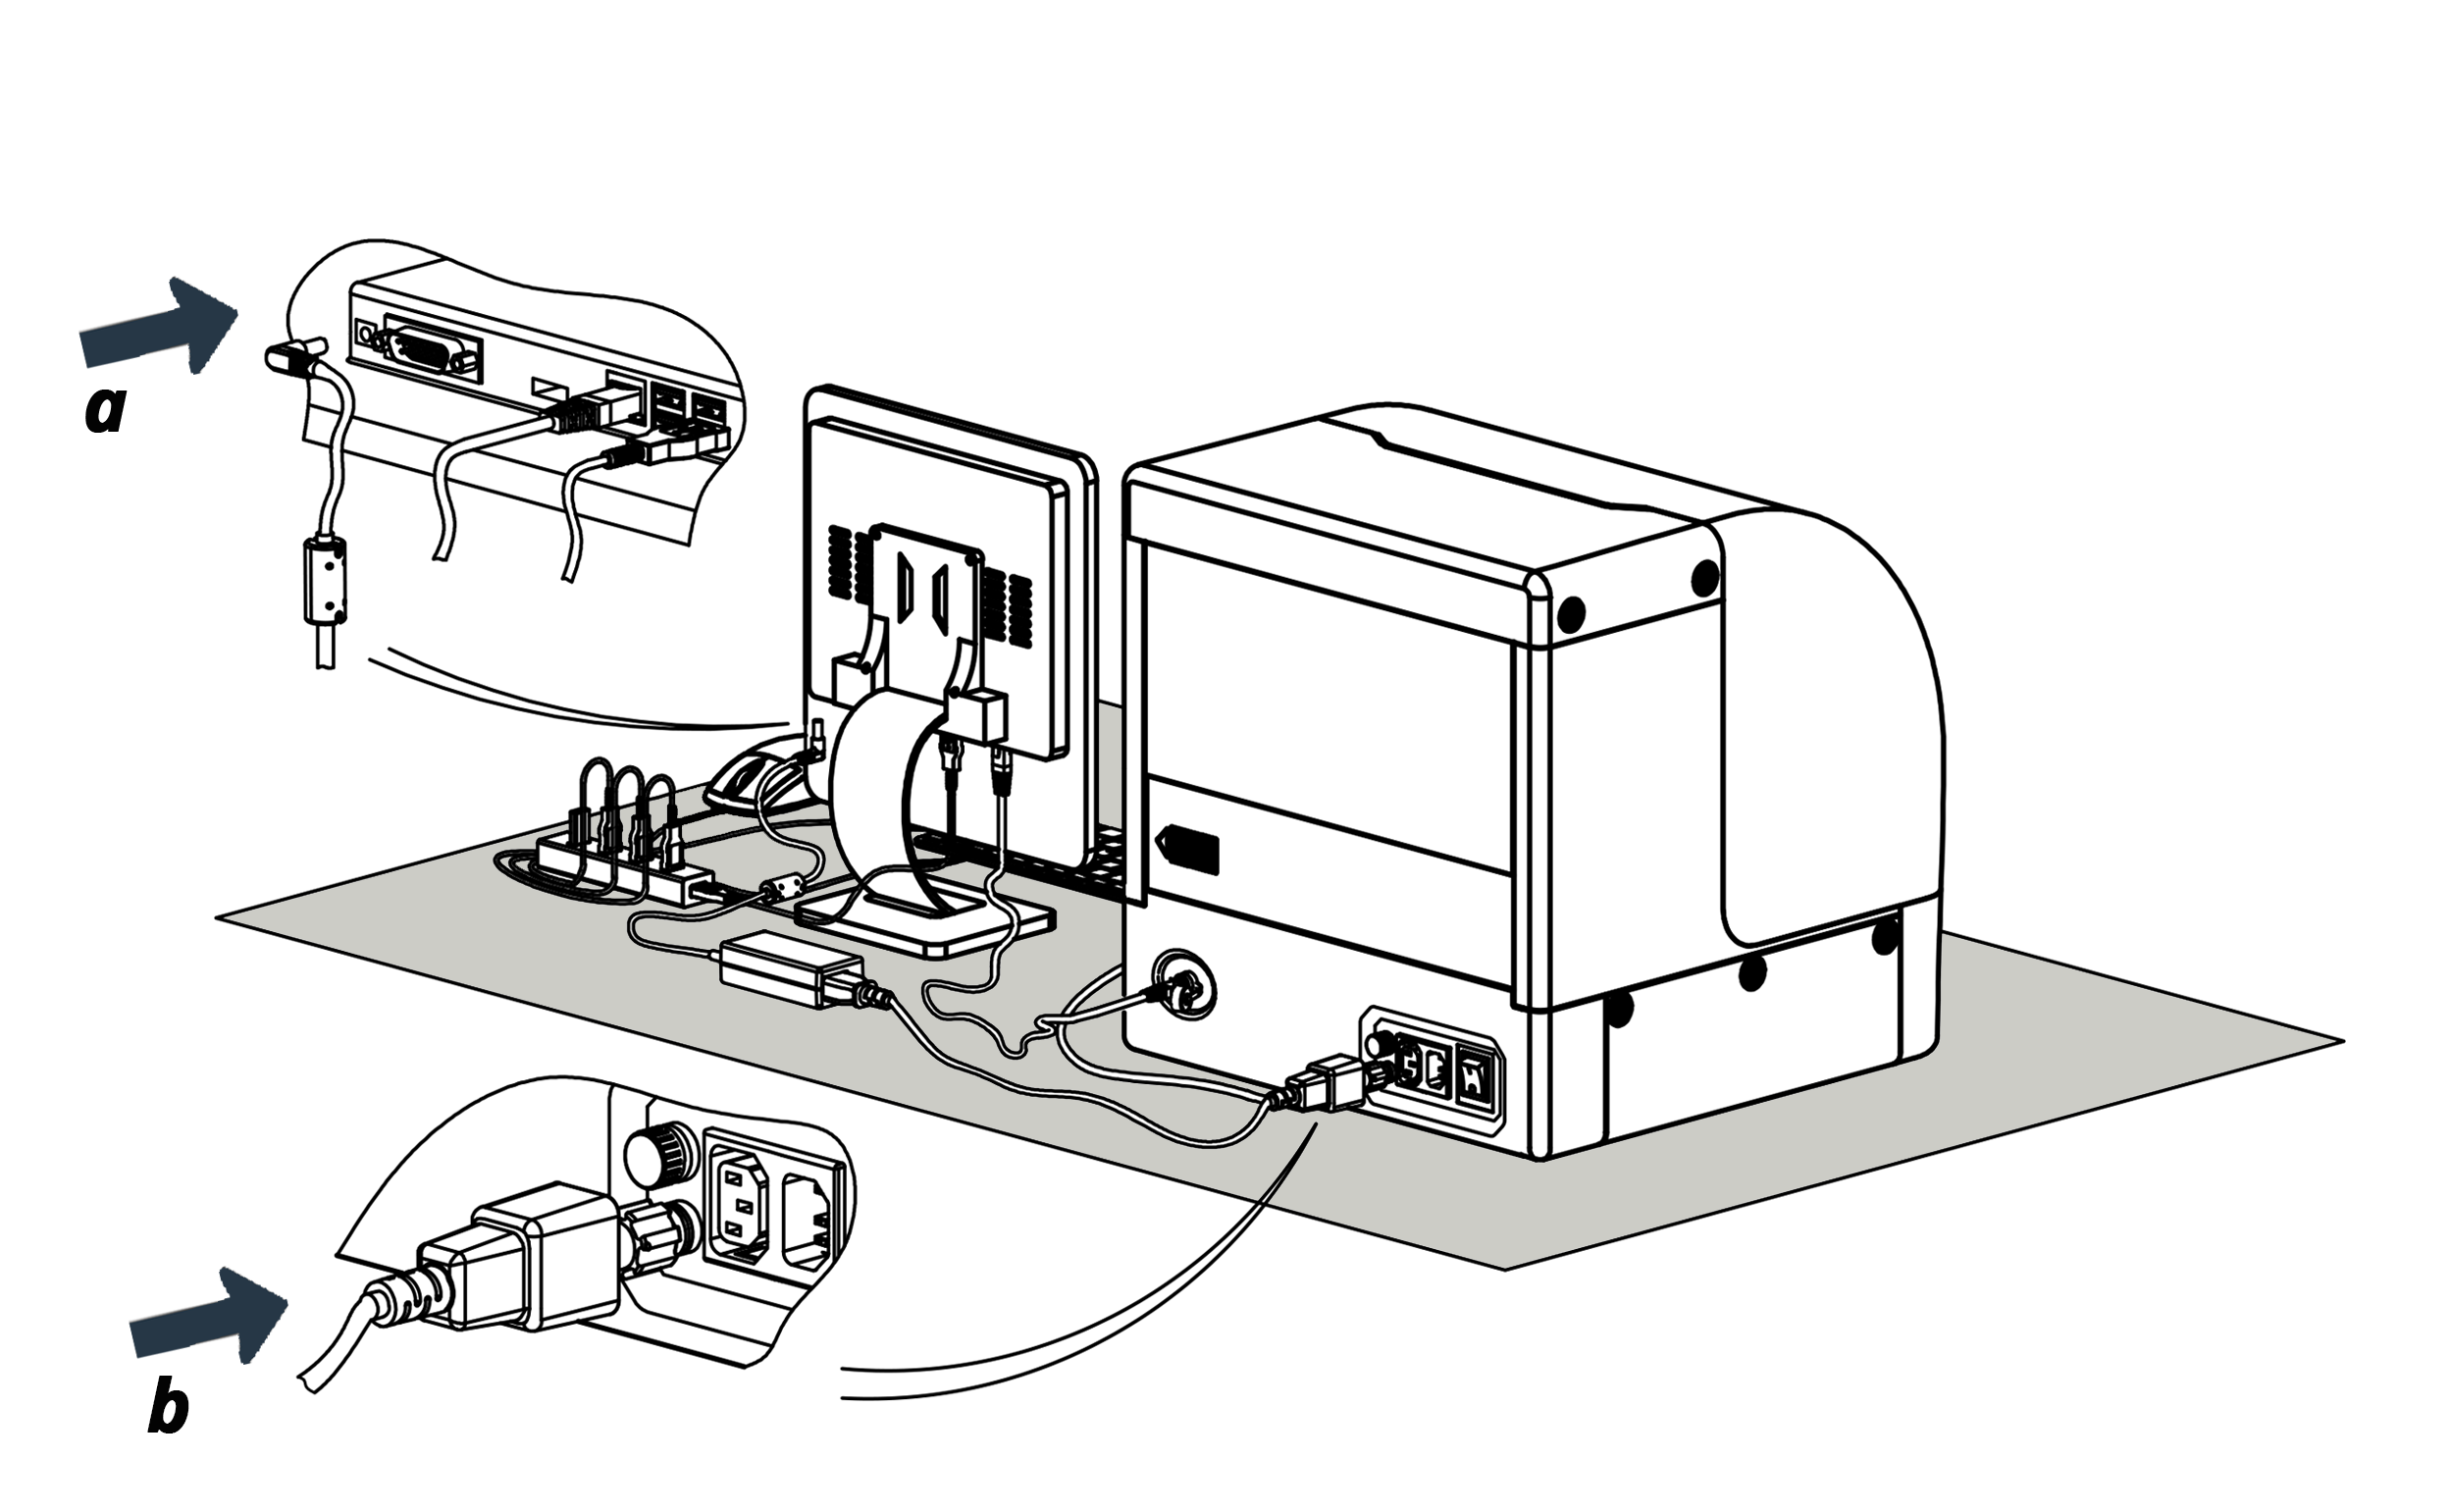
Connect the power cable for the controller to the xsTECH.
-
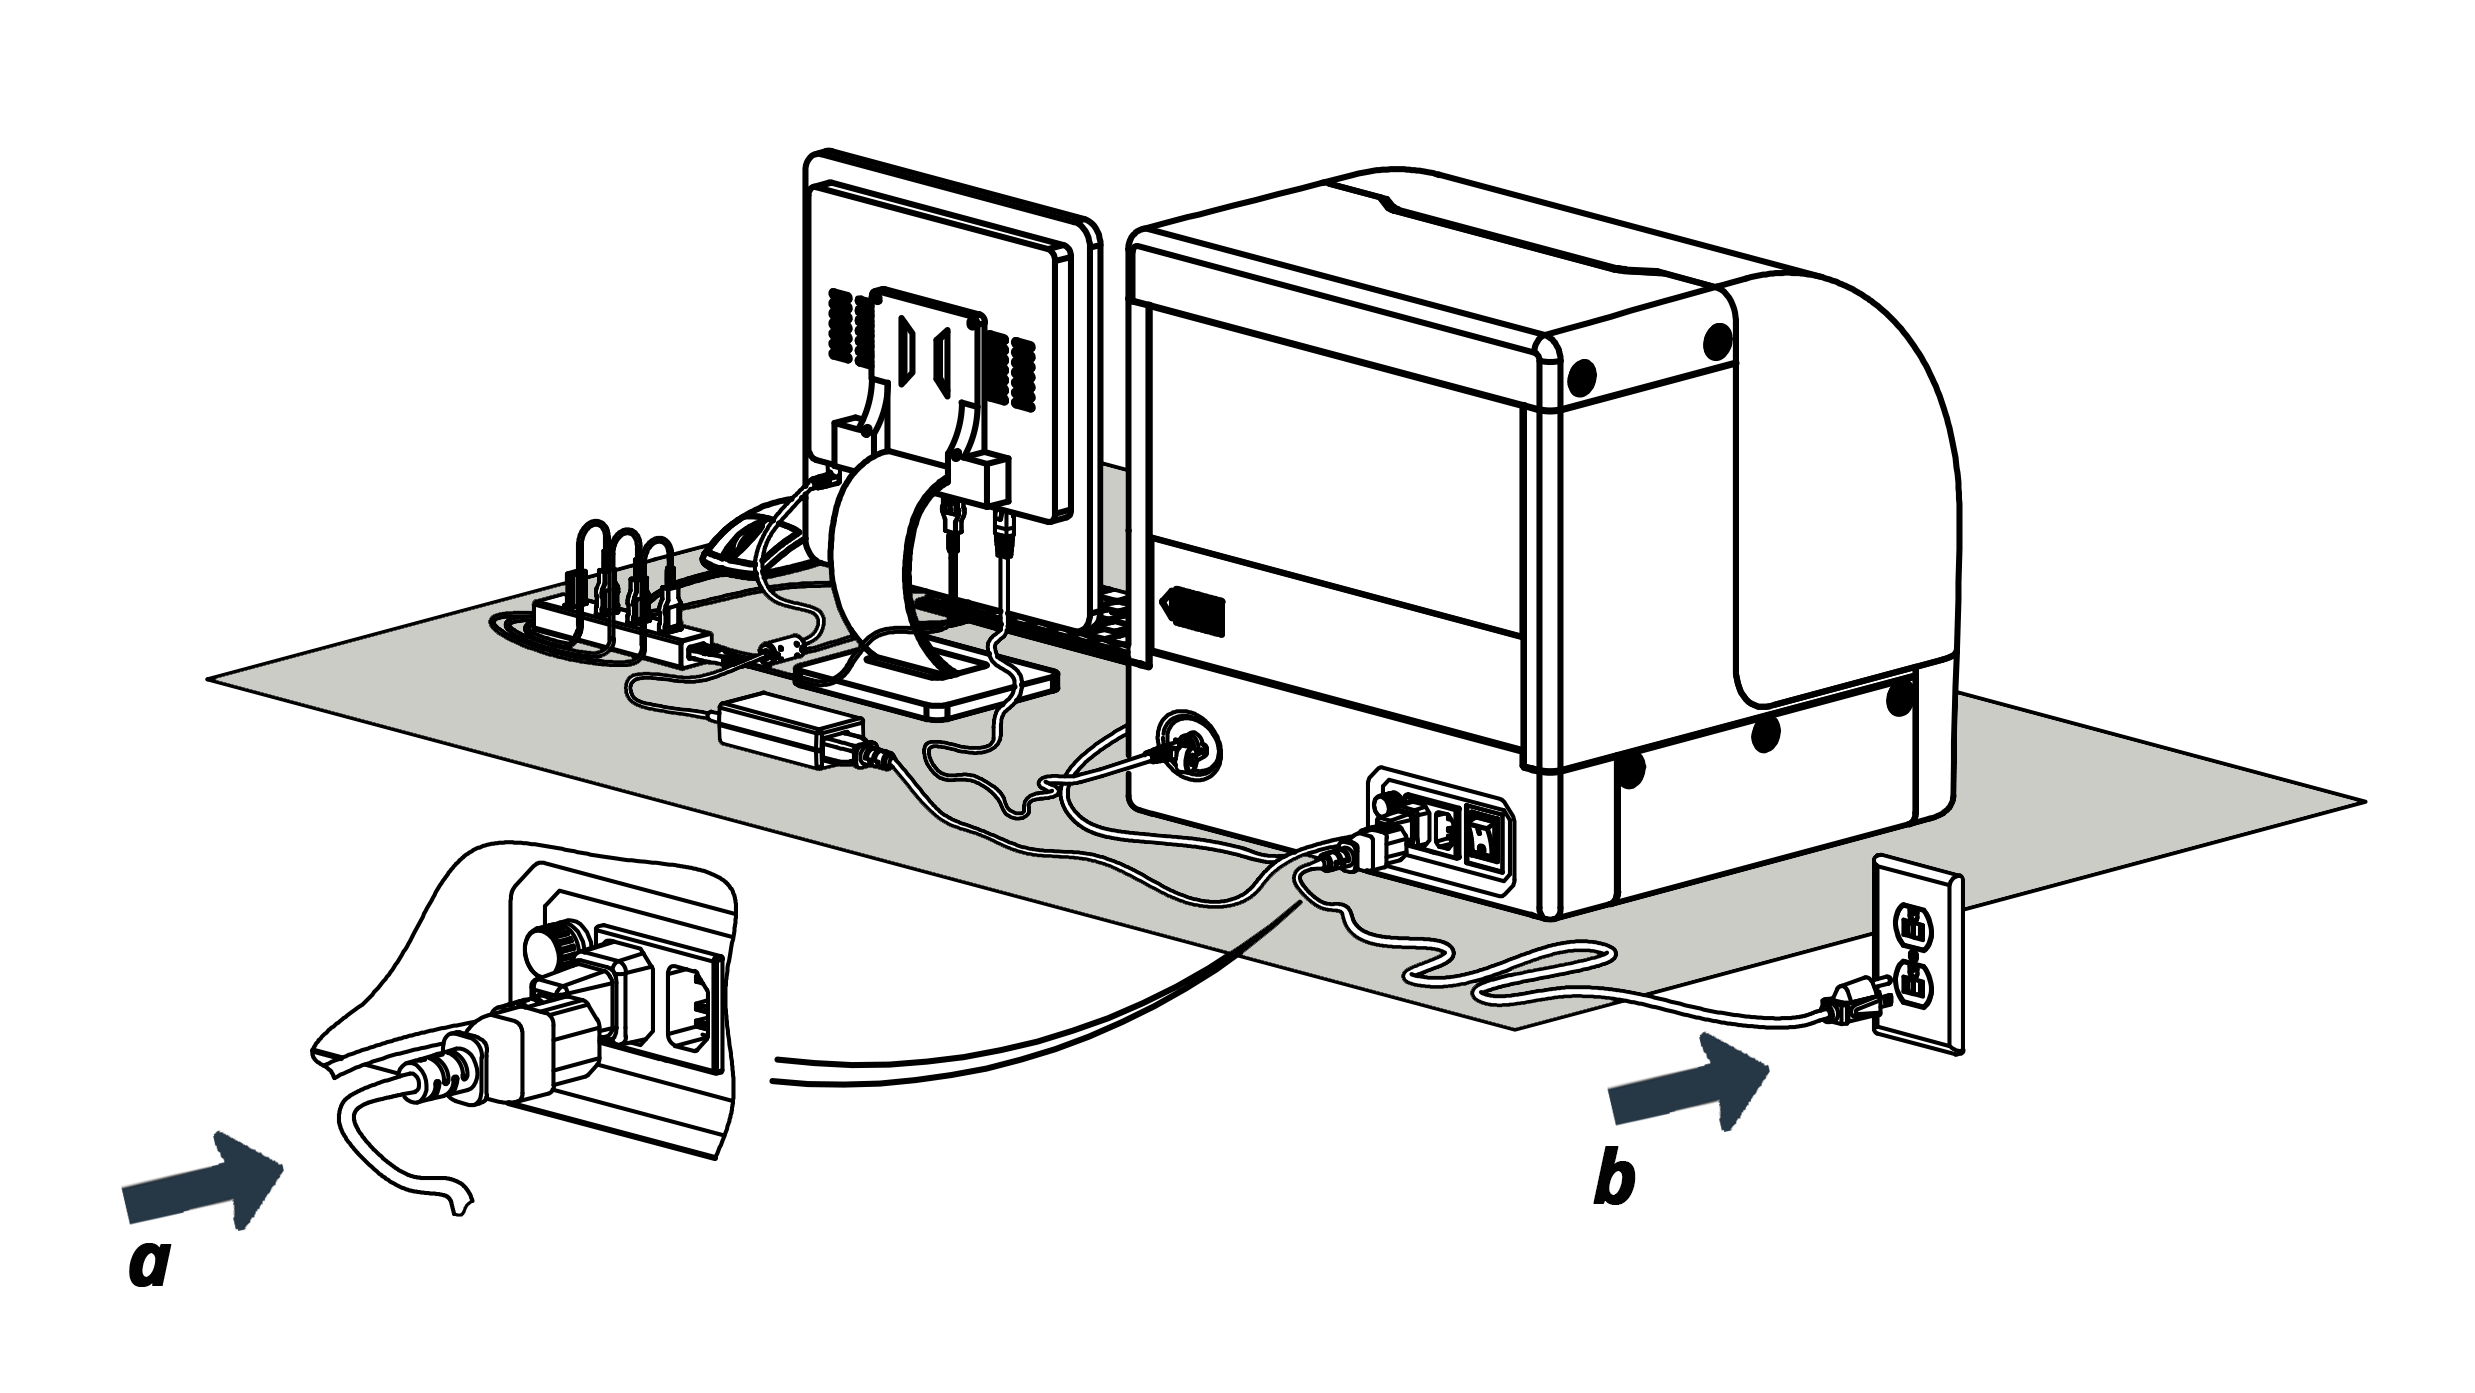
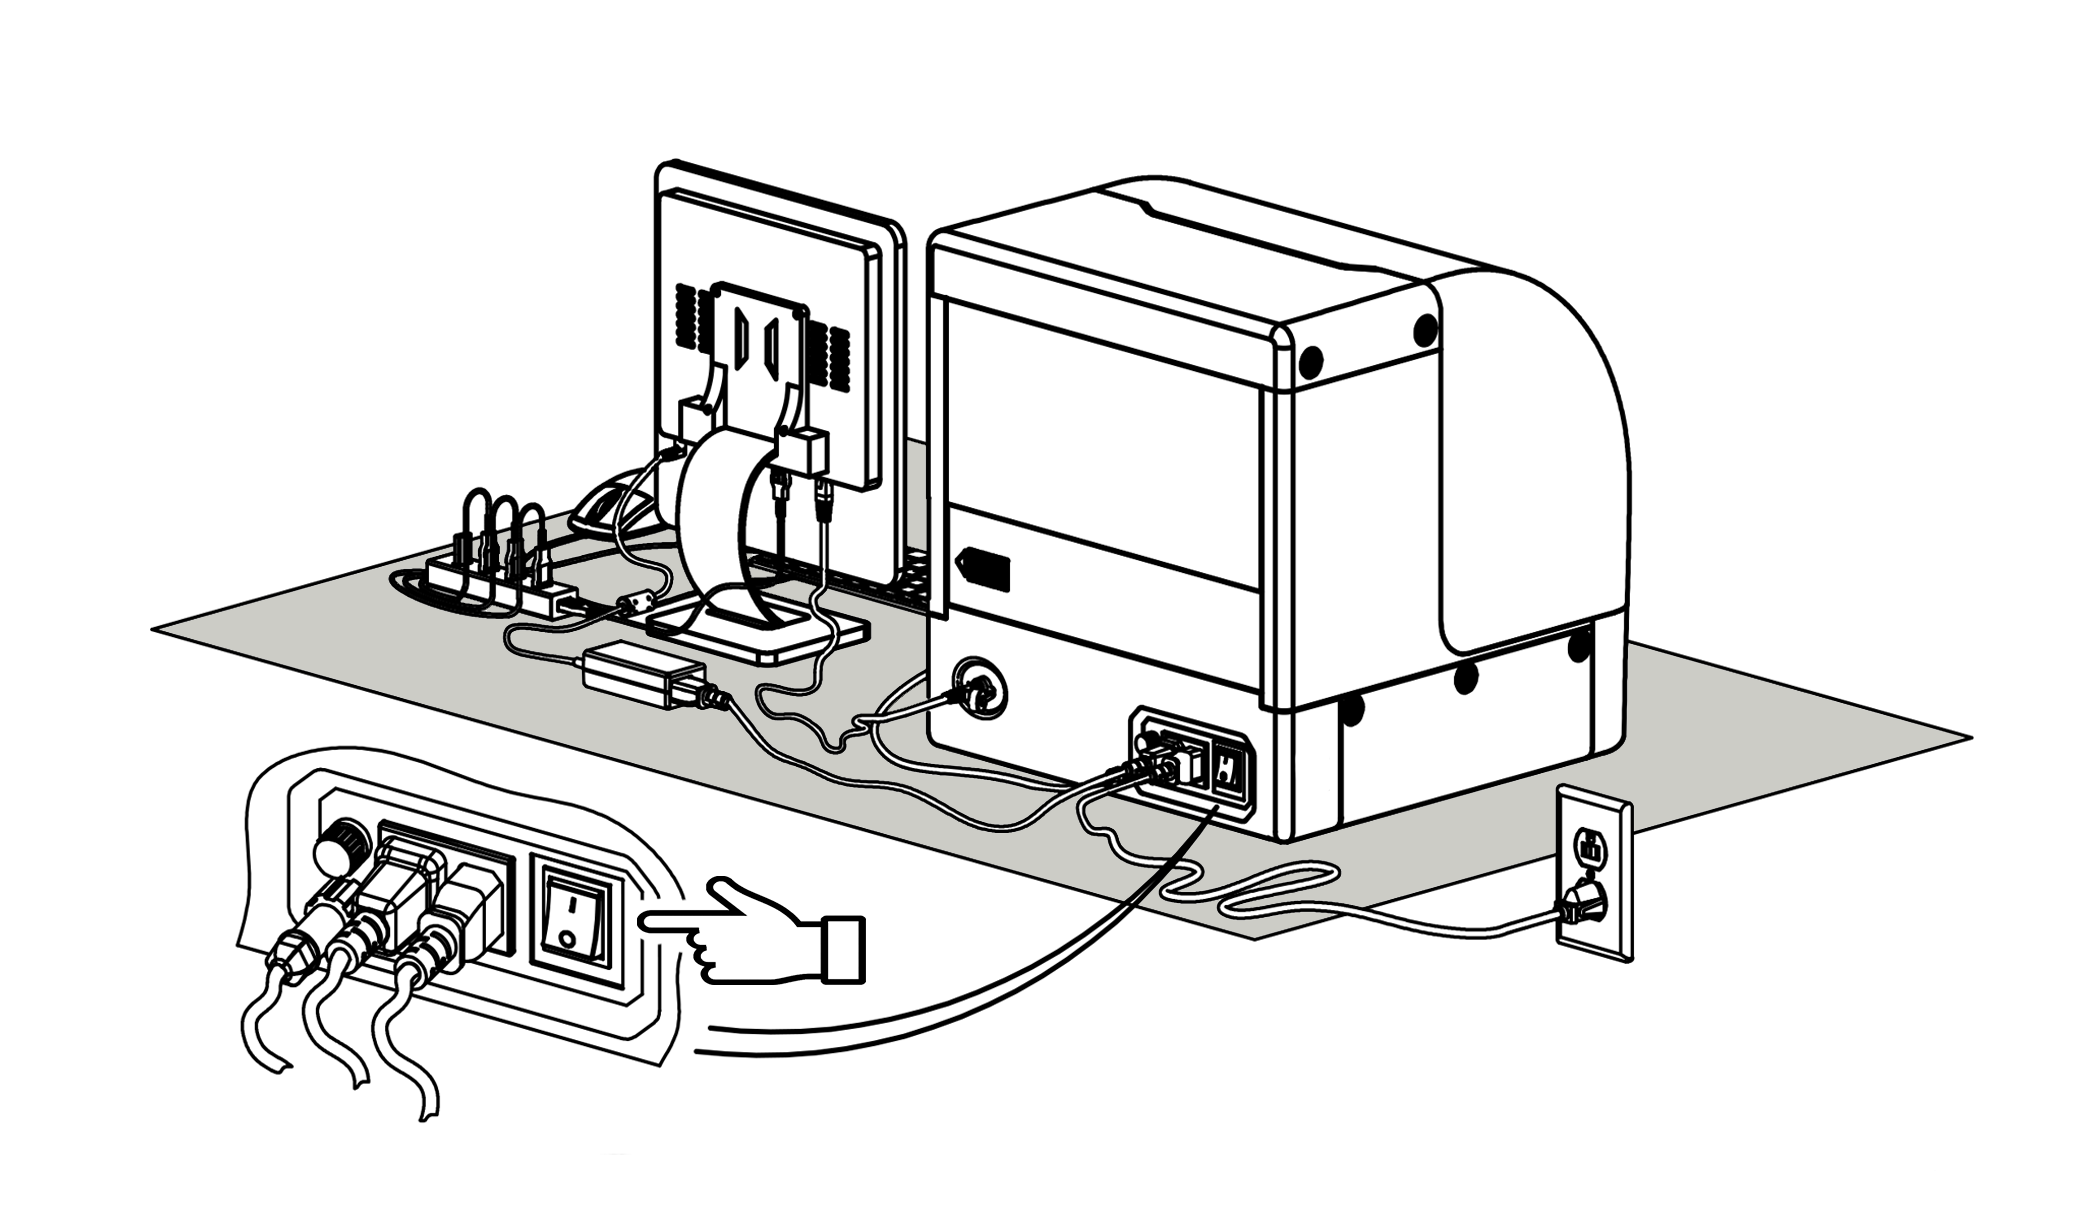
Connect the xsTECH to wall power.
-
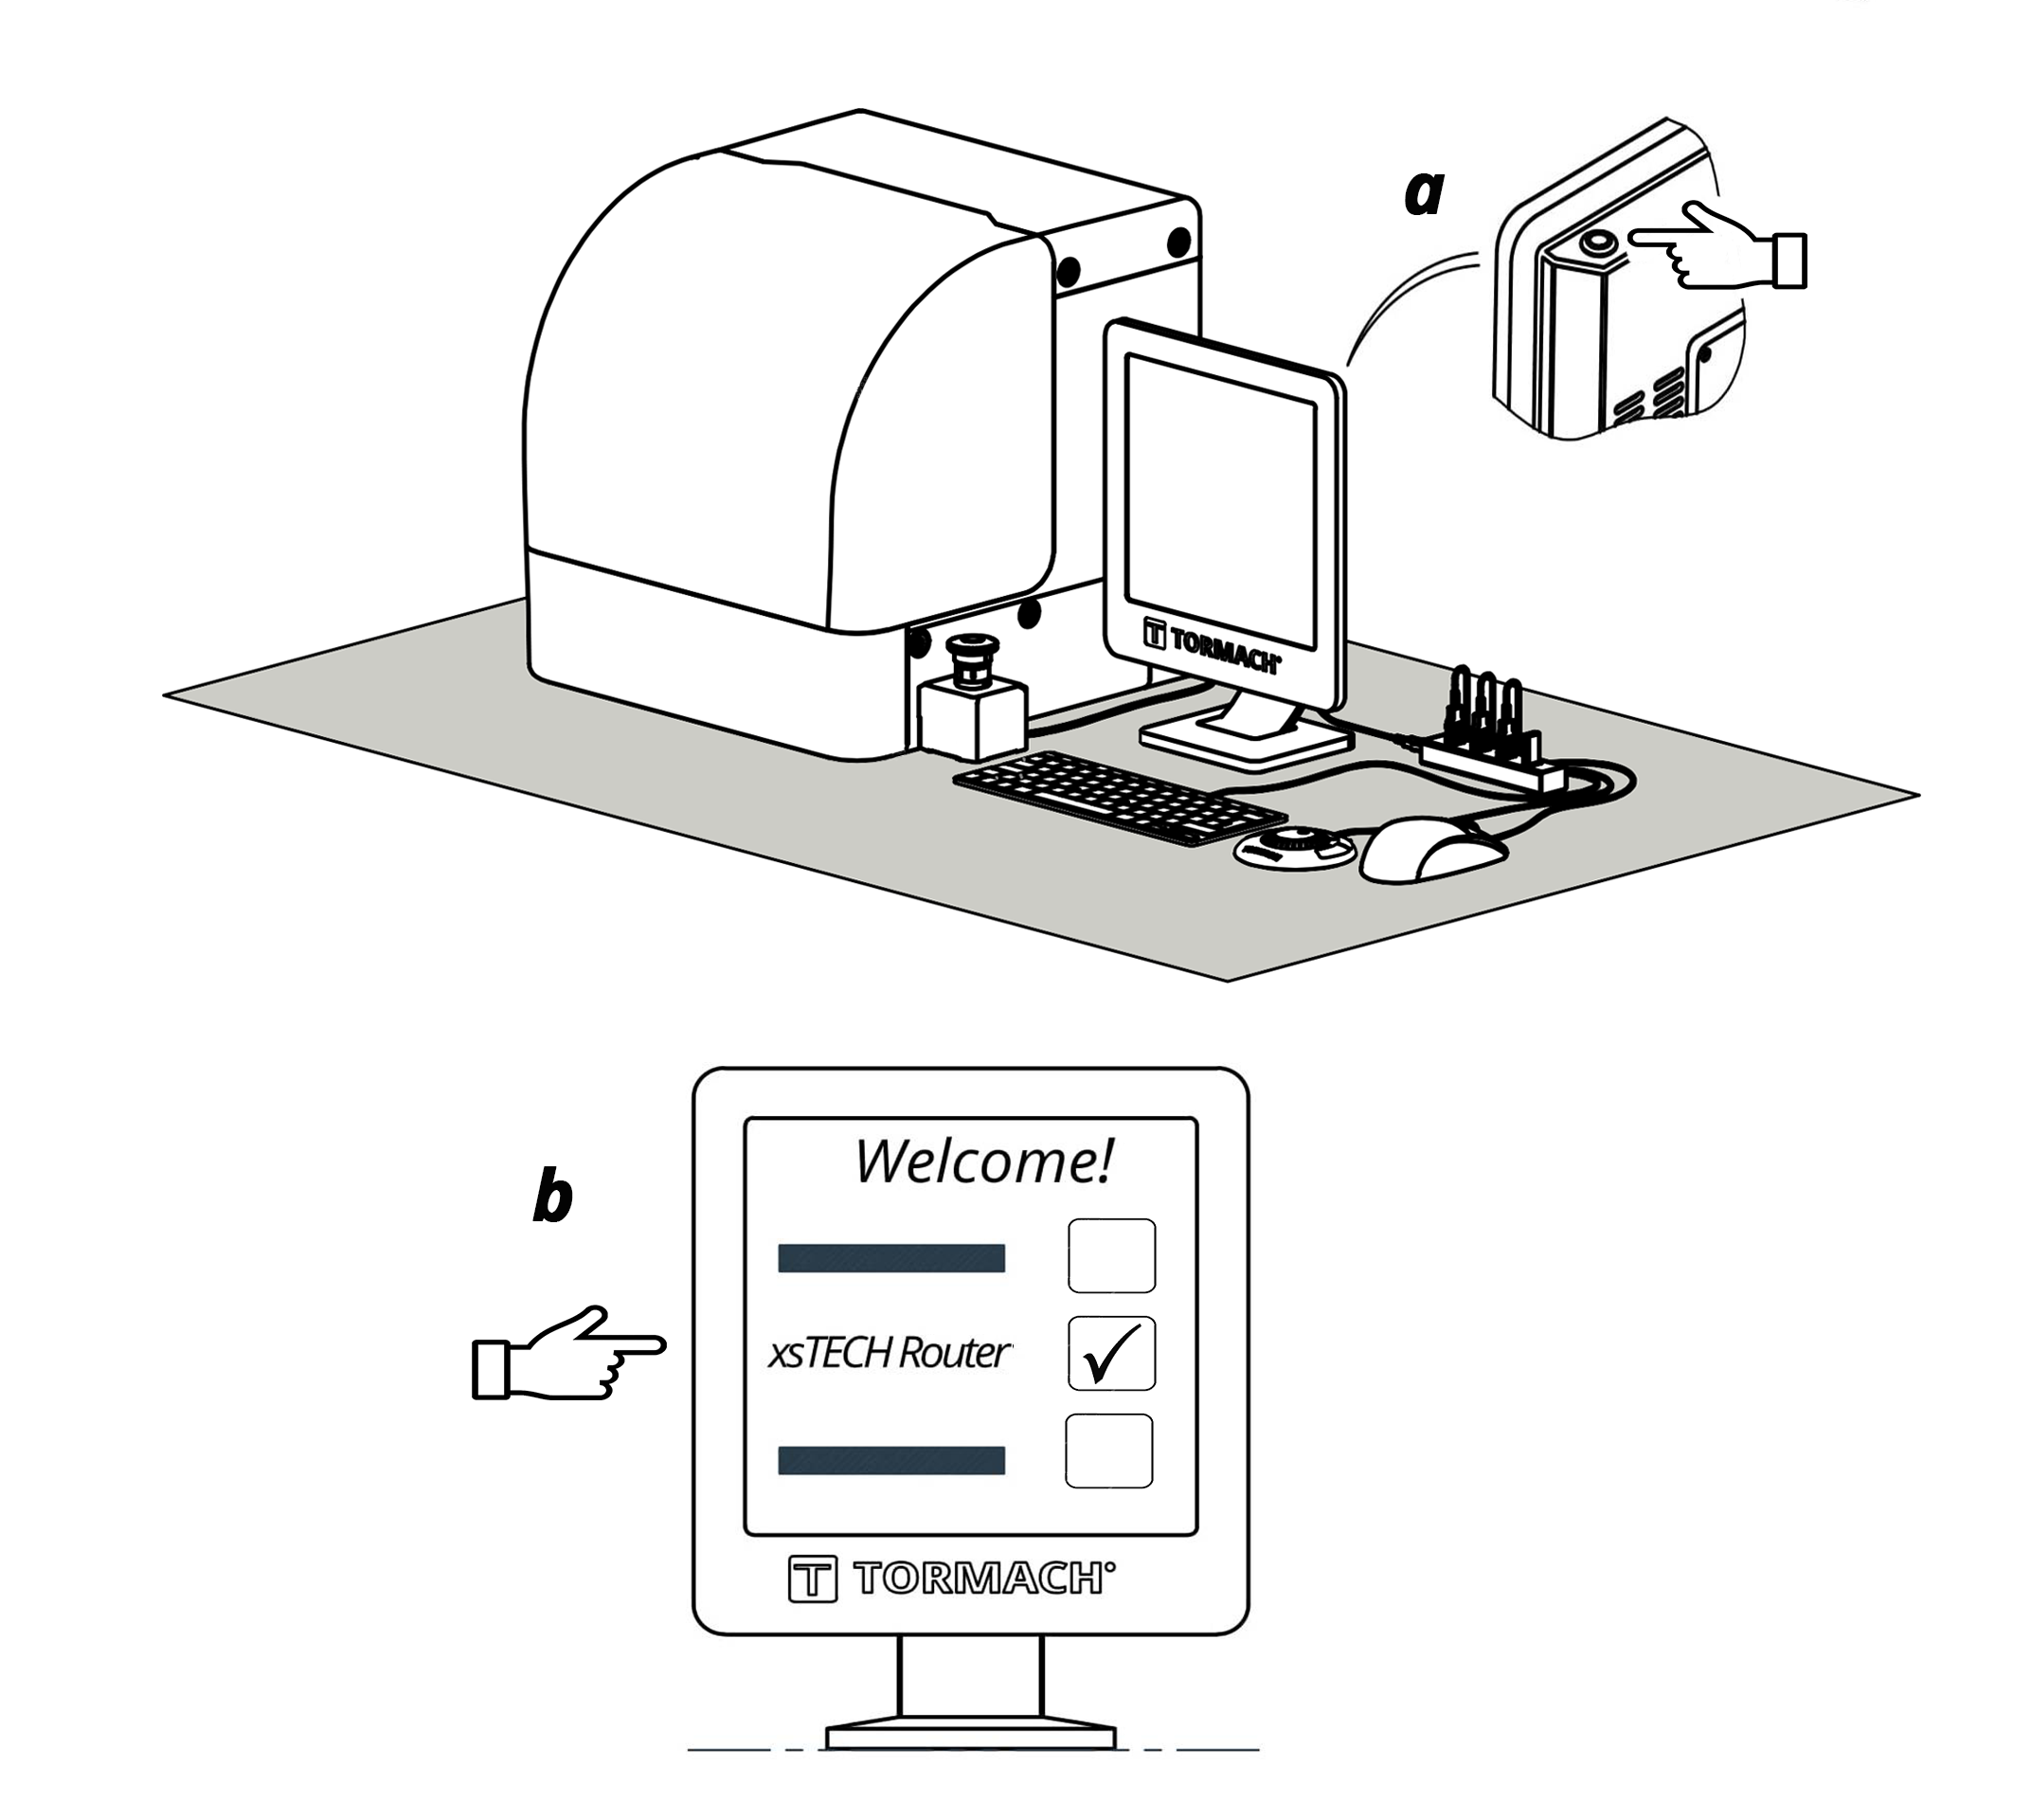
Turn on the main unit with the switch in the back.
-
Press the button on the top of the controller. After the initial boot-up, choose “xsTECH Router” to configure the controller and follow the instructions on the screen.