Install the Machine Stand Coolant Kit (PN 50931)
-
Because the coolant pump is dual voltage, you must verify that the motor strapping is correct before you install it:
-
Remove the access cover on the coolant pump, and then identify the jumper configuration diagram.
-
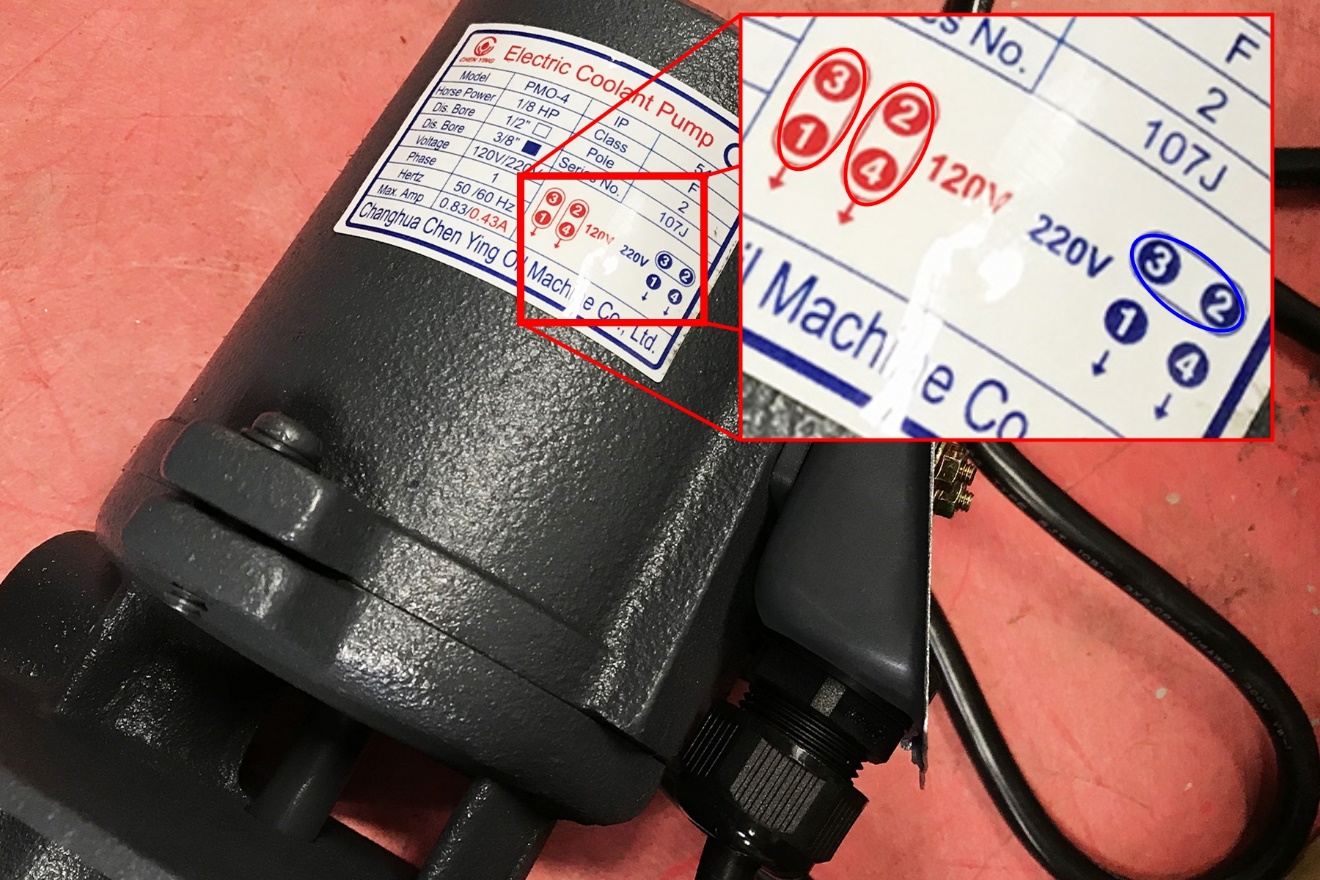
b. Verify that the jumpers are in the correct configuration (120 Vac or low volt) for your installation. If necessary, adjust the configuration. Go to "Adjust the Coolant Pump Motor Strapping".
-
Remove the four M8 socket head cap screws pre-installed on the coolant tank. Set the screws aside.
-
Put the coolant pump into the coolant tank, and secure it with the four socket head cap screws that you set aside in Step 2.
-
Attach the provided 90° push-to-connect fitting to the coolant pump.
-
Find the coolant tube, which you routed through the machine stand earlier. Attach the loose end of the coolant tube to the push-to-connect fitting on the coolant pump.
-
Route the power cord on the coolant pump to the right side of the machine, and connect it to the Coolant Pump Power outlet.
-
Verify that the coolant setup operates properly:
-
From the PathPilot interface, on the Main tab, select Coolant.
The coolant pump powers on.
-
b. Select Coolant again.
The coolant pump powers off.
Adjust the Coolant Pump Motor Strapping
Because the coolant pump is dual voltage, you may need to adjust the motor strapping.
-
Identify the jumper configuration diagram.

-
Remove the access cover on the coolant pump.
-
Reference the configuration diagram and move the jumper to the 120 Vac (low volt) position. Don't change the position of any wires – just the jumper that connects the terminals.

-
Reinstall the access cover on the coolant pump.
Looking for more information?
This is a section of the 8L operator's manual. To view the whole manual, go to Tormach document UM10753.
If you have additional questions, we can help. Create a support ticket with Tormach Technical Support at tormach.com/how-to-submit-a-support-ticket for guidance on how to proceed.