Validate the basic setup prior to installing any accessory kits.
IMPORTANT! Follow the Power Off/On Procedure detailed earlier in this chapter. After powering on, jog the Z-axis up to remove shipping block between spindle nose and bed.
Verify Spindle Function
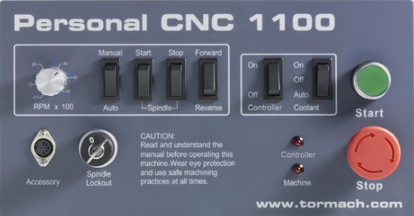
Use the Operator Panel controls to verify spindle function as follows (see Figure 3.14):
-
Turn Spindle Lockout key to I (unlocked position).
-
Select Manual for spindle mode.
-
Press Start; spindle begins to rotate.
-
Turn Spindle Speed Dial (RPM x 100) up and down to vary spindle speed.
-
Toggle between Forward and Reverse to switch spindle direction.
-
Press Stop; spindle stops.
Verify Limit Switch Function
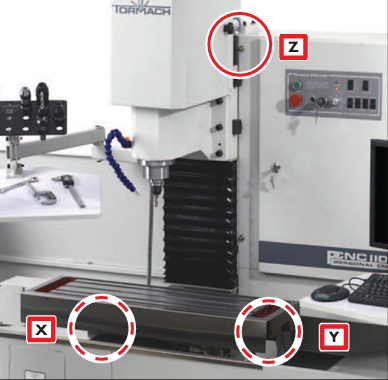
Limit switches prevent the mill from exceeding its travel limits and provide a reference location during the mill homing procedure.
There are three limit switches, one for each axis of motion (X, Y, and Z), as shown in Figure 3.18.
If a limit switch is triggered, the mill is placed in a reset state.
To verify proper limit switch function:
-
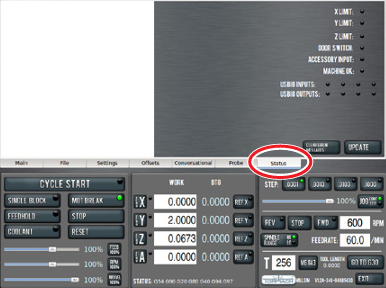
On the PathPilot interface, click the Status tab. (see Figure 3.19)
-
Manually depress X, Y, and Z limit switches by hand. (see Figure 3.18)
-
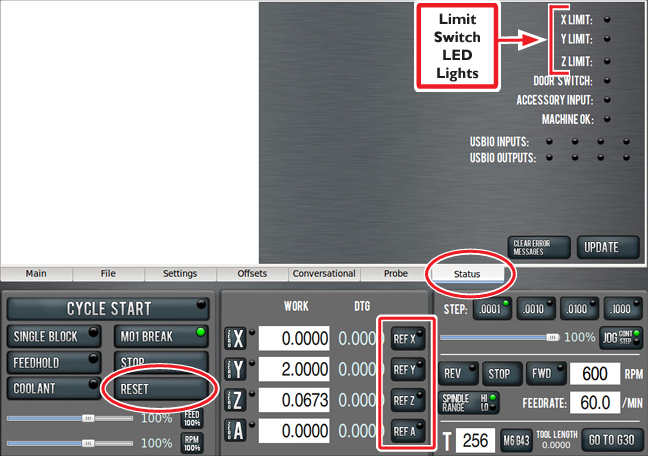
Verify that the corresponding limit switch LED light illuminates on the Status screen. (see Figure 3.20)
-
After verifying limit switch function, click the flashing Reset button. (see Figure 3.20)
Verify Axis Function
-
Reference the mill by clicking the Ref Z, Ref X, and Ref Y buttons; (see Figure 3.20) the mill moves.
-
Next, switch to the Main screen.
-
Use keyboard to verify axis motion:
-
To move X-axis, use the ←/→ keys.
-
To move Y-axis, use the ↑/↓ keys.
-
To move Z-axis, use the Page Up/Page Down keys.
-
-
To test the optional jog shuttle:
-
Press the corresponding axis button (X, Y, or Z) to select the axis.
-
Twist shuttle ring of jog shuttle to move axis. Twist in opposite direction to reverse direction.
-
Coolant On/Off
The coolant pump can be controlled manually using the Coolant switch on the operator panel. This switch has three positions: On, Off, and Auto. The Auto position allows PathPilot to control the coolant pump. To operate:
-
Press On to turn the coolant pump on.
-
Press Off to turn the coolant pump off.
-
Press Auto to switch to operating system control of coolant.
-
In Auto mode, click the Coolant button on the PathPilot interface to turn coolant on. Click the button again to turn coolant off.
Looking for more information?
This is a section of the PCNC 770 operator's manual. To view the whole manual, go to Tormach document UM10350.
If you have additional questions, we can help. Create a support ticket with Tormach Technical Support at tormach.com/how-to-submit-a-support-ticket for guidance on how to proceed.