-
Install the cable retention loop into the base plate.
-
Locate the ohmic torch wire inside the X-axis motor cover. Pull it out and let it hang down for now.
-
To prepare for the installation of the torch lead, remove all of the side-to-side covers from one side of the flexible cable guard using a flat-blade screwdriver.
-
Remove the plasma power supply unit from its packaging.
-
Put the plasma power supply at the back left of the machine. Then, locate the torch lead.
-
Remove the brass gear from the torch body. Depending on which torch you have, do one of the following:
-
Unthread the body and slide the gear out of the housing.
-
Remove the two screws securing the gear.
-
Using the manufacturer's instructions, install the torch consumables.
-
Install the plasma torch into the breakaway torch holder using the two socket head screws. Only tighten these screws enough to securely hold the torch, do not overtighten.
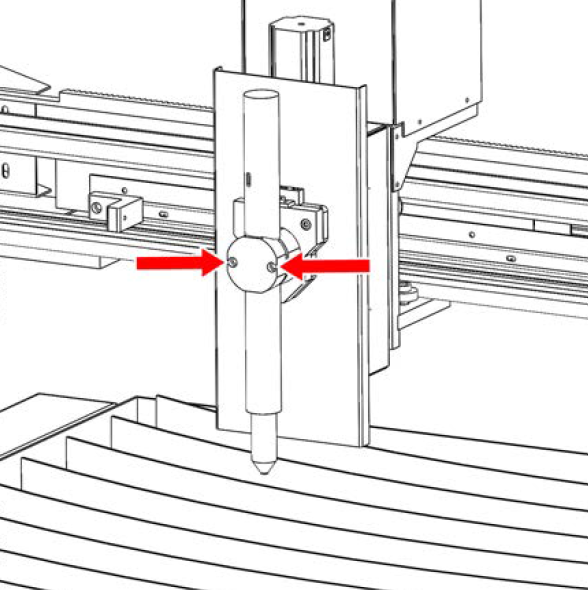
Tip! We recommend positioning the torch nose about 1" below the Z-axis cover plate to start.
-
Attach the ohmic probing spade connector to your torch cap.
-
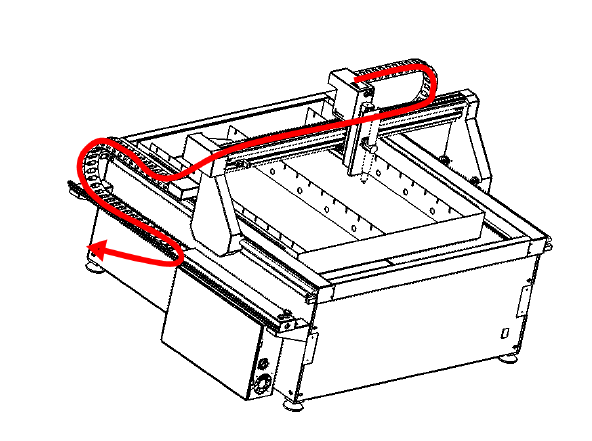
Install plasma torch lead into the cable guard from the X carriage to the electrical cabinet and pass it through the rectangular access hole to bottom of track.
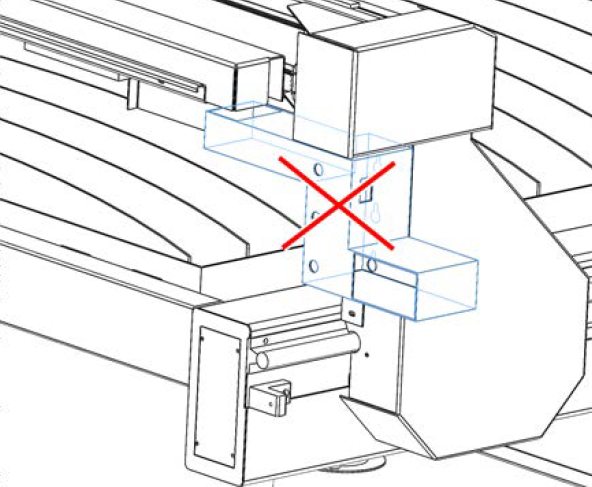
NOTE: Do not try to pass the torch lead through the stepped section between the Y and X axis cable guards. Simply run the torch lead along the outside.
-
Plug the torch leads into the plasma power supply.
-
Plug in the ground cable, and route the loose end of the cable under the back of the machine and up to the water table.
-
Connect the included Hypertherm control cable to the electrical cabinet and plasma source (this cable is a 14-pin CPC connector on one end and a 7-pin threaded -body connector on the other). For more information on this cable see "Plasma Source Control".
-
Reinstall the cable guard covers that you removed in Step 3.
Looking for more information?
This is a section of the 1300PL operator's manual. To view the whole manual, go to Tormach document UM10720.
If you have additional questions, we can help. Create a support ticket with Tormach Technical Support at tormach.com/how-to-submit-a-support-ticket for guidance on how to proceed.