Make Electrical Connections
-
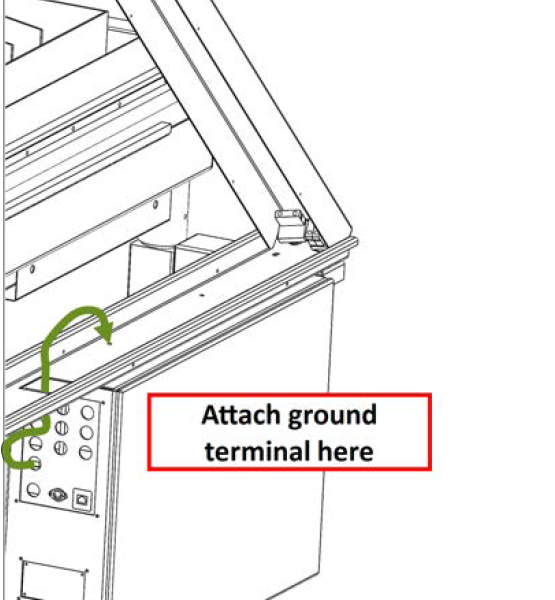
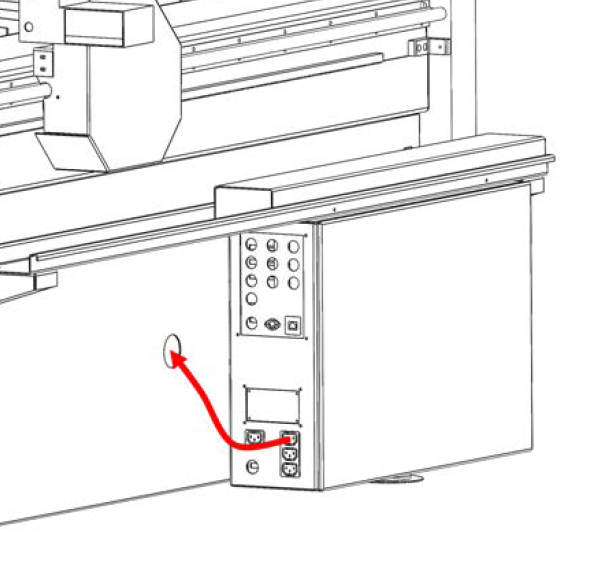
Locate the cable cover with the integrated E-Stop and Reset button. The cable for the Reset button and E-Stop contains a green and yellow ground lead with a ring terminal on the end. Attach this ground lead for the reset panel to the fourth M6 mounting screw on the electrical cabinet that you left unpopulated earlier.
-
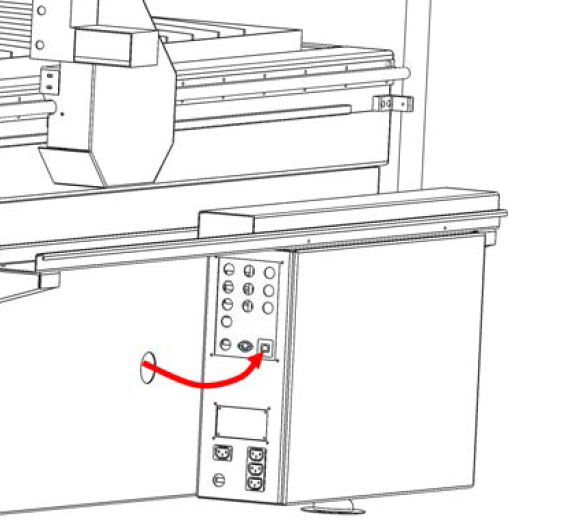
Pass the connector for the reset panel down through cable track.
-
Install the reset panel / cable cover using four M4 socket head cap screws.
NOTE: The two inboard screws are slightly longer.
-
Plug in all connectors at rear of cabinet, following the "Connectors Reference" guide in the System Basics section.
-
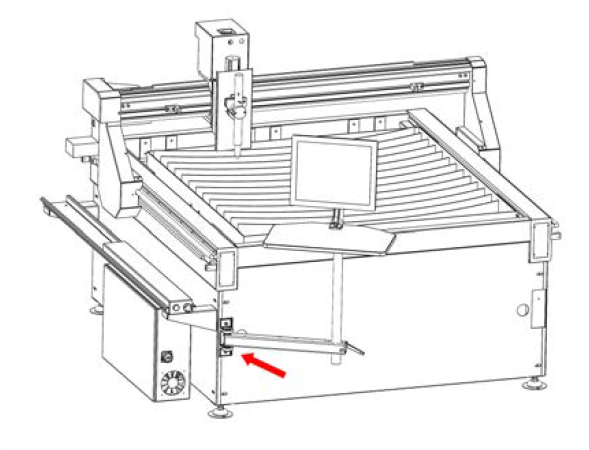
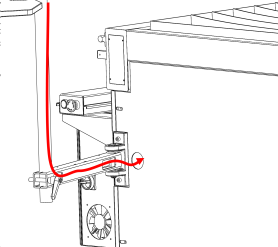
Pass the ground wire through the hole in the side panel, and then connect it to the ground block on the underside of the water table.
Install Machine Arm and Connect Controller
-
Bolt your machine arm to the mounting pad on either the left or right hand leg of the machine.
-
Install the monitor, keyboard tray and controller mount on the machine arm.
-
Mount the controller PC to the back of the monitor using the PathPilot Controller VESA Mount (PN 50382).
-
Connect a keyboard and mouse to the controller PC.
-
Run the Ethernet cable included in your machine owner's kit down from the controller and through the hole in the front panel of the plasma table.
-
Connect the Ethernet cable to the port on the rear of the electrical cabinet.
-
Run a power cable from the rear of the electrical cabinet to the power supply for the controller PC in the same way. Use the block of three IEC ports designated for Accessory Power in "Connectors Reference" (page 1).
Repeat for the display's power cable.
-
Now that all connections have been made inside the machine frame, the right side panel can be installed. Before installing the panel, check that the drain valve on the water table is fastened securely and in the closed position.
-
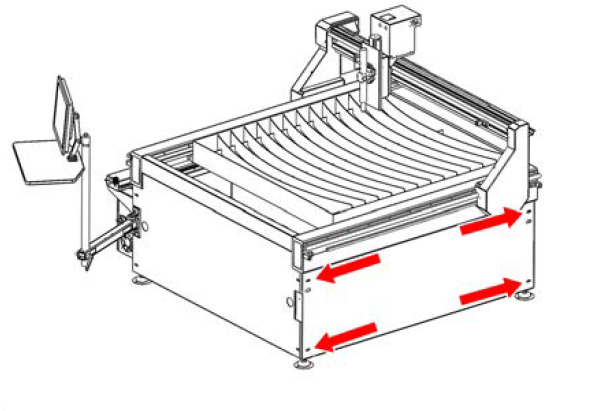
Install all end panels on the frame rails.
Looking for more information?
This is a section of the 1300PL operator's manual. To view the whole manual, go to Tormach document UM10720.
If you have additional questions, we can help. Create a support ticket with Tormach Technical Support at tormach.com/how-to-submit-a-support-ticket for guidance on how to proceed.