Unpack the Machine Crate
Tools and Items Required
-
Pallet jack
-
Flat-blade screwdriver
-
Pliers
-
Tin snips
-
Safety eyewear that meets ANSI Z87+
-
Work gloves
CAUTION! Sharp Objects Hazard: Before opening the shipping crate, you must put on work gloves and safety eyewear that meets ANSI Z87+. If you don't, the shipping crate and steel straps could cut you, causing serious injury.
Open the Crate
-
Put on work gloves and eye protection.
-
Pry up the tabs holding the lid on to the sides of the crate. You may need to use pliers to fully straighten them so the lid can be removed.
-
With a helper, lift the lid off of the crate and set aside.
-
Remove the screws from the base of the crate on all four sides.
-
Straighten the tabs holding one of the panels on to the crate. The front panel is opposite the side of the crate stenciled "Lift from this side only".
-
Remove the front panel from the crate and set aside.
-
With a helper, lift the remaining three sides from the crate as a unit.
-
Inspect the item(s):
-
Photograph any damage that may have occurred during shipping.
-
Verify the received goods against the packing list.
If there is any damage or shortages, you must contact Tormach within 30 days of receipt. Create a support ticket with Tormach Technical Support at tormach.com/how-to-submit-a-support-ticket for guidance on how to proceed.
Unpack the Machine
-
Cut the strap holding the electrical cabinet to the crate and unwrap the plastic from it. Set it aside in a safe area.
-
Remove the Hypertherm control cable and package of small parts from the crate.
-
Unstrap and remove the cable tray and cable tray cover.
-
Unstrap and remove the cable tray support brackets.
-
Unstrap and remove all four legs.
-
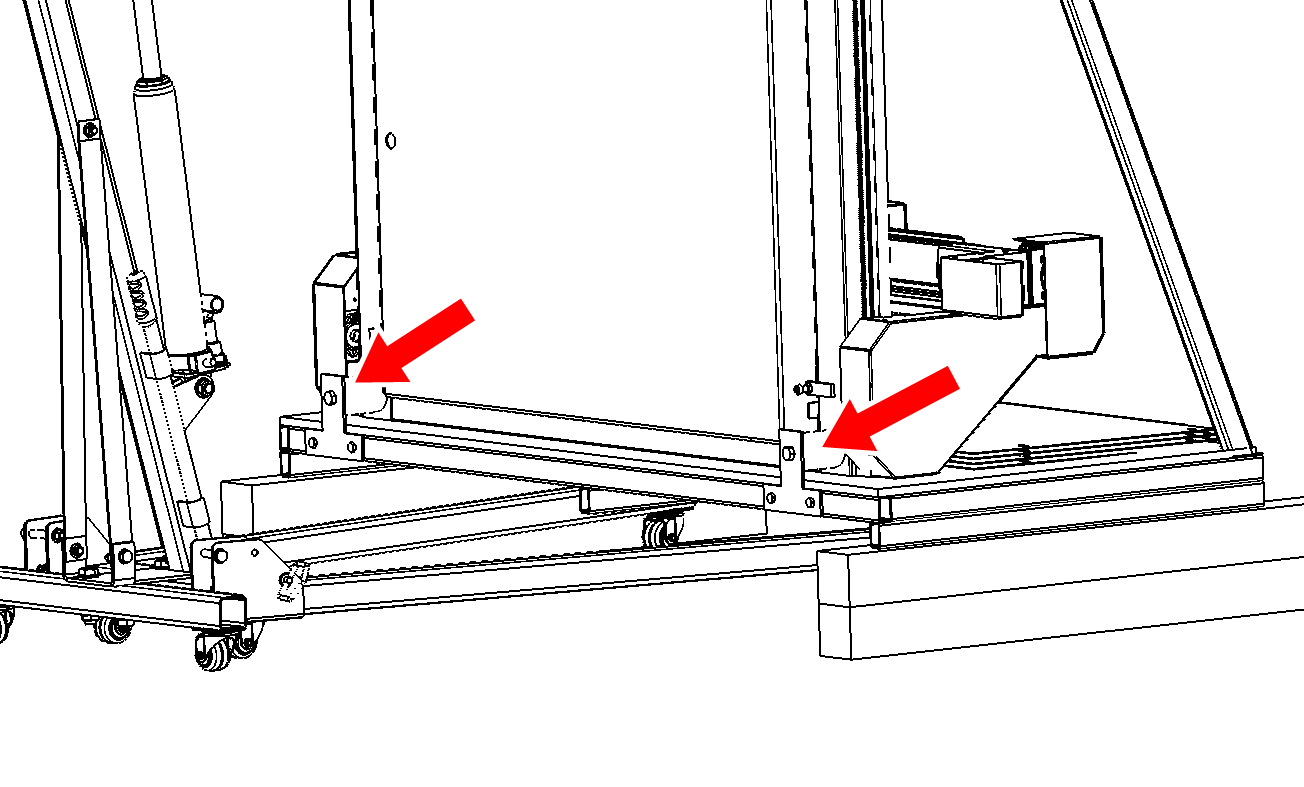
Remove the four side panels from underneath the machine frame.
CAUTION! Be careful not to hit the torch lifter head while removing panels from the crate.
-
Remove all plastic overwrap from the machine frame and water table except for the Y axis energy chain (it will be unwrapped later).
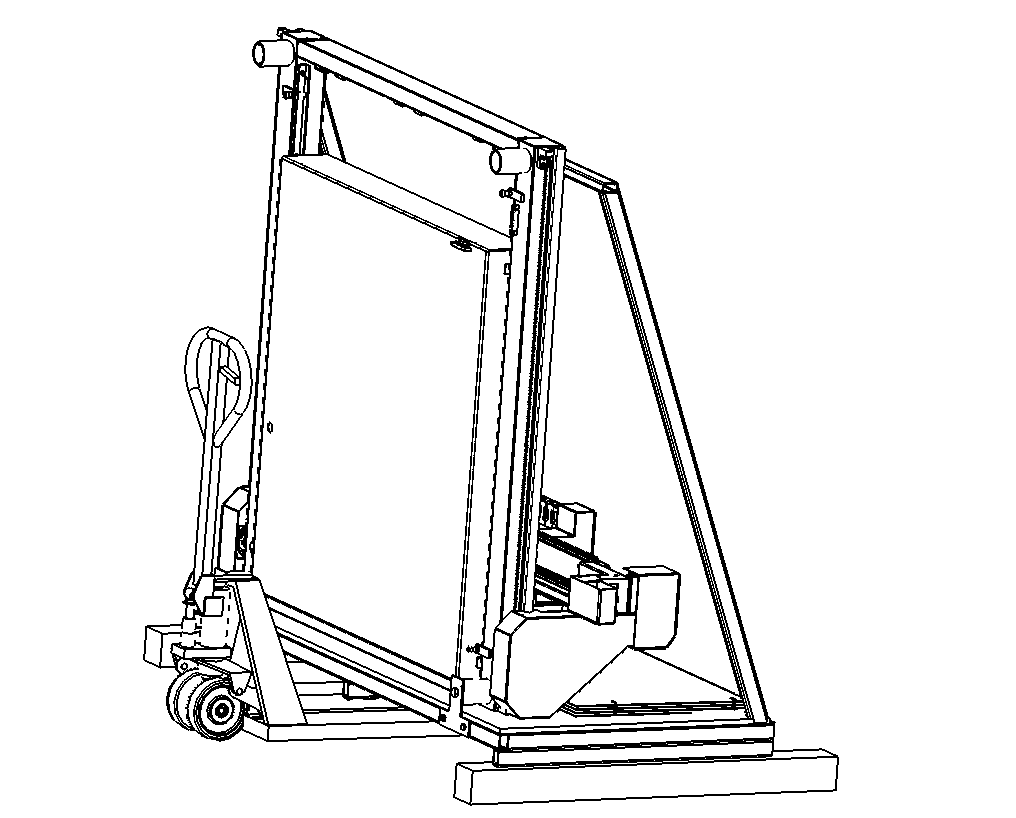
Remove Frame from Crate
This potion of the installation requires at least two people. Make sure that you have a partner before beginning the lifting procedure.
Tools and Items Required
-
Engine hoist or gantry crane rated for 825 lb (375 kg)
-
Pallet jack
-
4x4 lumber (4ft long)
-
Lifting strap
-
Pry bar
-
Allen keys
-
Safety eye-wear that meets ANSI Z87+
-
Work gloves
CAUTION! Lifting a machine can be dangerous if you are unfamiliar with your equipment. Make sure to know the load ratings of your lifting equipment and hire a qualified rigging company if you are not confident in its safe operation.
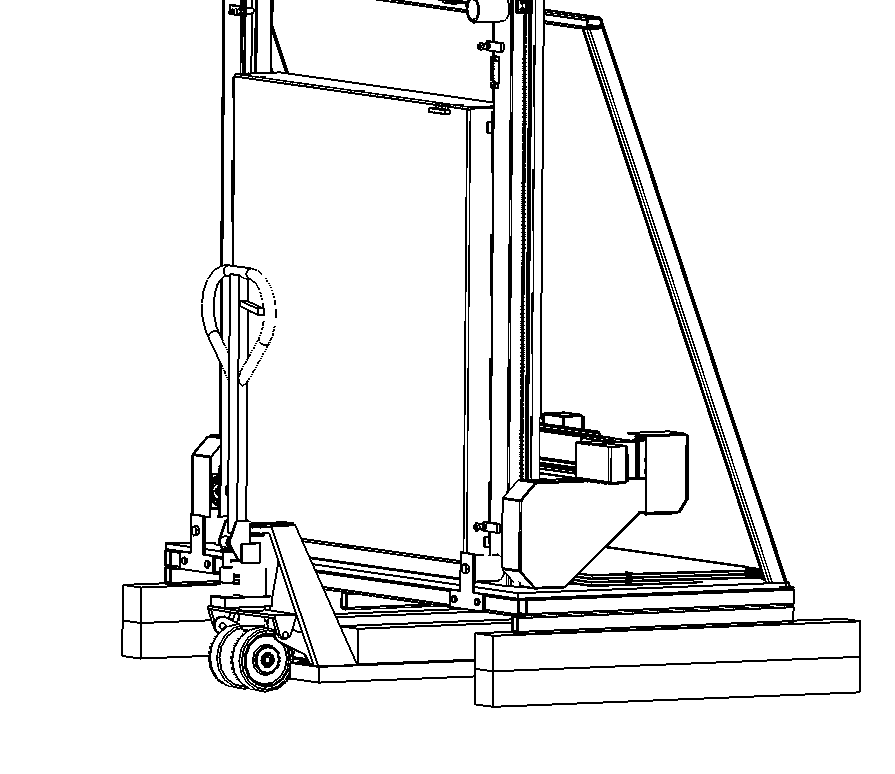
Lifting Frame
-
If using an engine hoist, perform the following steps to lift the crate for clearance underneath. If using a forklift or gantry, proceed to the next step.
-
Position a pallet jack under the machine and lift high enough to place a 4x4 under the side supports.
-
Place two 4x4 pieces on the pallet jack legs and repeat the lift. Place another 4x4 under the side supports.
-
Repeat the above steps until the crate clears the front legs of your engine hoist.
-
-
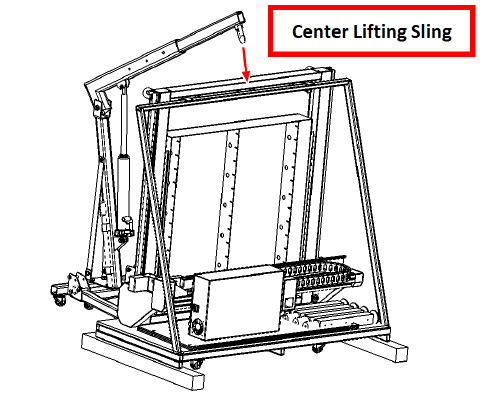
Attach a sling to the top frame rail of the plasma. Make sure the sling is positioned securely between two of the raised accessory mounting pads to prevent side-to-side slippage of the frame.
WARNING! Make sure that the lifting device you are using is rated for the weight of the machine frame - 825 lb (375 kg).
-
Position your engine hoist, crane or forklift above the sling and put light tension on it, just enough to hold the frame upright when it is released.
-
Remove the top two bolts holding the A-frame support of the crate to the machine frame.
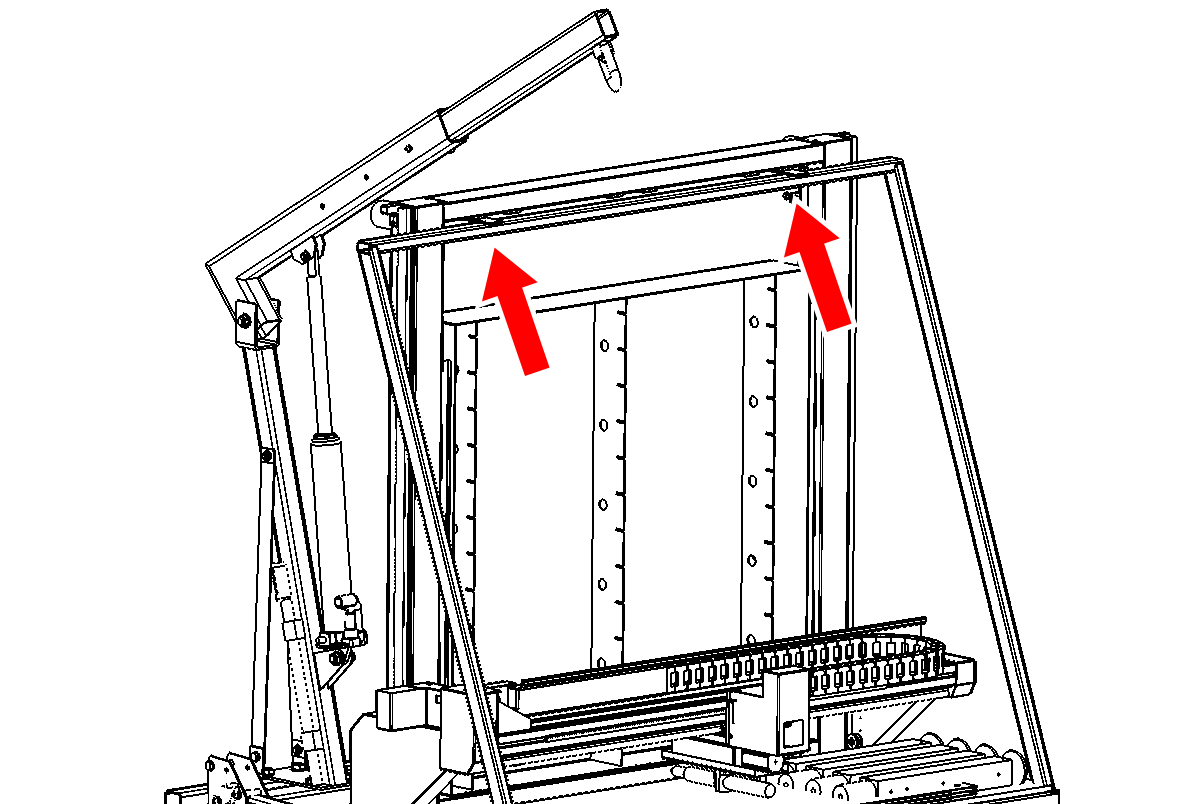
-
Remove the two bottom bolts connecting the crate frame to the machine leg mounting pockets.
-
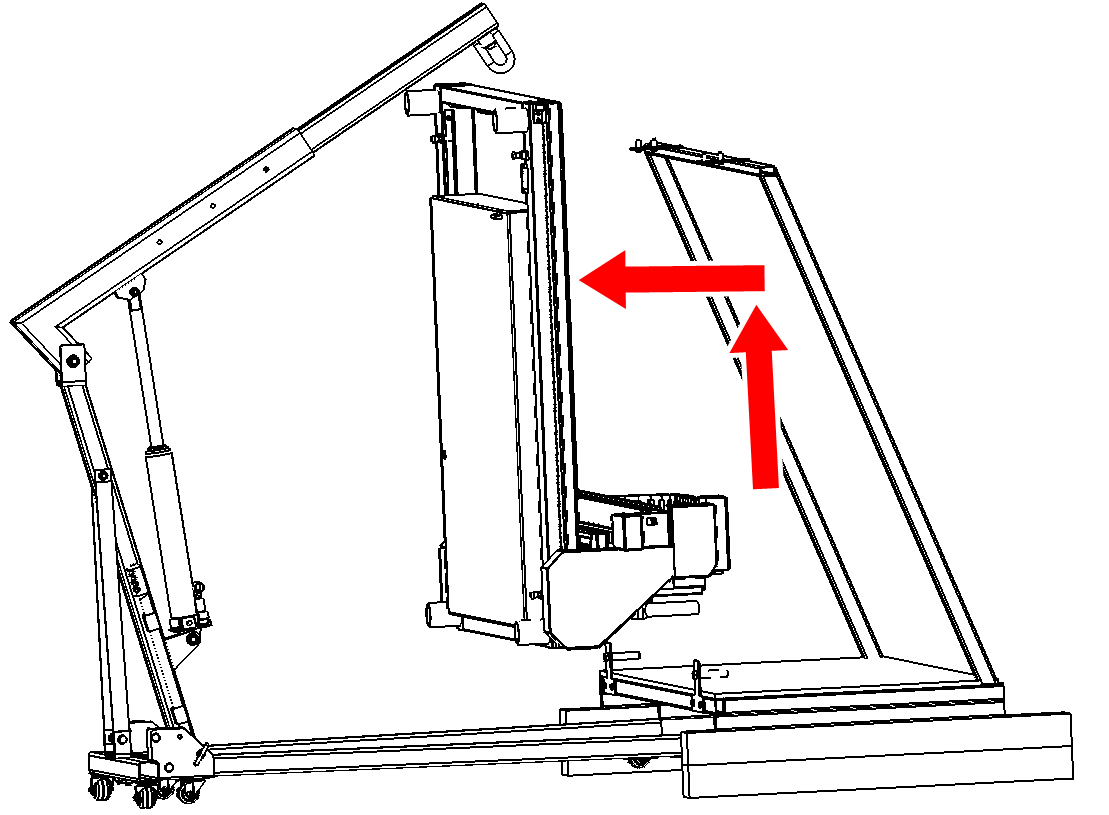
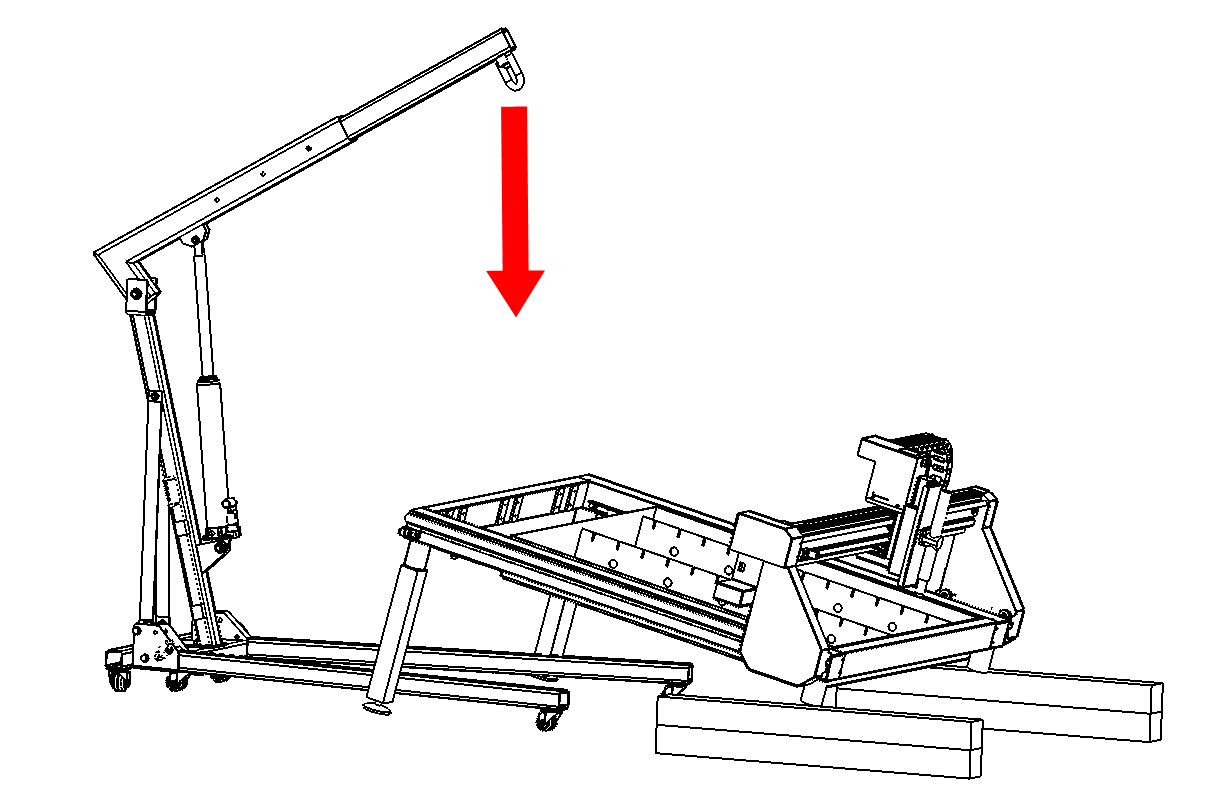
Use your lifting device to put enough upwards pressure on the machine that it will be fully supported. Use a pry bar to push the lower leg mounting pockets off of the crate mounting bosses.
-
Lift the machine frame enough to clear the crate and use a pallet jack to remove the crate from the area.
Installing Legs and Righting Machine
-
Lower the bottom end of the frame down on to 4x4 blocks to protect the paint and clear the engine hoist legs (if present).
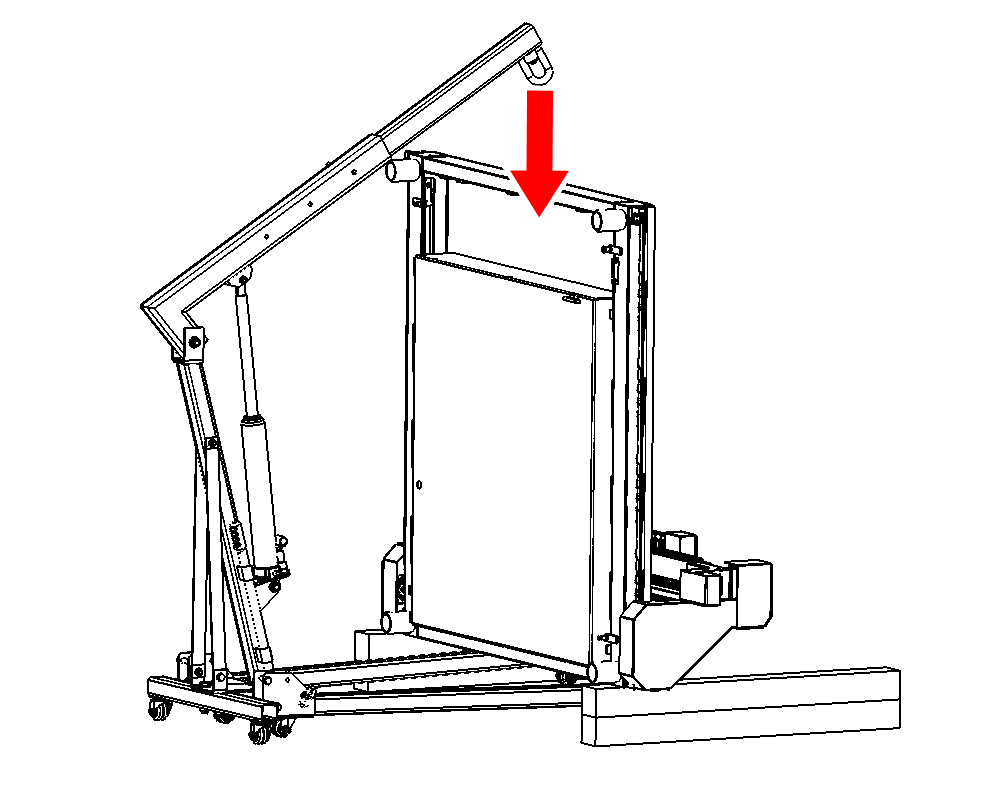
-
Install the top two legs on the machine on the end supported by the lifting sling.
-
Using gantry crane, slowly lower the top side of the machine frame until the two legs are on the ground.
-
Move the lifting sling to the same position on the opposite end of the frame.
-
Lift the remaining end of the frame off of the 4x4 blocks.
-
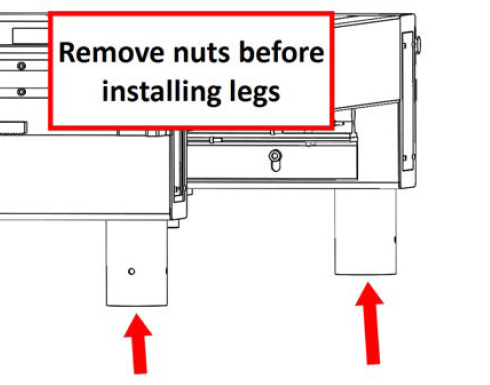
Remove the two nuts (used to bolt to the crate frame) from inside the leg mounting holes. Do not discard the socket head cap screws attaching the nuts, these are used to attach the last two legs.
-
Install the last two legs.
Looking for more information?
This is a section of the 1300PL operator's manual. To view the whole manual, go to Tormach document UM10720.
If you have additional questions, we can help. Create a support ticket with Tormach Technical Support at tormach.com/how-to-submit-a-support-ticket for guidance on how to proceed.