Tools and Items Required
-
Distilled water, 2-1/4 gal
-
Find the water chiller that you set aside in “Unpack the Machine Crate”. Then, remove the components from the box the water chiller is shipped in. Set the two cables aside.
-
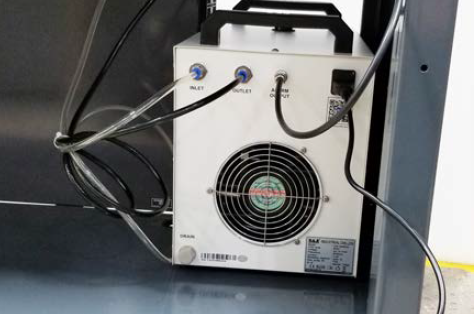
Put the water chiller into the machine stand.
-
Find the two preinstalled water lines in the machine stand. Then, route both toward the water chiller.
-
Connect the water lines to the water chiller:
-
Put the clear water line into the Inlet port.
-
Put the black water line into the Outlet port.
-
-
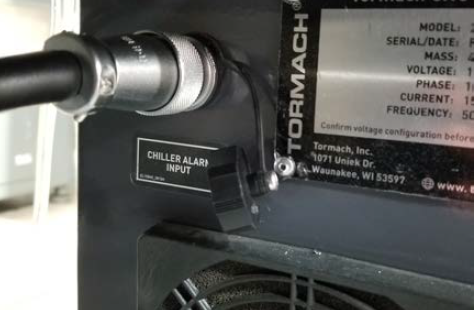
Find the water chiller alarm cable (that you set aside in Step 1). Then, connect one end to the back of the water chiller.
-
Route the loose end of the water chiller alarm cable toward the electrical cabinet, and connect it to the Chiller Alarm Input port on the side of the left end of the electrical cabinet.
-
Fill the water chiller with 2-1/4 gal of distilled water.
-
Find the water chiller's power cable (that you set aside in Step 1). Then, connect one end to the back of the water chiller.
-
Route the loose end of the power cable to a 115 Vac outlet, and connect it.
-
Turn on the water chiller and examine the clear water line to confirm that water is flowing.
-
Inspect the water chiller and water lines for leaks.
Looking for more information?
This is a section of the 24R operator's manual. To view the whole manual, go to Tormach document UM10564.
If you have additional questions, we can help. Create a support ticket with Tormach Technical Support at tormach.com/how-to-submit-a-support-ticket for guidance on how to proceed.