Background
Your machine axes require power and control signals to work. If either of those are disrupted you can lose any or all axis motion. If all of your motors are not working, go to “All Axes Won't Move When Commanded - 24R”.
Tools
-
Digital multimeter
-
Small flat-bladed screwdriver
-
Metric hex wench set
-
Phillips screwdriver
Reseat the Connectors on the ECM Board and Motors
Reason: Control signals aren't reaching the electronic driver modules.
-
Power off the machine.
-
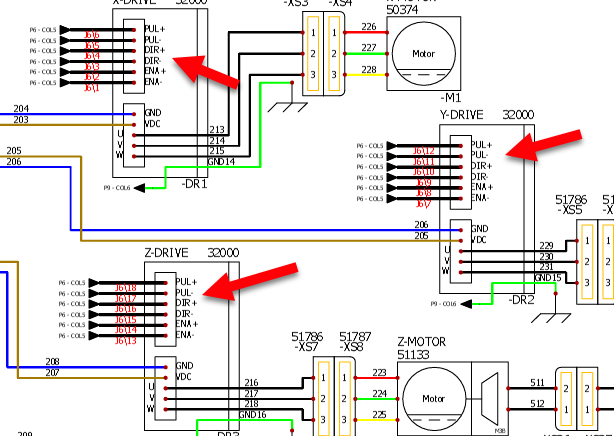
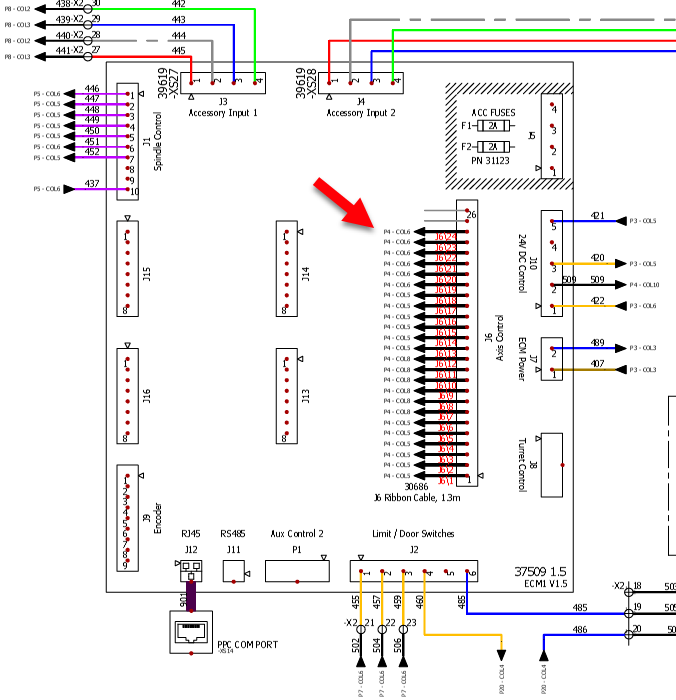
Examine the data cable at the machine control board and the axes drivers.
-
Machine control board: 26 pin IDC (ribbon cable); J6
-
Stepper driver controllers: 10 pin IDC (ribbon cable)
-
-
Examine the power and control cables at the DC-Bus and the stepper driver controllers removing, inspecting, and re-connecting them to ensure they are seated.
-
DC-Bus/Stepper driver controllers: Spade connectors/Degson style
-
203/204 (X-axis)
-
205/206 (Y-axis)
-
207/208 (Z-axis)
-
-
-
If there is any discoloration, replace the cable and driver.
-
Continue to the next troubleshooting topic.
Inspect the Motor’s Drivers
Assess the State of the Motor or Stepper Driver Controller
Reason: There's a defective or malfunctioning axis driver/cable.
-
Power on the machine and take it out of reset.
-
Examine the LEDs of the stepper driver controllers.
-
If the stepper driver controller has an illuminated green light: It is ready and operating normally.
-
If the stepper driver controller has an illuminated red LED: The machine should be power cycled to try and reset the stepper driver controller or the stepper driver controller needs to be replaced.
-
If the is no light on the stepper driver controller: Continue to the next troubleshooting topic.
-
Full Stepper Driver Controller Swap (Full Driver Swap) 
NOTE: 4th AXIS DRIVERS CANNOT BE SWAPPED WITH SERIES 3 OR 'M' SERIES MACHINE DRIVERS.
-
Power off the machine.
-
Identify the stepper driver controller corresponding to the malfunctioning axis and its two sets of wires; a green power connector and 10 pin IDC (ribbon cable). Remove and examine them:
-
If there the connector appears burnt: Replace both the cable connector and driver.
-
If the cable and pins appear normal: Continue to the next step.
-
-
On the malfunctioning axis stepper driver controller, replace the ribbon cable connector power connector with those from a functioning axis driver.
-
Power on the machine.
-
Jog the malfunctioning axis and swapped axis in both directions.
-
If the malfunctioning motor now functions properly: It is likely that the malfunctioning axis driver is defective.
-
If the malfunctioning motor continues to move erratically: Continue to the next troubleshooting topic; but, it is likely that the malfunctioning axis motor is defective.
-
Half Stepper Driver Controller Swap (Half Driver Swap)
-
Power off the machine.
-
Verify that the wires and cables are in their original position.
-
Swap the ribbon cables between the malfunctioning stepper driver controller and a known good stepper driver controller.
-
Jog the malfunctioning axis in both directions.
-
If the malfunctioning motor now functions properly: It is likely the ribbon cable or control board are malfunctioning.
-
If the malfunctioning motor continues to move erratically: Continue to the next troubleshooting topic; but, it is likely that the malfunctioning axis motor is defective.
-
Inspect the DC-BUS board
Reason: There's a blown fuse on the DC-BUS board.
-
Power on the machine and take it out of reset.
-
Examine the green LED on the DC-BUS board.
-
If the green LED is not illuminated: Go to All Axes Won't Move When Commanded - 24R
-
If the green LED is illuminated: Continue to the next step.
-
-
Power off the machine.
-
Remove the cover from the DC-BUS board.
-
Using the table below, locate the corresponding axis fuse and measure its resistance across the fuse with a digital multimeter set to resistance.
-
Replace the fuse if the digital multimeter reads OL, shows a resistance in the MΩ, and/or doesn’t produce continuity tone.
-
If the fuse measures 0-5 Ω, reinstall it.
-
|
Function |
Fuse Number |
Amperes |
Speed |
|---|---|---|---|
|
X-Axis |
F1 |
8 A |
Fast |
|
Y-Axis |
F2 |
8 A |
Fast |
|
Z-Axis |
F3 |
8 A |
Fast |
|
A-Axis |
F4 |
8 A |
Fast |
|
Main DC-BUS fuse |
F6 |
10 A |
Slow |
|
ATC |
F8 |
5 A |
Fast |
A blown fuse can be the result of a defective driver or wiring. Inspect the axis' wiring carefully and repair any damage observed. If you replace a fuse and it immediately blows, it's likely a defective axis drive or its wiring.
Inspect the Motor
Reason: There's a defective motor or motor connection.
-
Power off the machine.
-
Disconnect the motor lead quick connect, and examine the motor side wiring for signs of coolant or contamination.
-
If there is coolant or contamination: Replace the stepper driver controller and cable.
-
If there is nothing: Continue to the next step.
-
-
Based off of the chart, measure the resistance of windings at the motor quick connect.
-
If the resistance is out of spec: Then the motor is defective.
-
If the resistance is within spec: Then inspect the cable and connectors between the axis motor and axis driver.
-
|
Axis |
Probe |
Resistance |
|
|---|---|---|---|
|
From (black probe) |
To (red probe) |
||
|
X |
226 226 227 |
227 228 228 |
0.5-2.0 Ω |
|
Each wire |
Ground (bare metal or wire labeled PE) |
>1 M Ω or OL |
|
|
Y |
236 236 237 |
237 238 238 |
0.5-2.0 Ω |
|
Each wire |
Ground (bare metal or wire labeled PE) |
>1 M Ω or OL |
|
|
Z |
223 223 224 |
224 225 225 |
0.5-2.0 Ω |
|
Each wire |
Ground (bare metal or wire labeled PE) |
>1 M Ω or OL |
|
Resistance across leads on all phases for X, Y and Z should be about the same. Deviation may indicate a problem. This does not apply to the A-axis.
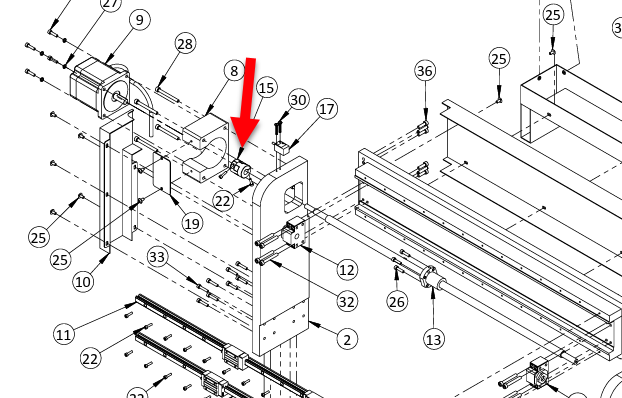
Inspect the Motor Coupling
Reason: There's a loose axis motor coupling.
-
Jog the axis and listen to determine if you can hear the motor run.
-
Remove the cover plate over the coupling and make witness marks across the coupling and ball screw.
-
Jog the axis to determine if the motor's turning but the screw isn't.
-
If the coupling is slipping, locate the hex screws and tighten them down
-
Clean the ball screw
Reason: There's debris on the ball screw.
-
Clean the ball screw.
Debris on the ball screws can rapidly accelerate wear and reduce the lifespan of your machine. Evaluate if additional measures are required to protect your machine's ball screws and ways (like supplemental dust collection).
Lubricate the Linear Rails and Ball Screws
Reason: The linear rails or ball screw do not have the proper amount of grease.
For more information, see: “24R Maintenance”