To properly validate the core installation of your machine, you must understand how to power on and off the machine and use the controls.
Power on the Machine
-
Use a multimeter to verify that the electrical service in your location meets the following requirements. If your location does not meet these requirements, do not install the machine. Instead, you must consult with a local electrician about your options.
-
Primary Power Required Single-Phase 230 Vac, 50/60 Hz
-
Recommended Circuit Amperage 30 A breaker
-
Connect the machine's mains power cable to the verified electrical service.
-
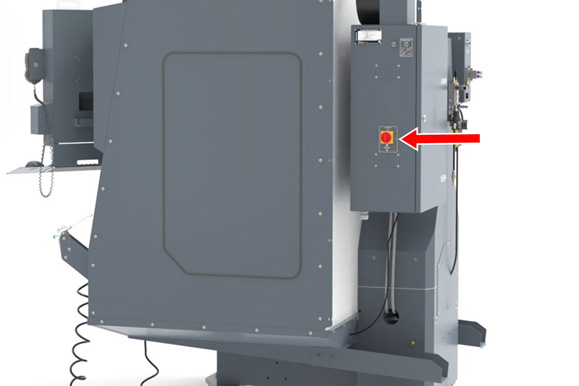
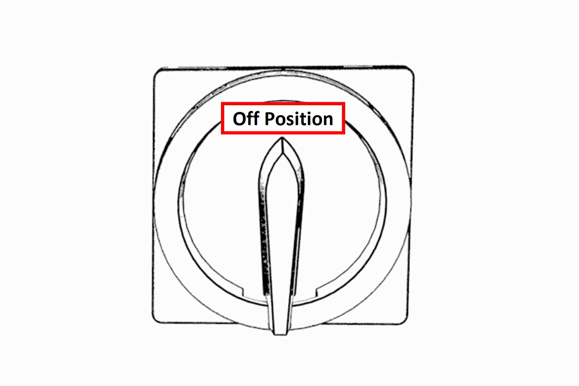
Find the Main Disconnect switch, and then remove the hang tag.
-
Turn the Main Disconnect switch to ON.
Mains power is now connected to the machine.
-
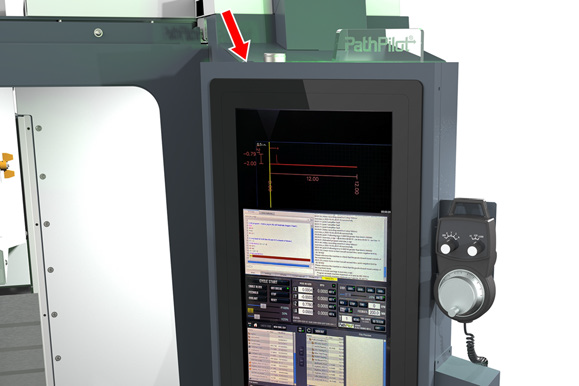
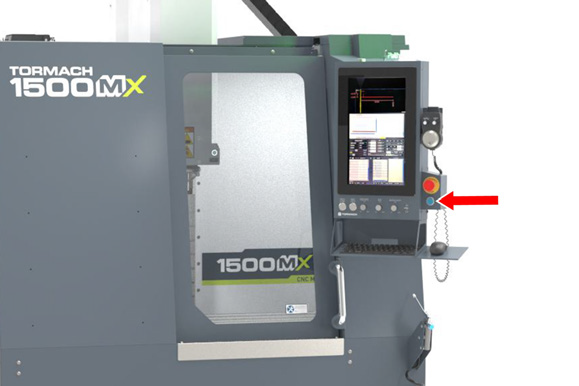
Push the Power button on the PathPilot operator console, if it's not already powered on.
-
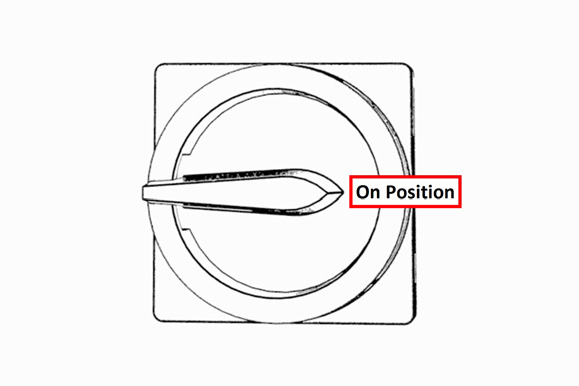
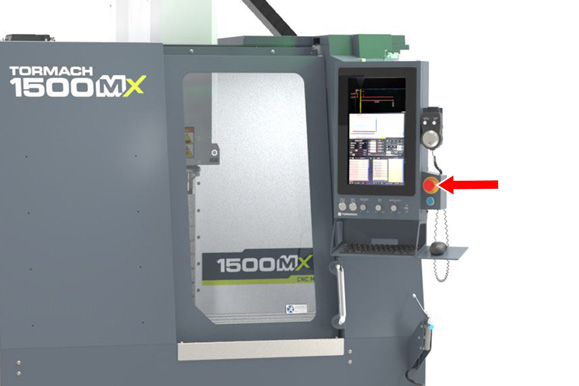
Rotate the Emergency Stop button one-quarter turn clockwise to release it.
-
Push the blue Reset button to enable the machine.
The axis drives are now powered on.
-
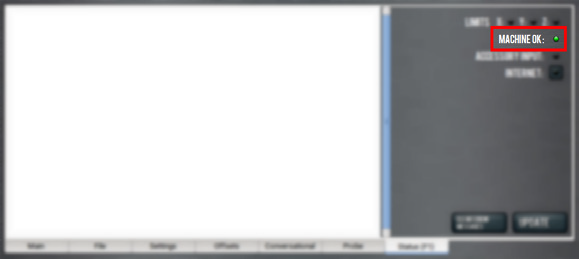
Verify that the blue Reset LED comes on. From the PathPilot interface, on the Status tab, verify that the Machine OK light changes from yellow to green.
-
Select Reset.
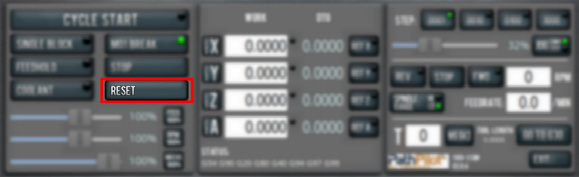
This initializes the connection between the machine and controller.
Verify Axes Function
You must confirm that the axes correctly operate.
-
Close the enclosure door.
-
Select Z on the manual pulse generator (MPG) and rotate the hand wheel clockwise to move the spindle head up (Z+).
-
Remove and discard the M6 fasteners securing the shipping bracket to the column and the machine table with a 4 mm hex wrench. Jog the machine table towards the operator a few inches.
-
Remove and discard the shipping block from the machine table.
-
Use the MPG to verify axis motion:
-
Select X on the MPG. Rotating the hand wheel moves the table left (X+) and right (X-).
-
Select Y on the MPG. Rotating the hand wheel moves the table towards you (Y+) and away from you (Y-).
-
Select Z on the MPG. Rotating the hand wheel moves the spindle head up (Z+) and down (Z-).
Verify Spindle Function
You must confirm that the spindle correctly operates.
-
Close and latch the spindle door.
-
From the PathPilot interface, in the RPM DRO field, type 500. Then select the Enter key.
NOTE: If you have an operator console, confirm that the RPM knob isn't set to 0%. If it is, turn the RPM knob.
-
Select FWD.
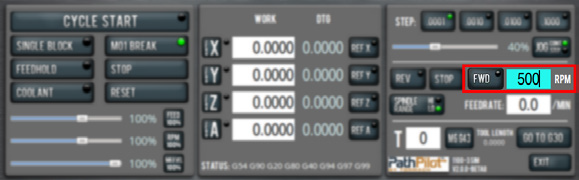
The spindle rotates clockwise (viewed from above) at 500 rpm.
-
Select STOP.
The spindle stops rotating. -
Select REV.
The spindle rotates counterclockwise (viewed from above) at 500 rpm. -
Select STOP.
The spindle stops rotating. -
In the RPM DRO field, type 1000. Then select the Enter key.
-
Select FWD.
The spindle rotates clockwise (viewed from above) at 1000 rpm. -
Repeat the procedure at 1000 rpm.
Power off the Machine
-
Push the Emergency Stop button to lock it into the disabled position.

With the Emergency Stop button in the disabled position all motion and spindle function stops, the Reset button is disabled , and the blue Reset LED goes off. From the PathPilot interface, on the Status tab, the Machine OK light illuminates yellow.
-
From the PathPilot interface, select Exit.
-
When prompted, select OK.
-
Once the PathPilot interface indicates that it's safe to power off the machine, turn the Main Disconnect switch to OFF.
Mains power is disconnected from the machine.
Looking for more information?
This is a section of the 1500MX operator's manual. To view the whole manual, go to Tormach document UM10811.
If you have additional questions, we can help. Create a support ticket with Tormach Technical Support at tormach.com/how-to-submit-a-support-ticket for guidance on how to proceed.