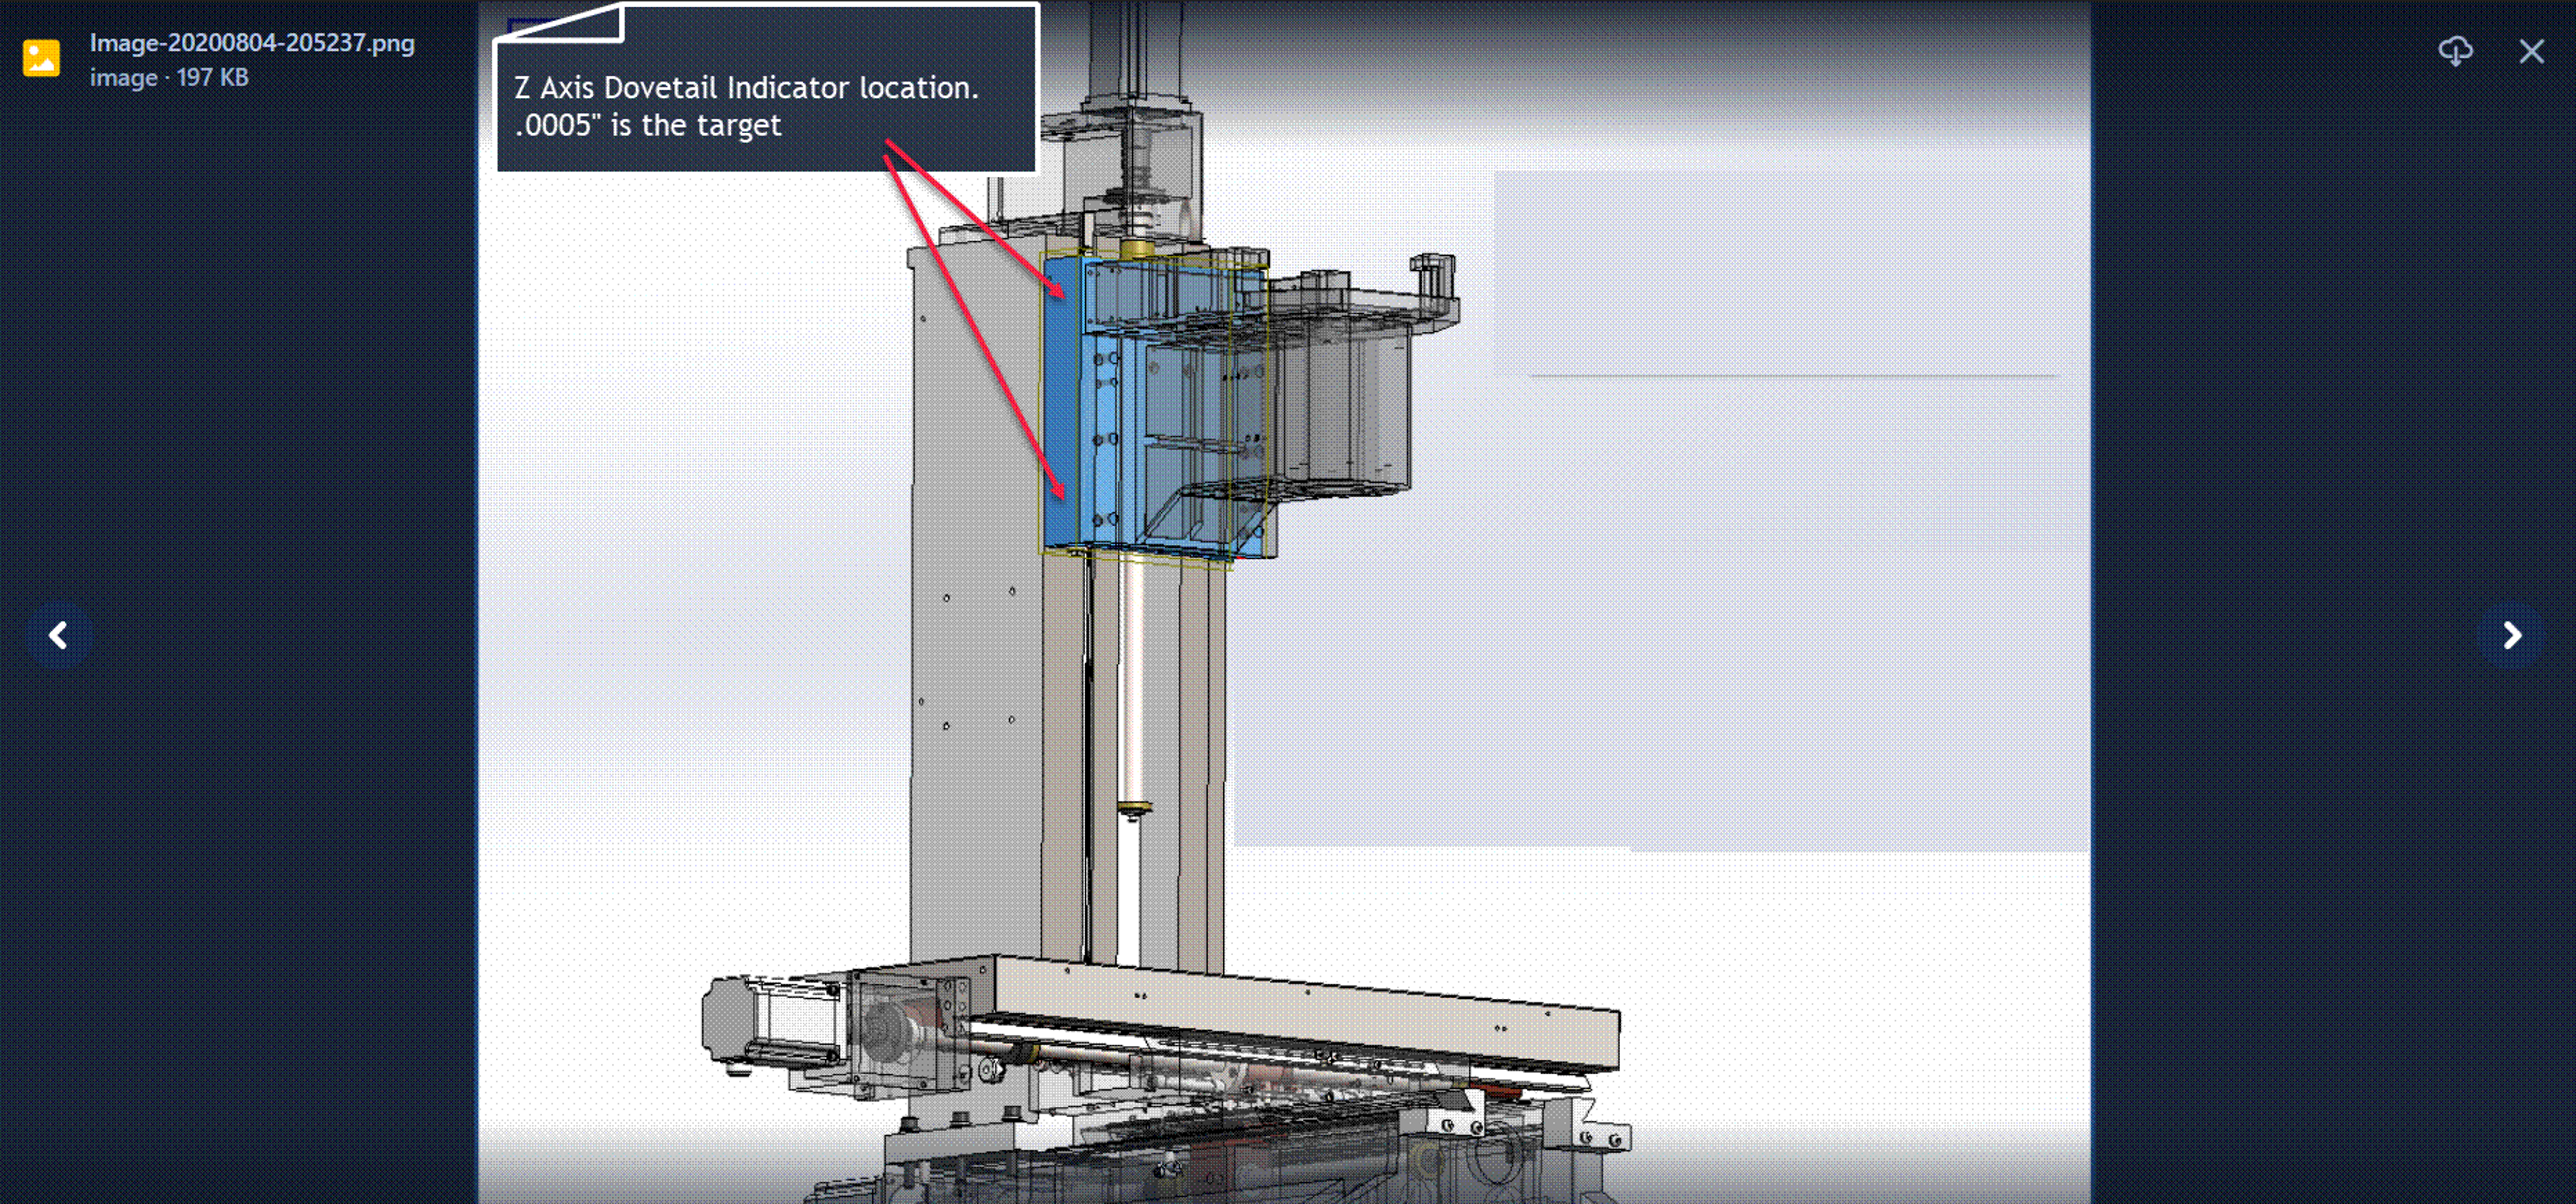
Background
This 9 step document will help you isolate the cause of your lost motion. Follow the tests in order, and make sure each passes, before continuing on.
Tools
-
Dial Travel Indicator with Mag Base
-
Allen Wrenches
Test 1 - Y Axis Ball Screw Axial Test
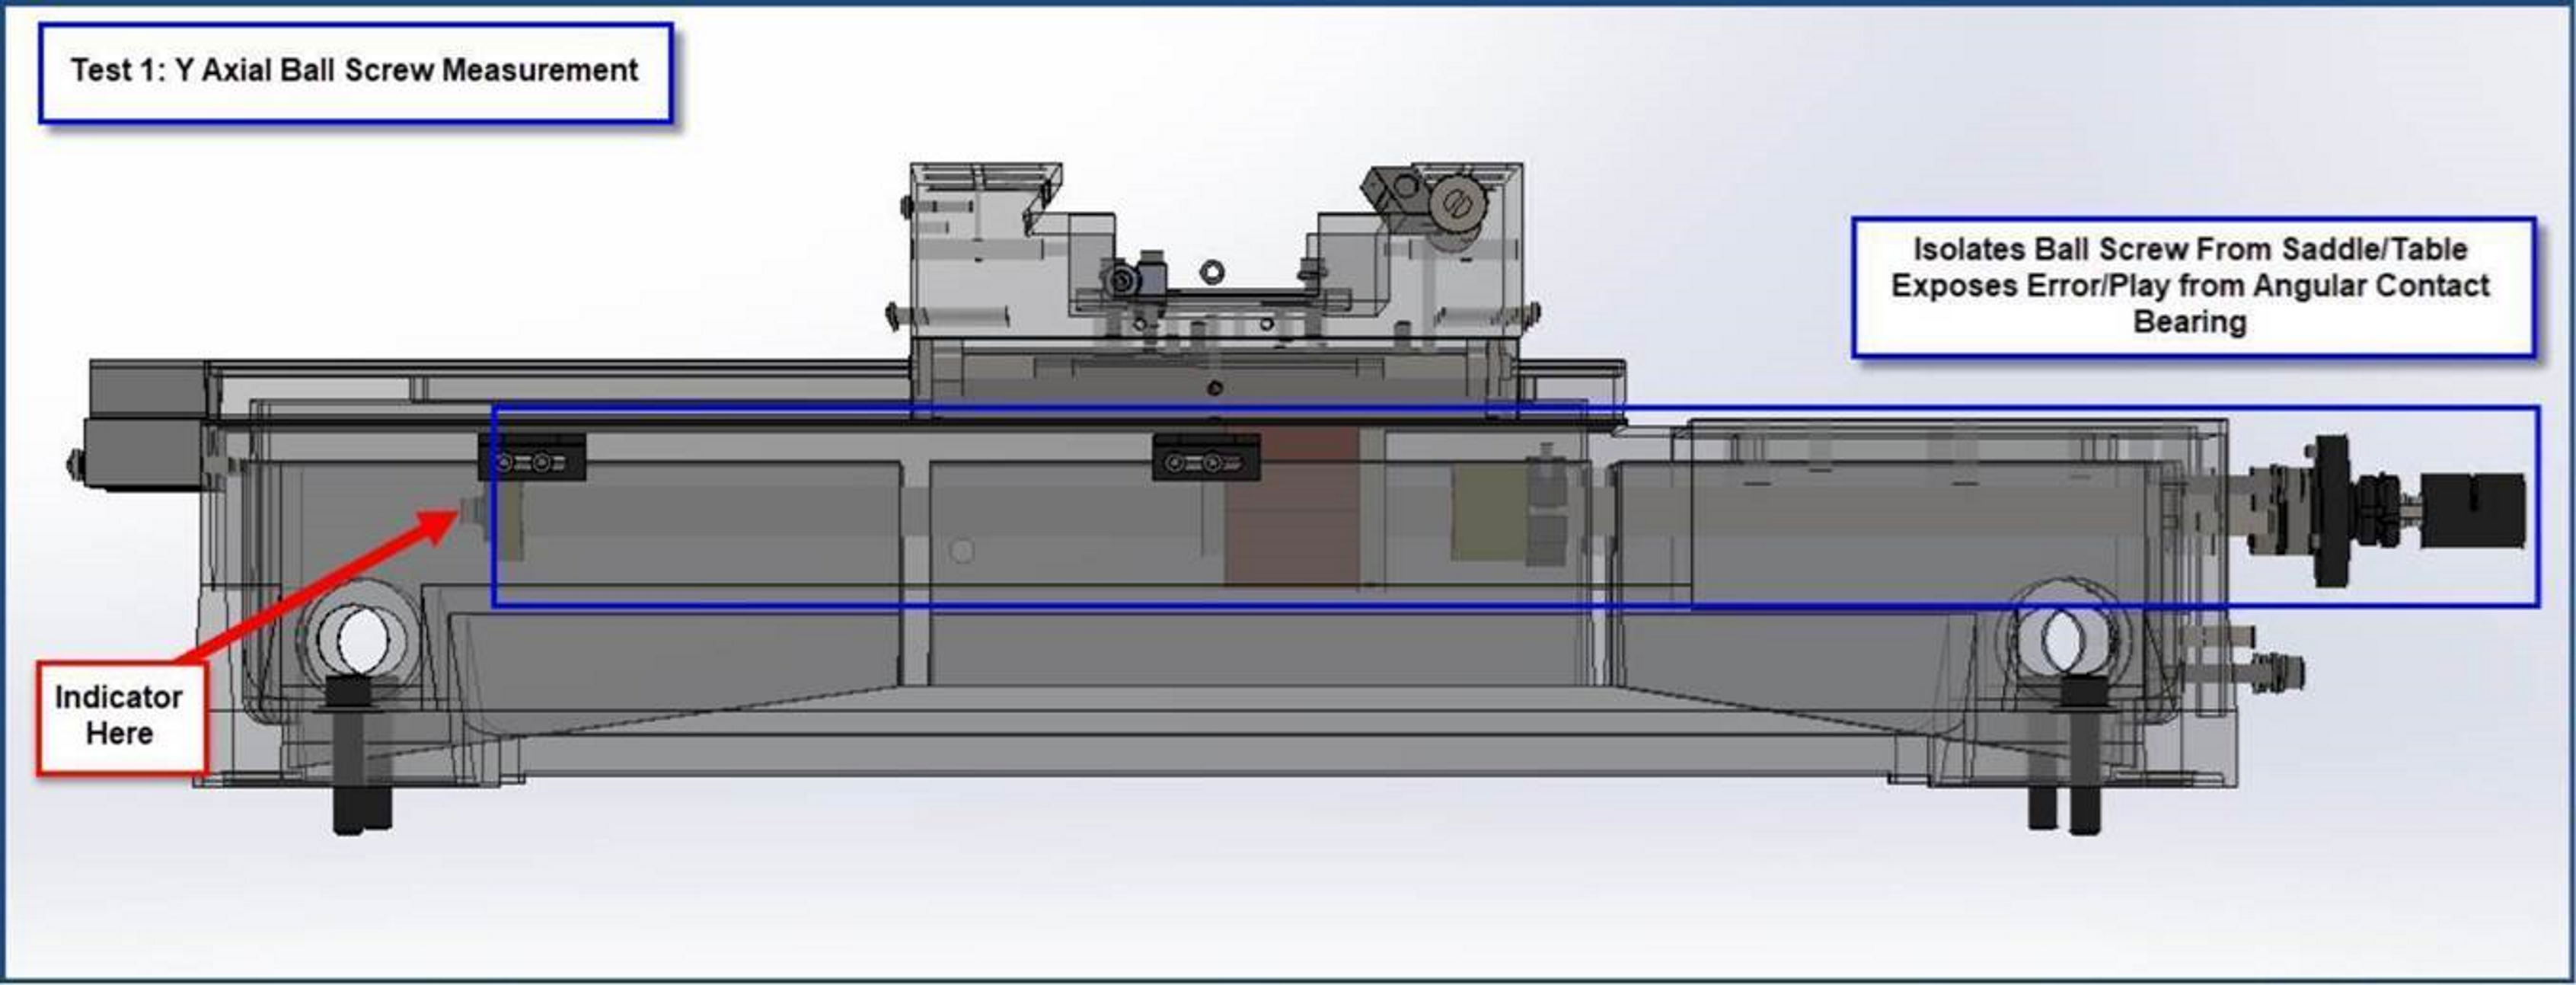
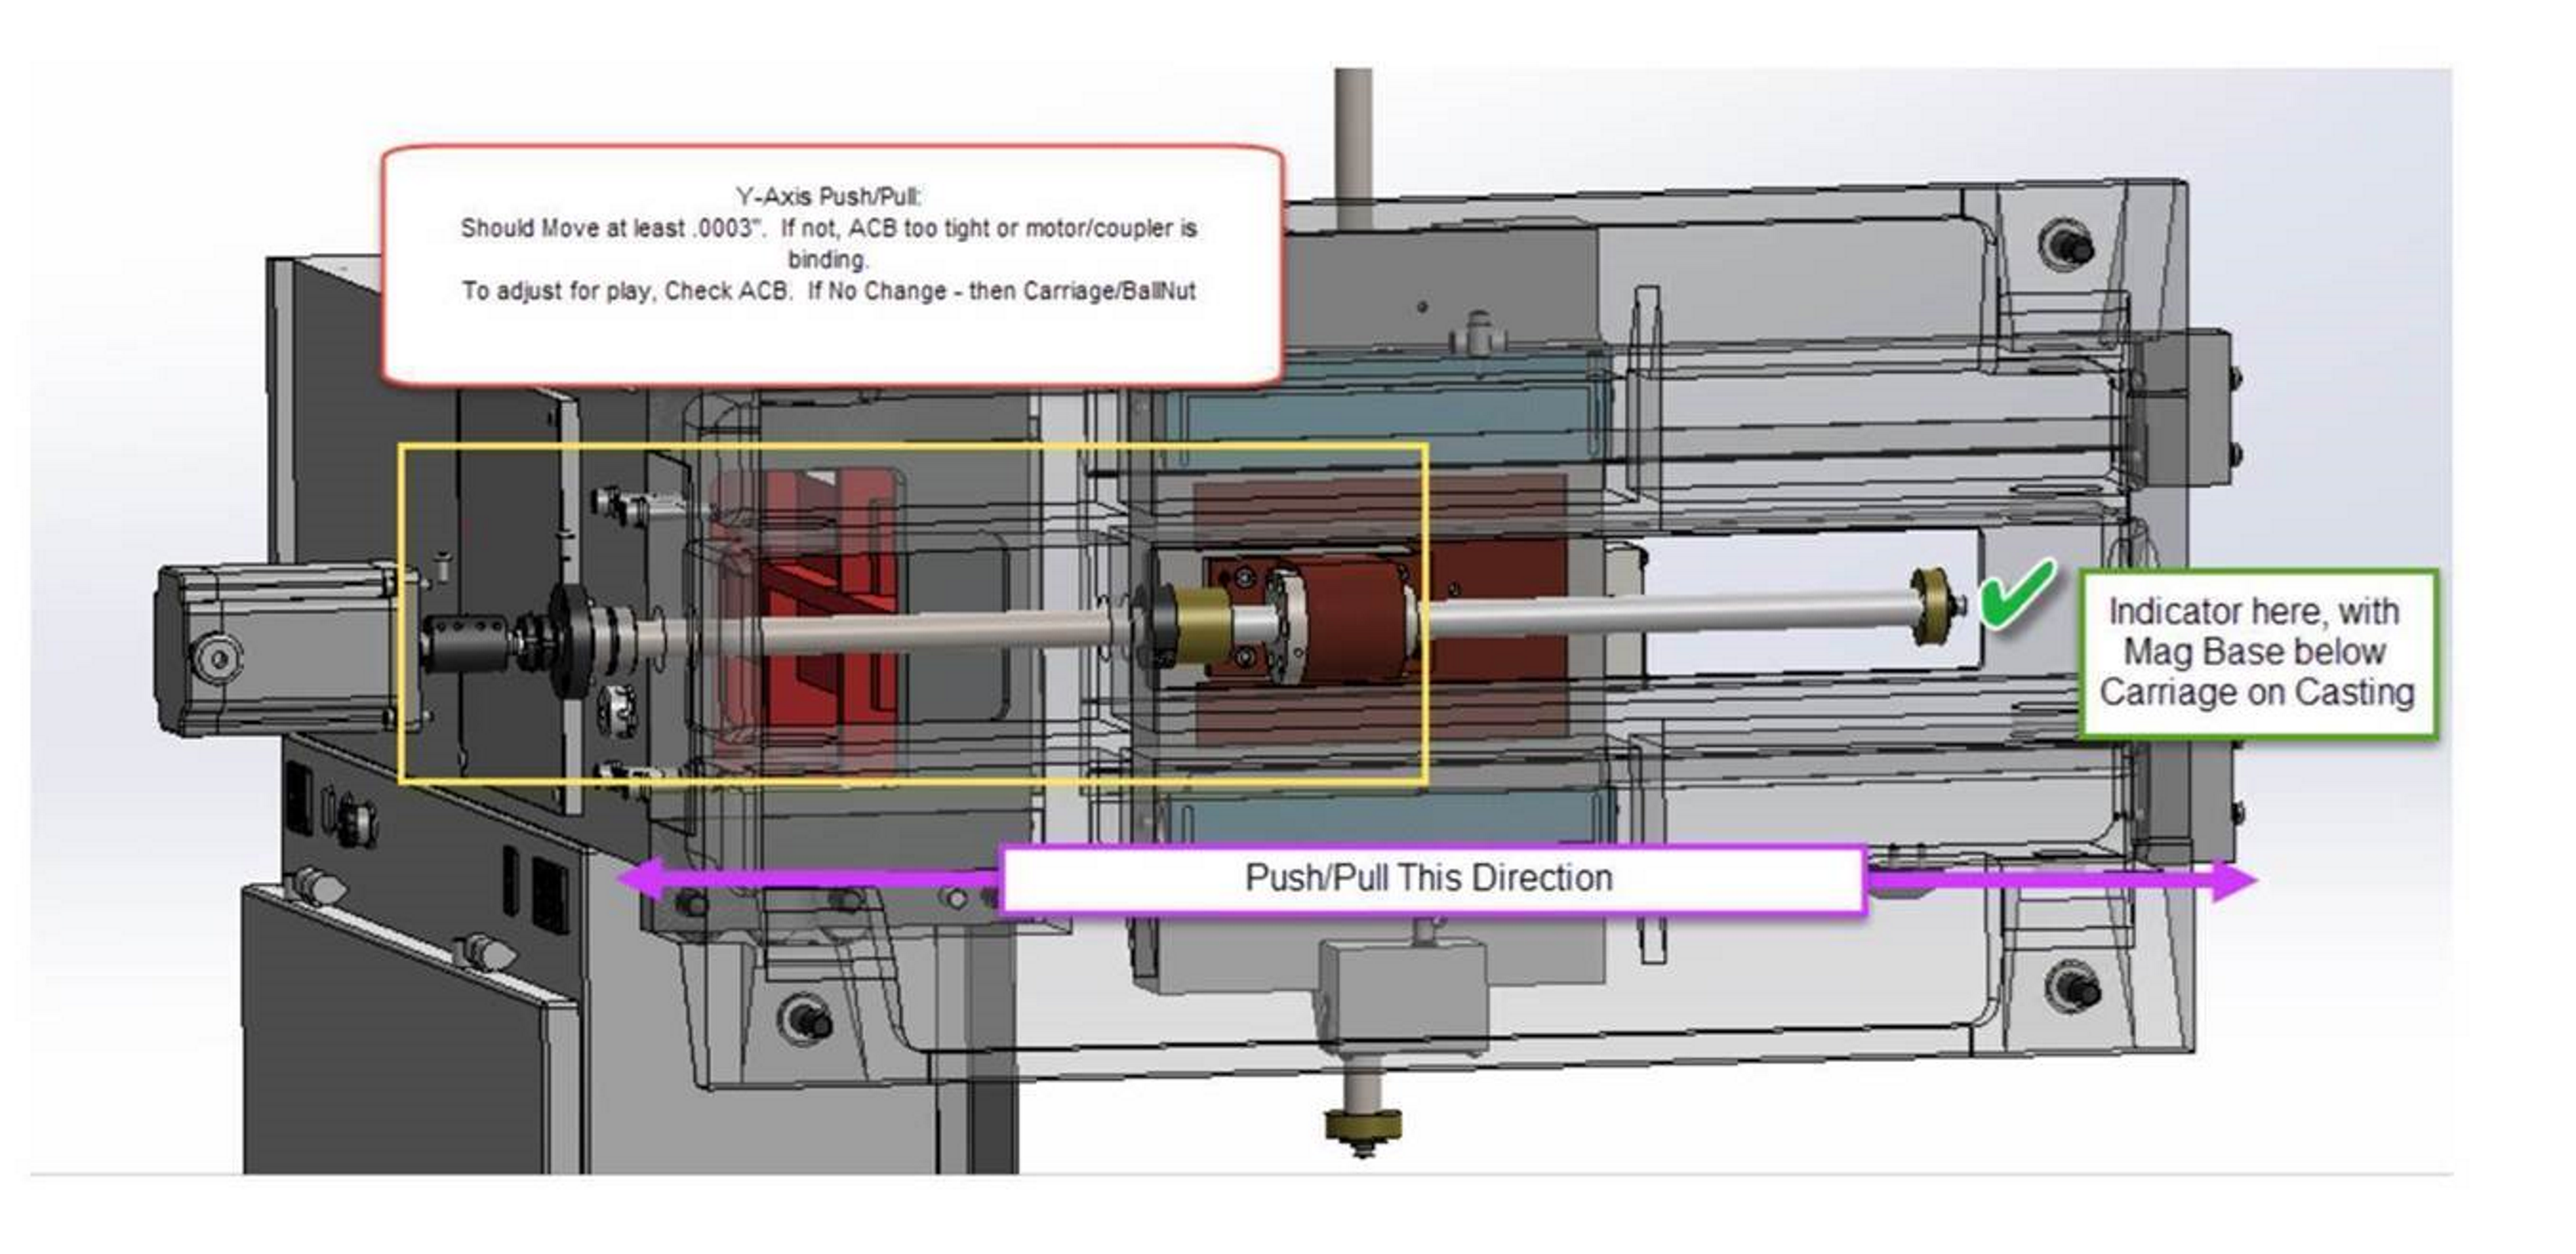
Dial Travel Indicator with Mag Base on Lower Machine Base/Chip Tray, and indicator on front side of ballscrew. Shake table/ball screw from front to back.
No Motion or Motion Exceeding .0003” – ACB Adjustment Needed (See Angular Contact Bearing Adjustment Procedure then proceed to Test 2.)
If motion is at .0003, proceed to Test 2
Test 2 - Y Axial Casting Measurement
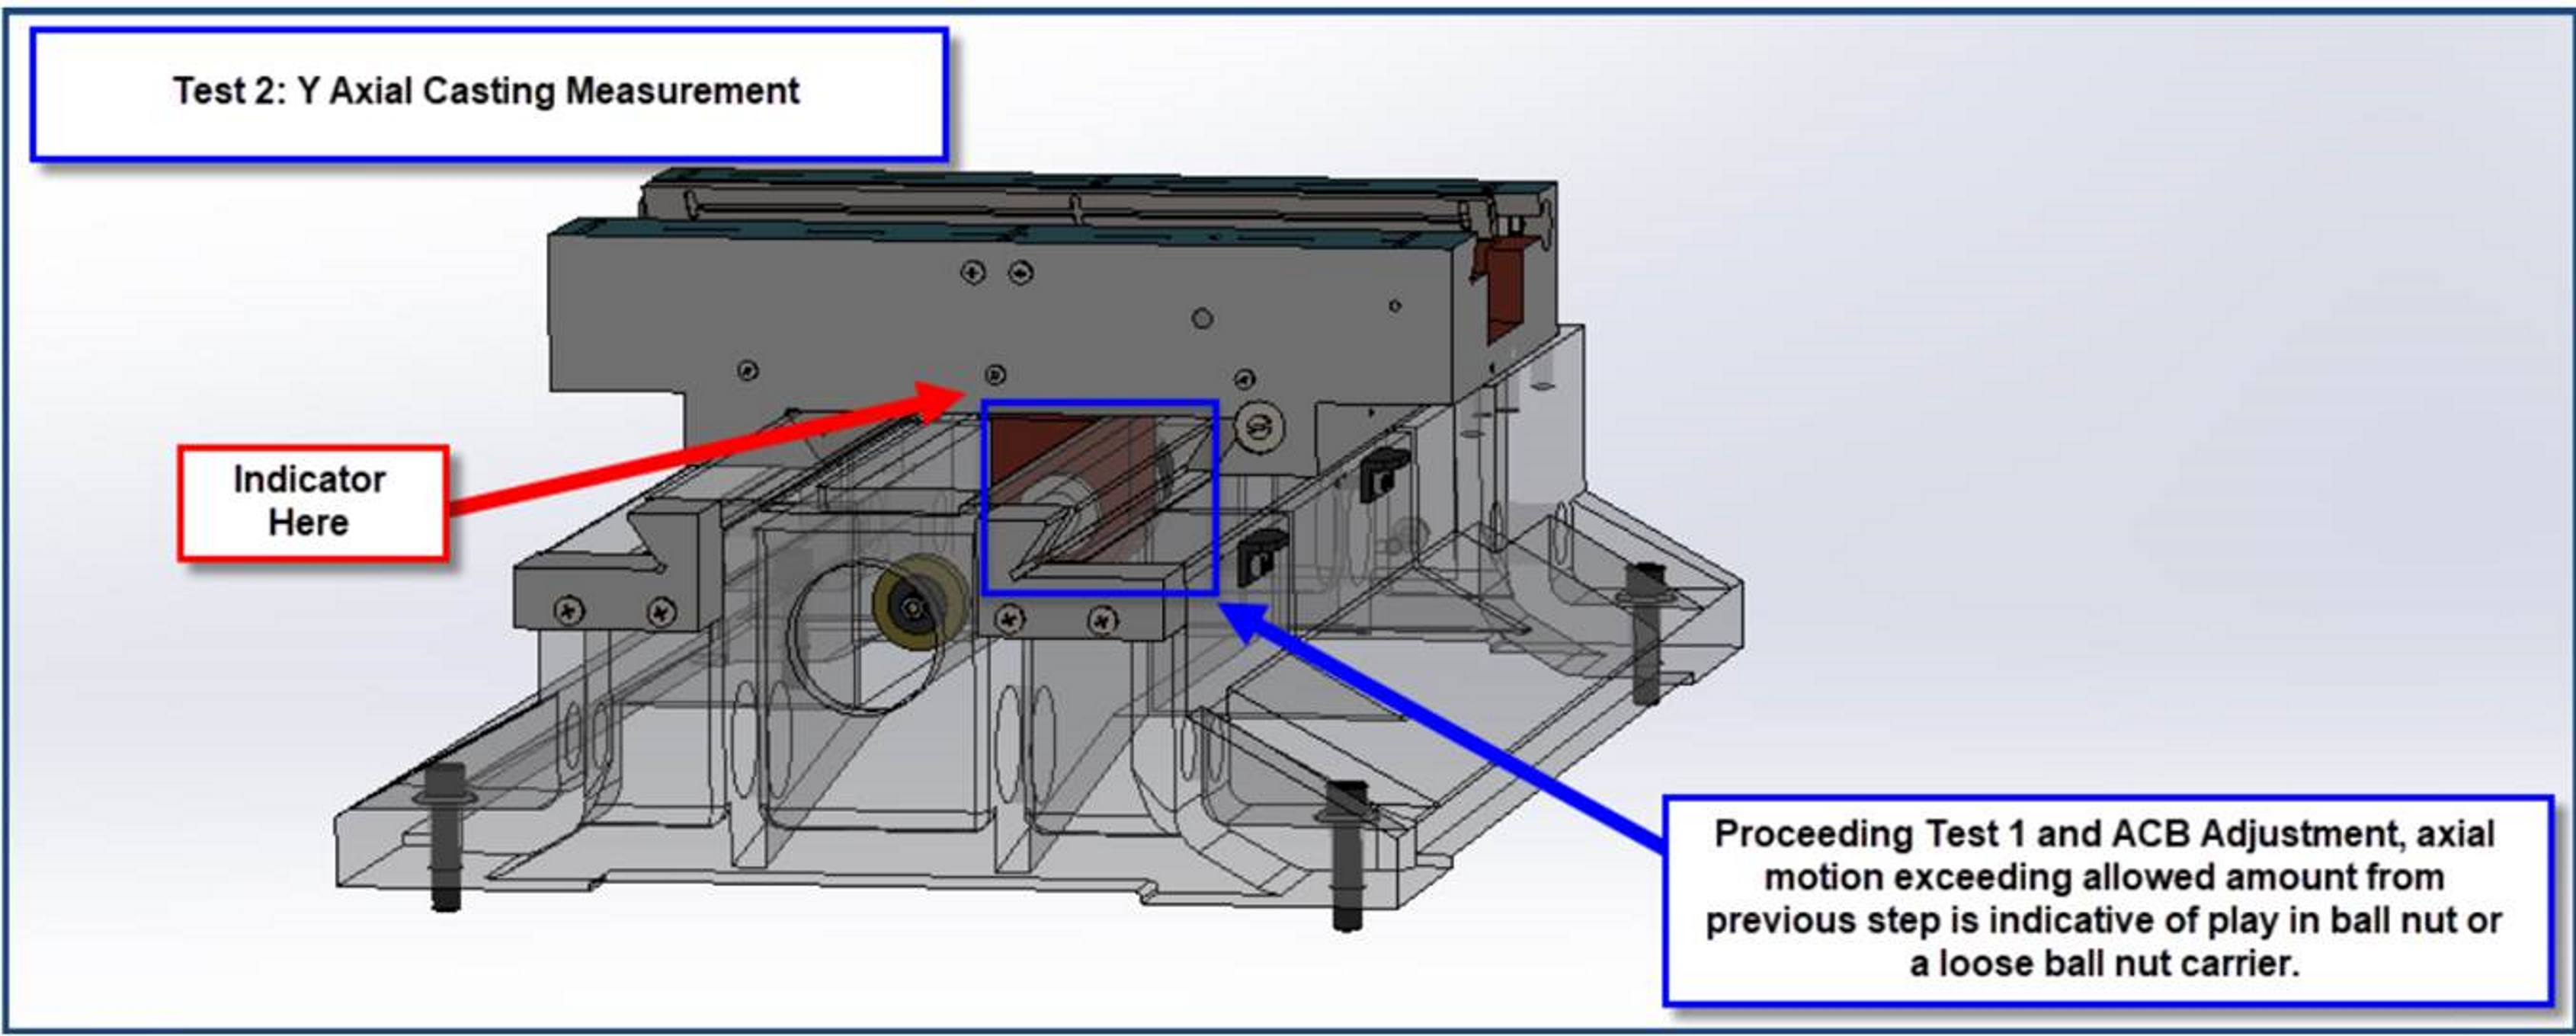
Move Dial Travel Indicator to front of Y carriage. Push and Pull. If test exceeds .001” - you could have an excessive amount of play that could be coming from the ball nut or carriage. (Depending on how worn your ball screw is or how close you are to .001 - you could comp this if it is consistent.)
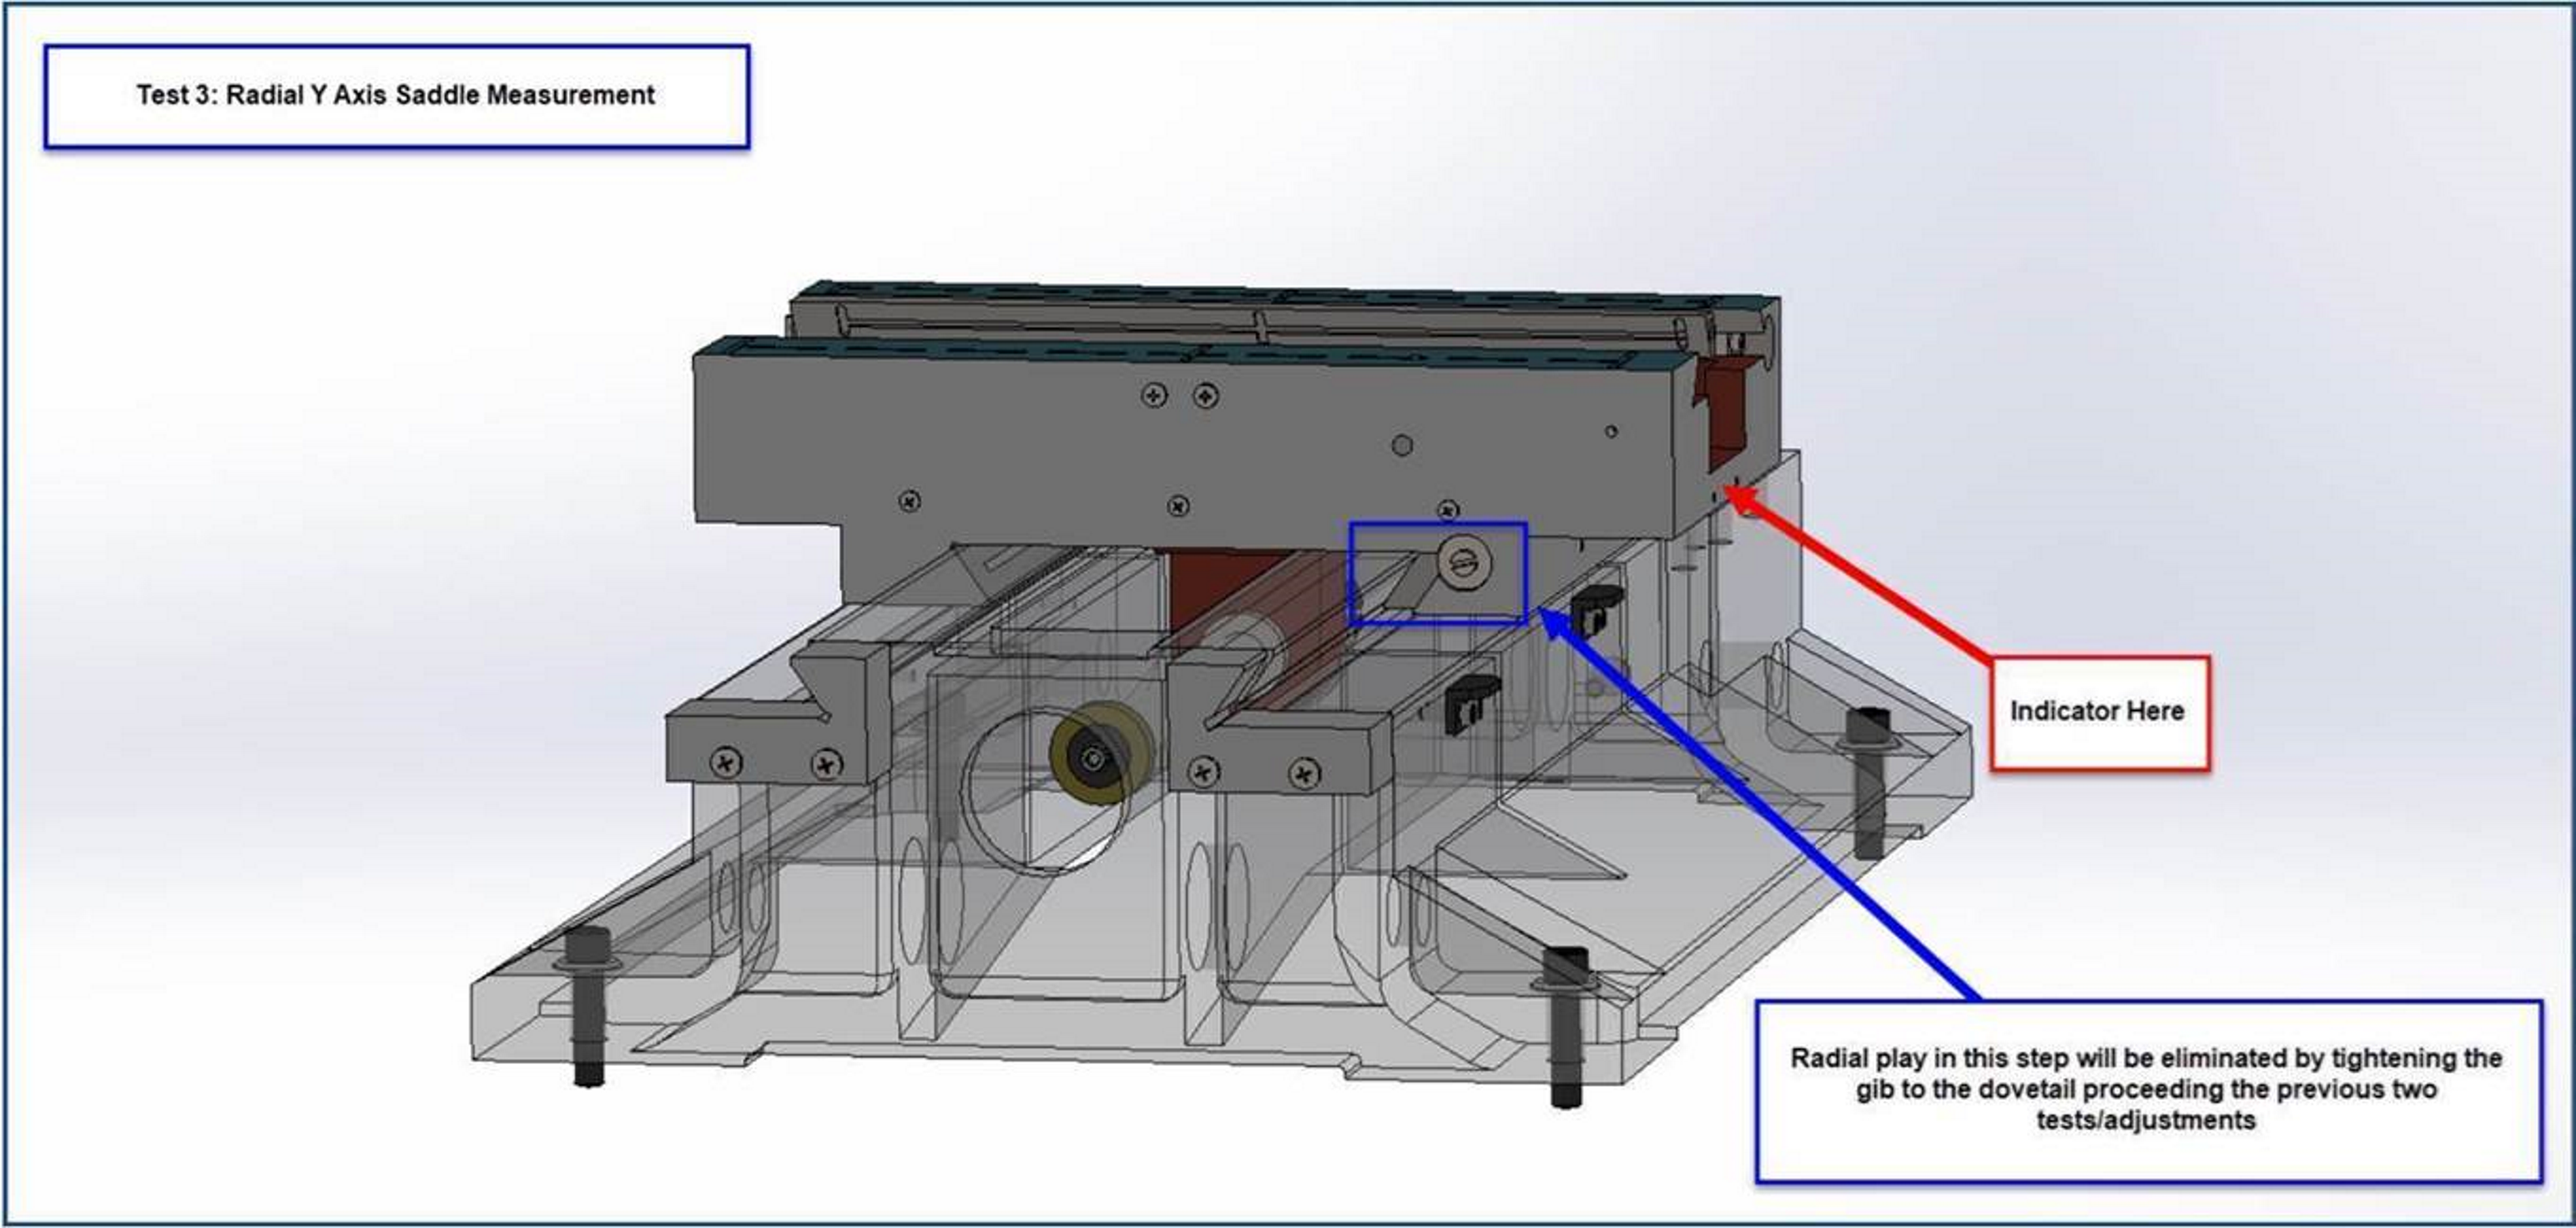
Test 3 - Radial Y Axis Saddle Measurement
Move Indicator Side of Carriage. Follow Gib adjustment procedure to get to the .0007 – .001” range. (Accumulative/Stacked Tolerance is factored in here - assuming .0005” per previous two steps.)
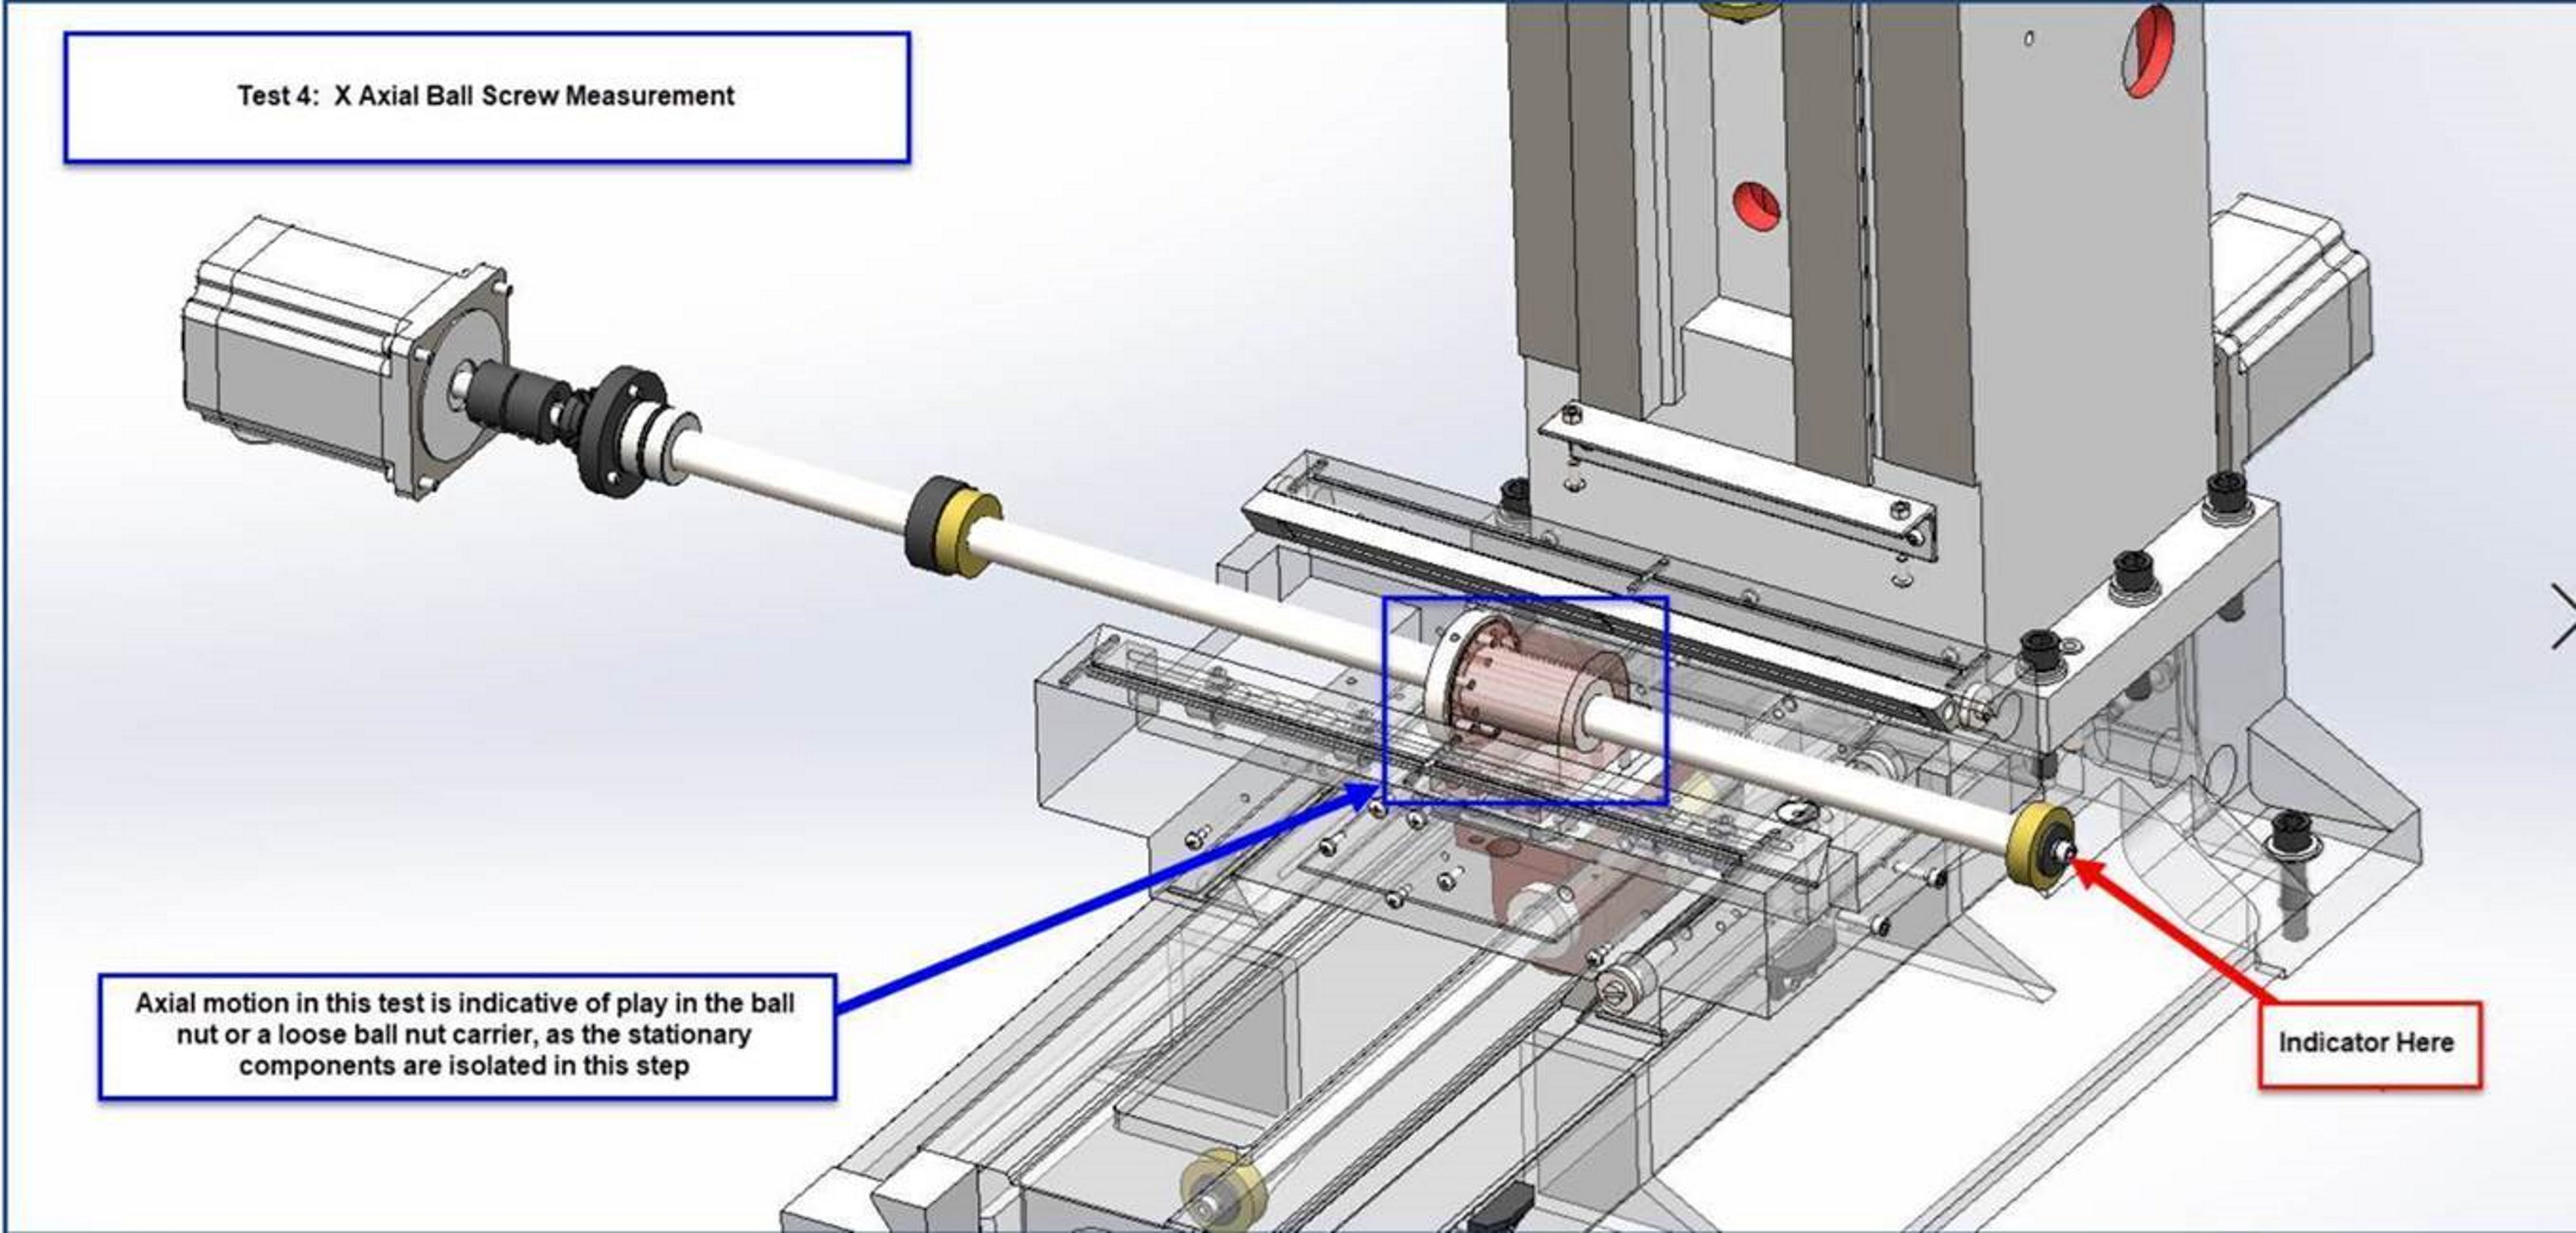
Test 4 - X Axial Ball Screw Measurement
Dial Travel Indicator with Mag Base on Lower Machine Base/Chip Tray, and indicator on front side of ball screw. Shake table/ball screw from front to back.
Push and Pull. If test exceeds .001” - you could have an excessive amount of play that could be coming from the ball nut or carriage. (Depending on how worn your ball screw is or how close you are to .001 - you could comp this if it is consistent.)
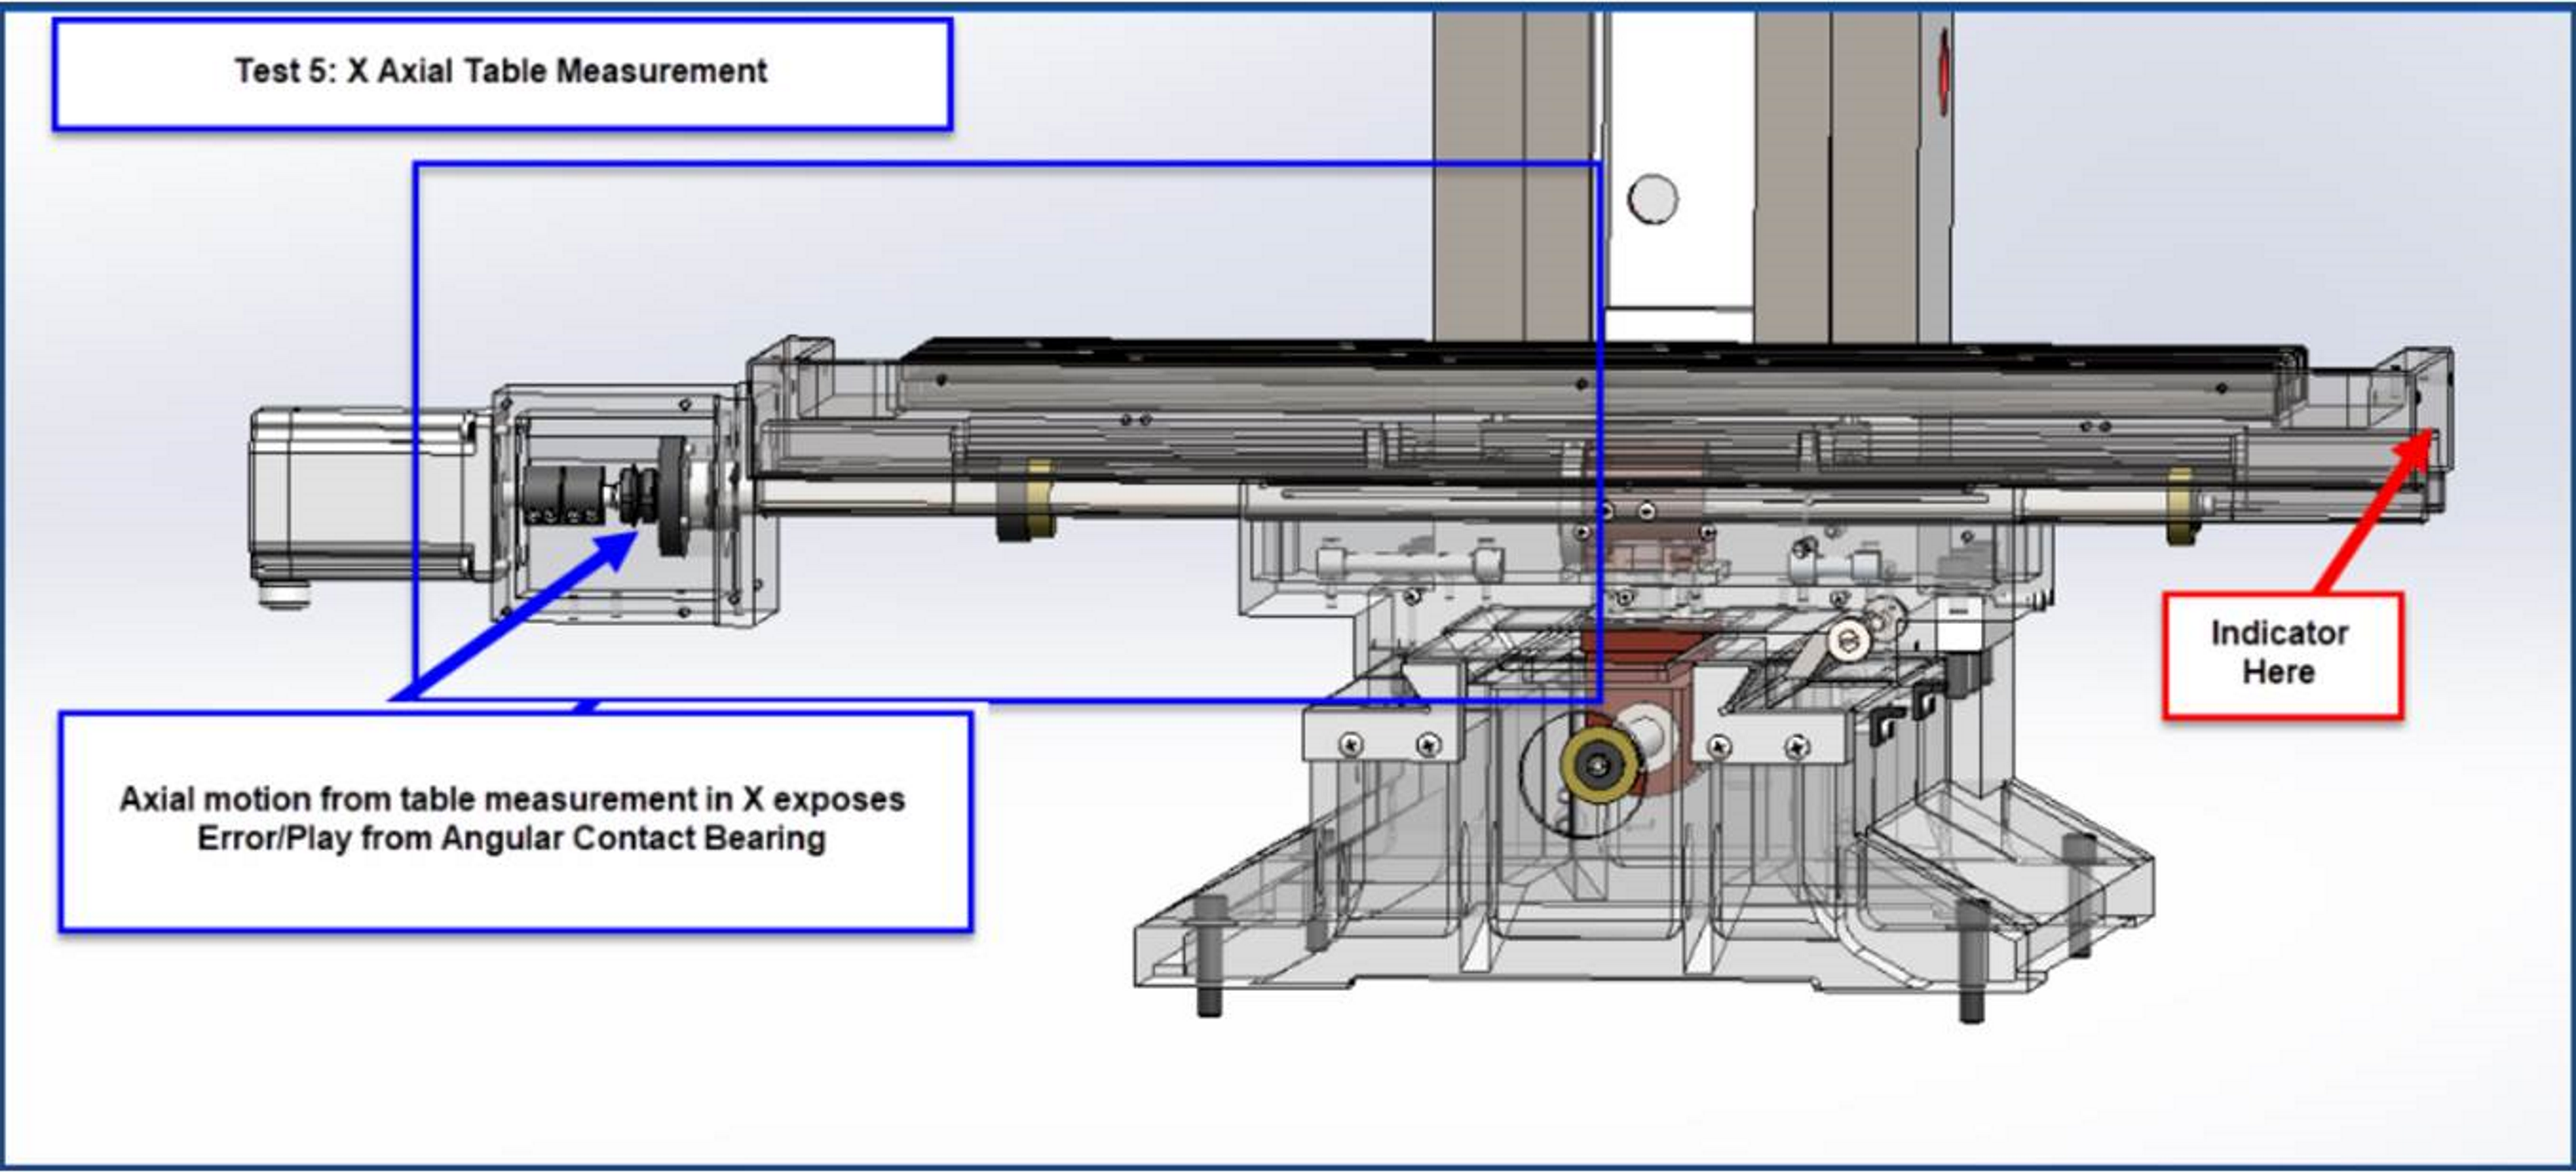
Test 5 - X Axial Table Measurement
Dial Travel indicator to right edge of table. No Motion or Motion Exceeding .0003” – ACB Adjustment Needed (See Angular Contact Bearing Adjustment Procedure then proceed to Test 6.)
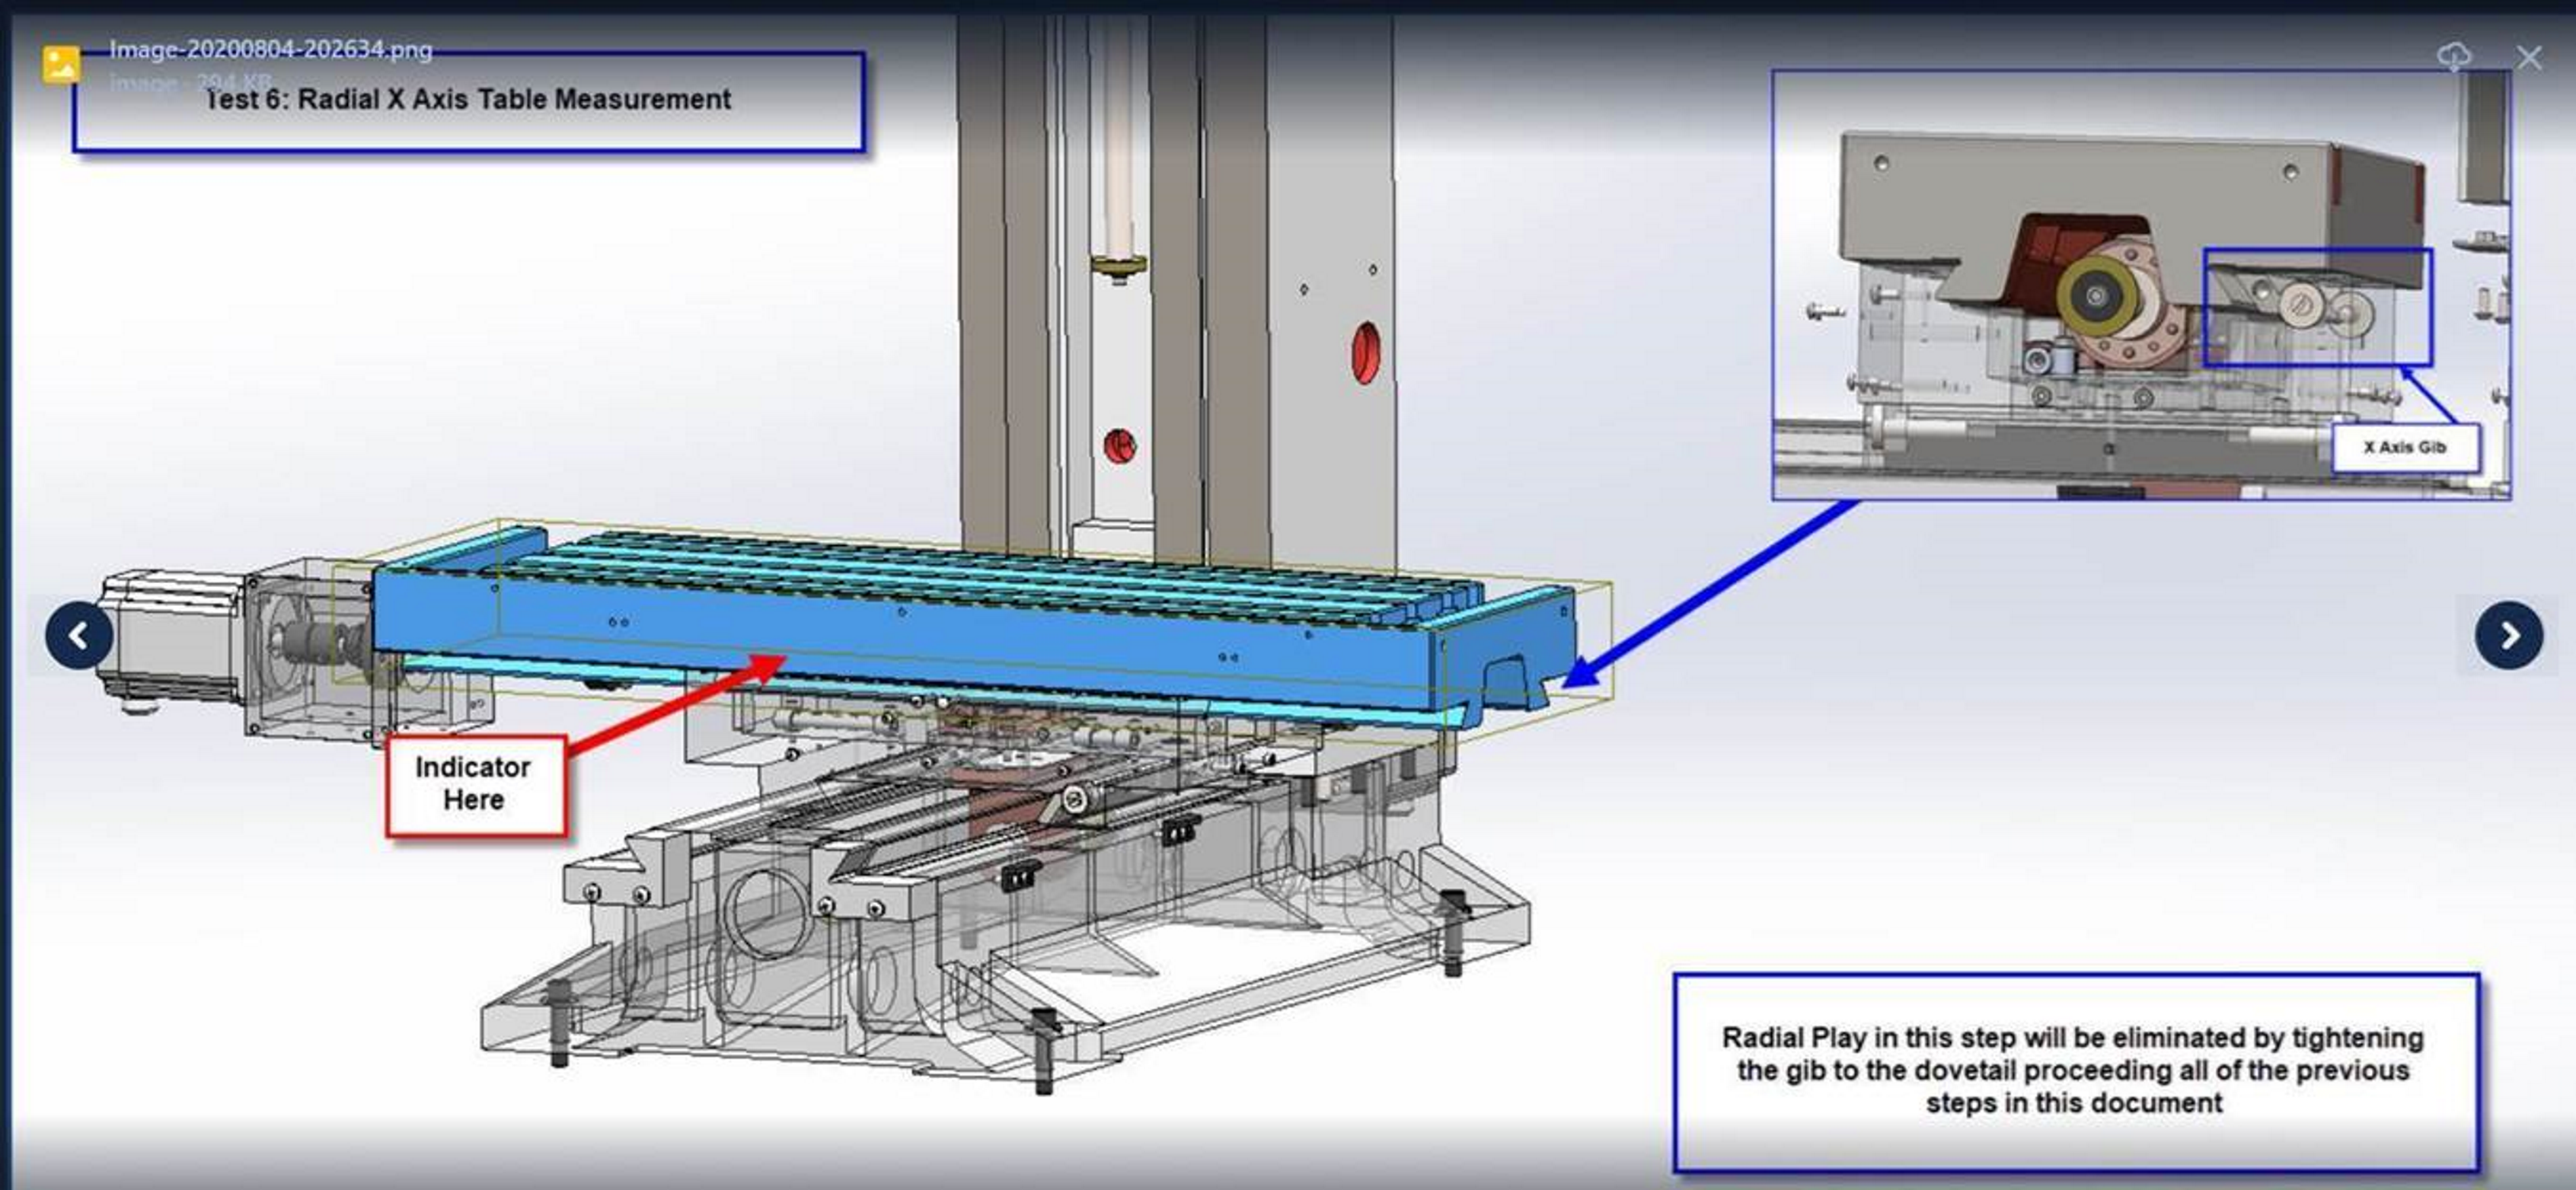
Test 6 - Radial X Axis Table Measurement
Move Indicator with Mag Base on Rail and indicator on the front of the table, one inch in from casting edge. Follow Gib adjustment procedure to get to the .0007 – .001” range. (Accumulative/Stacked Tolerance is factored in here - assuming .0005” per previous two steps.)
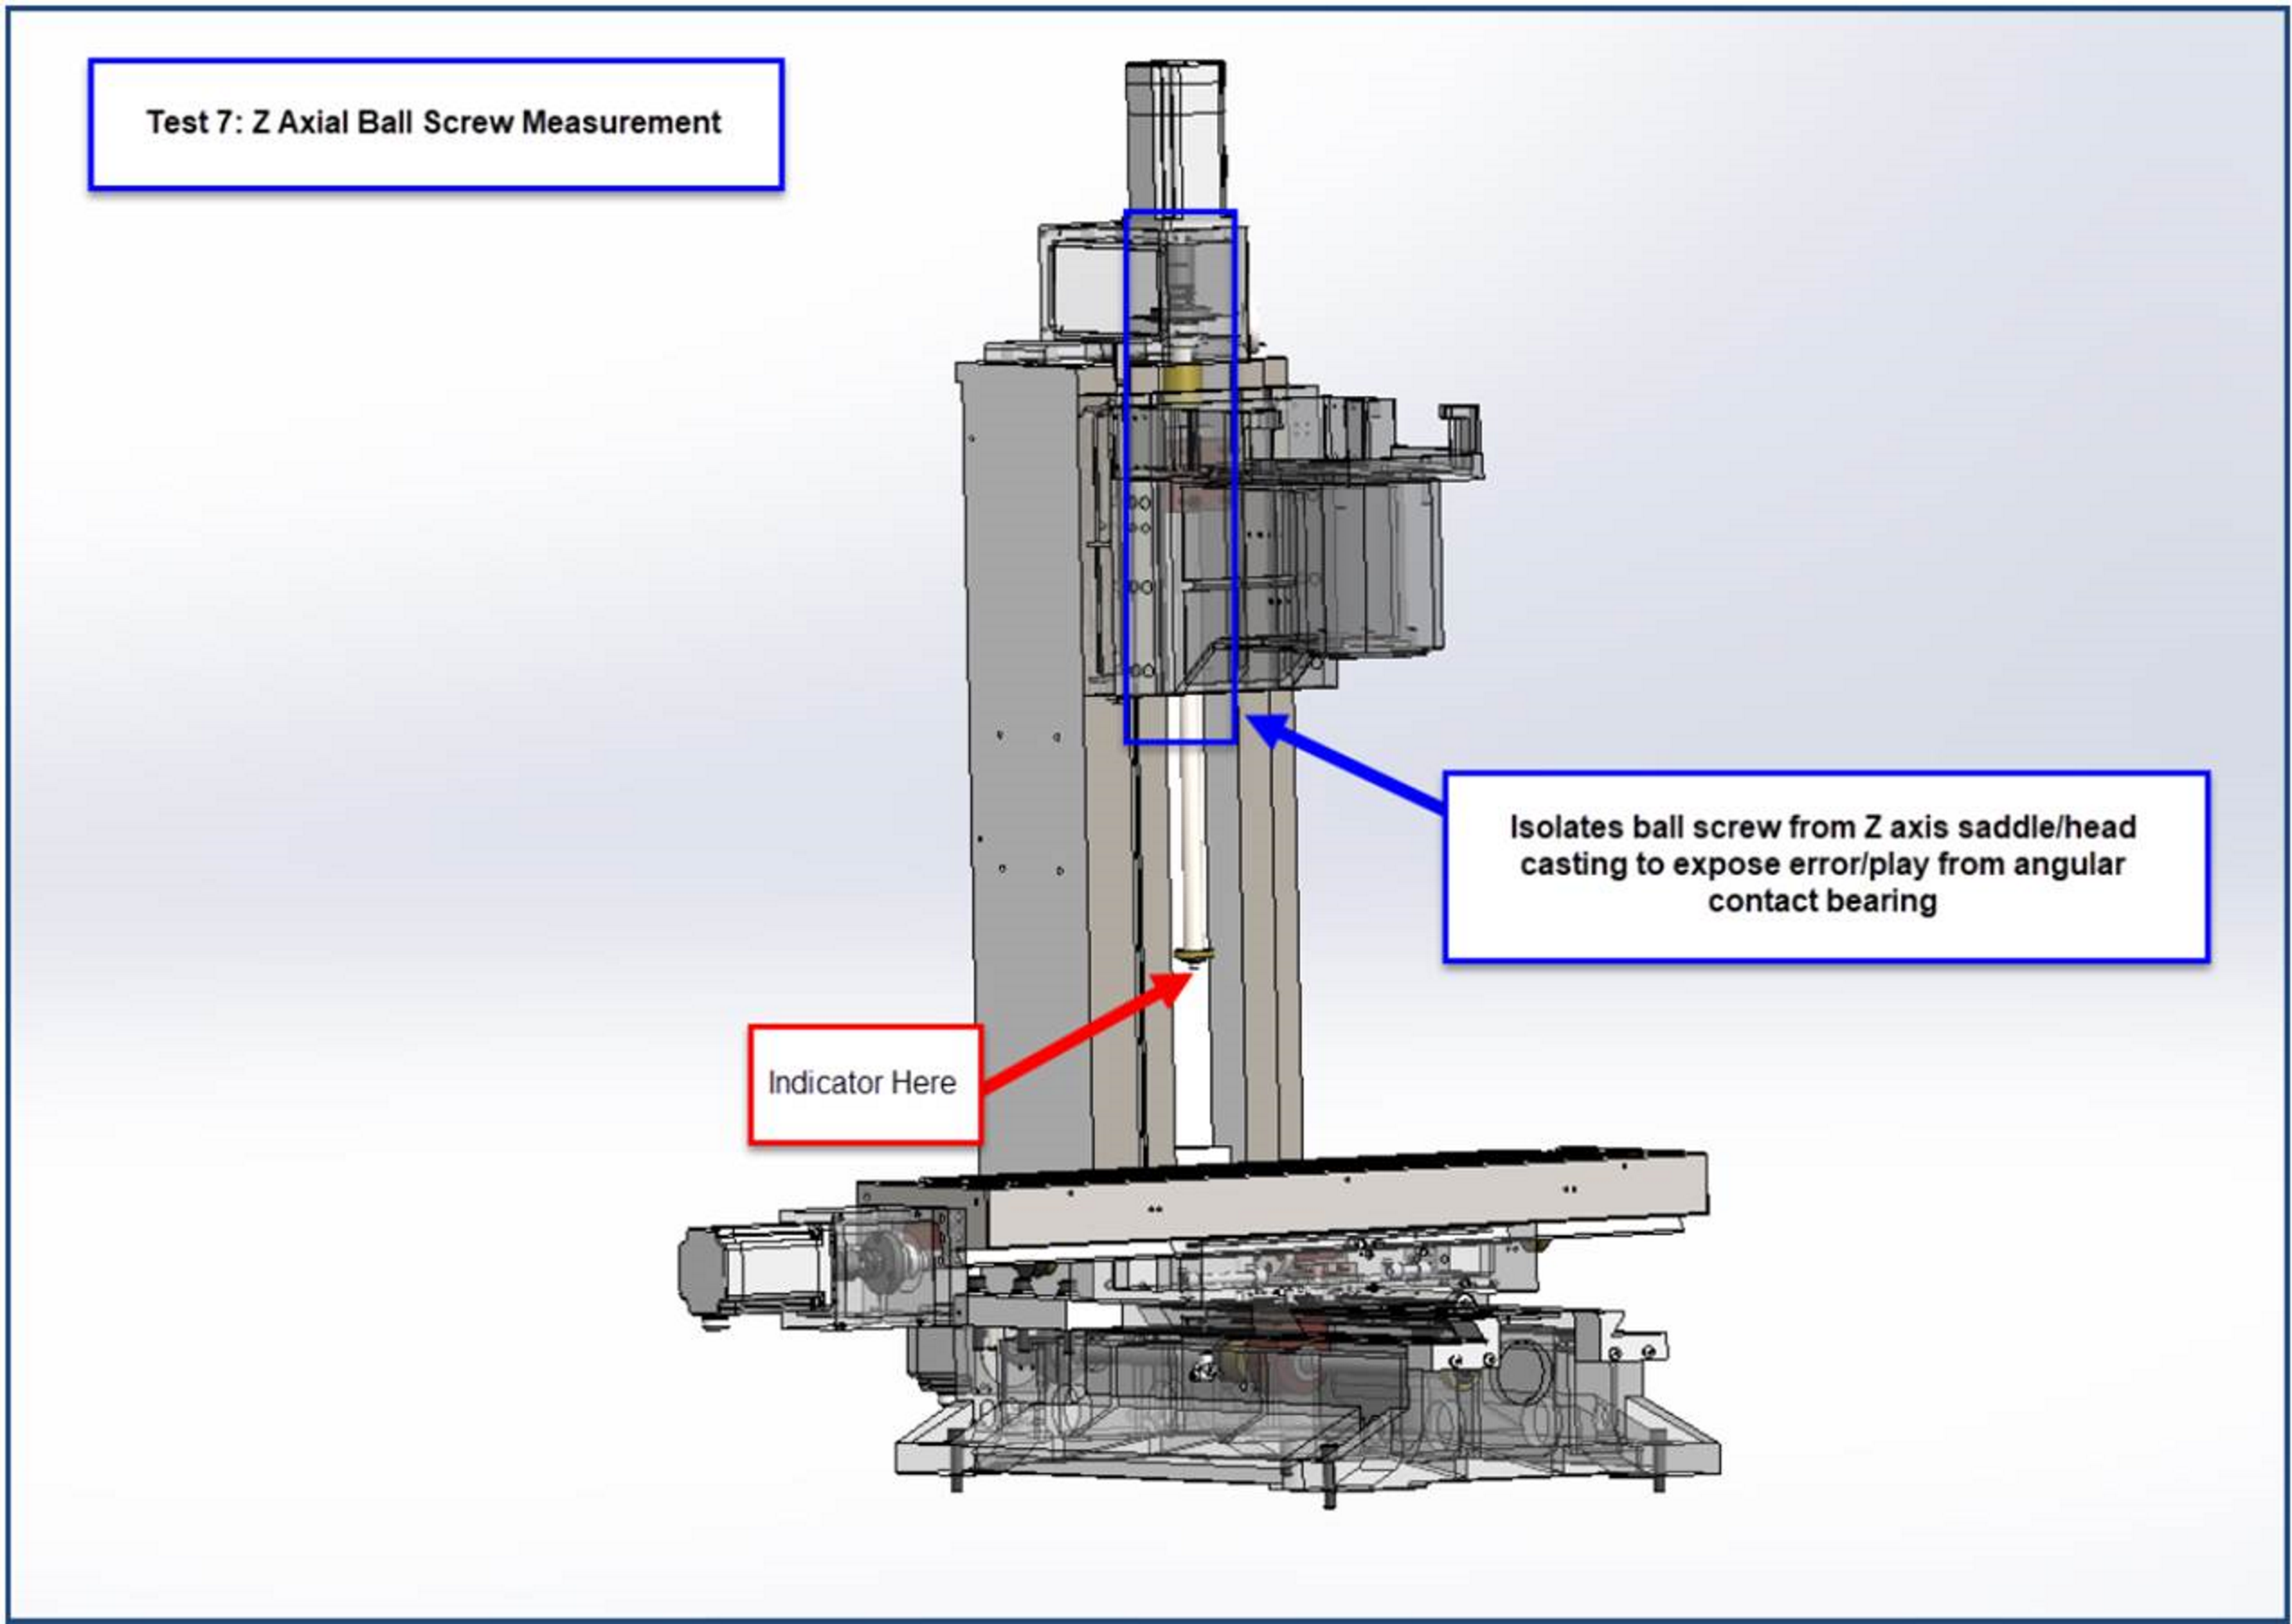
Test 7 - Z Axis Ball Screw Axial Test
Dial Travel Indicator on end of ball screw. Shake spindle head rail up and down.
No Motion or Motion Exceeding .0003” – ACB Adjustment Needed (See Angular Contact Bearing Adjustment Procedure then proceed to Test 8.)
If motion is at .0003, proceed to Test 8.
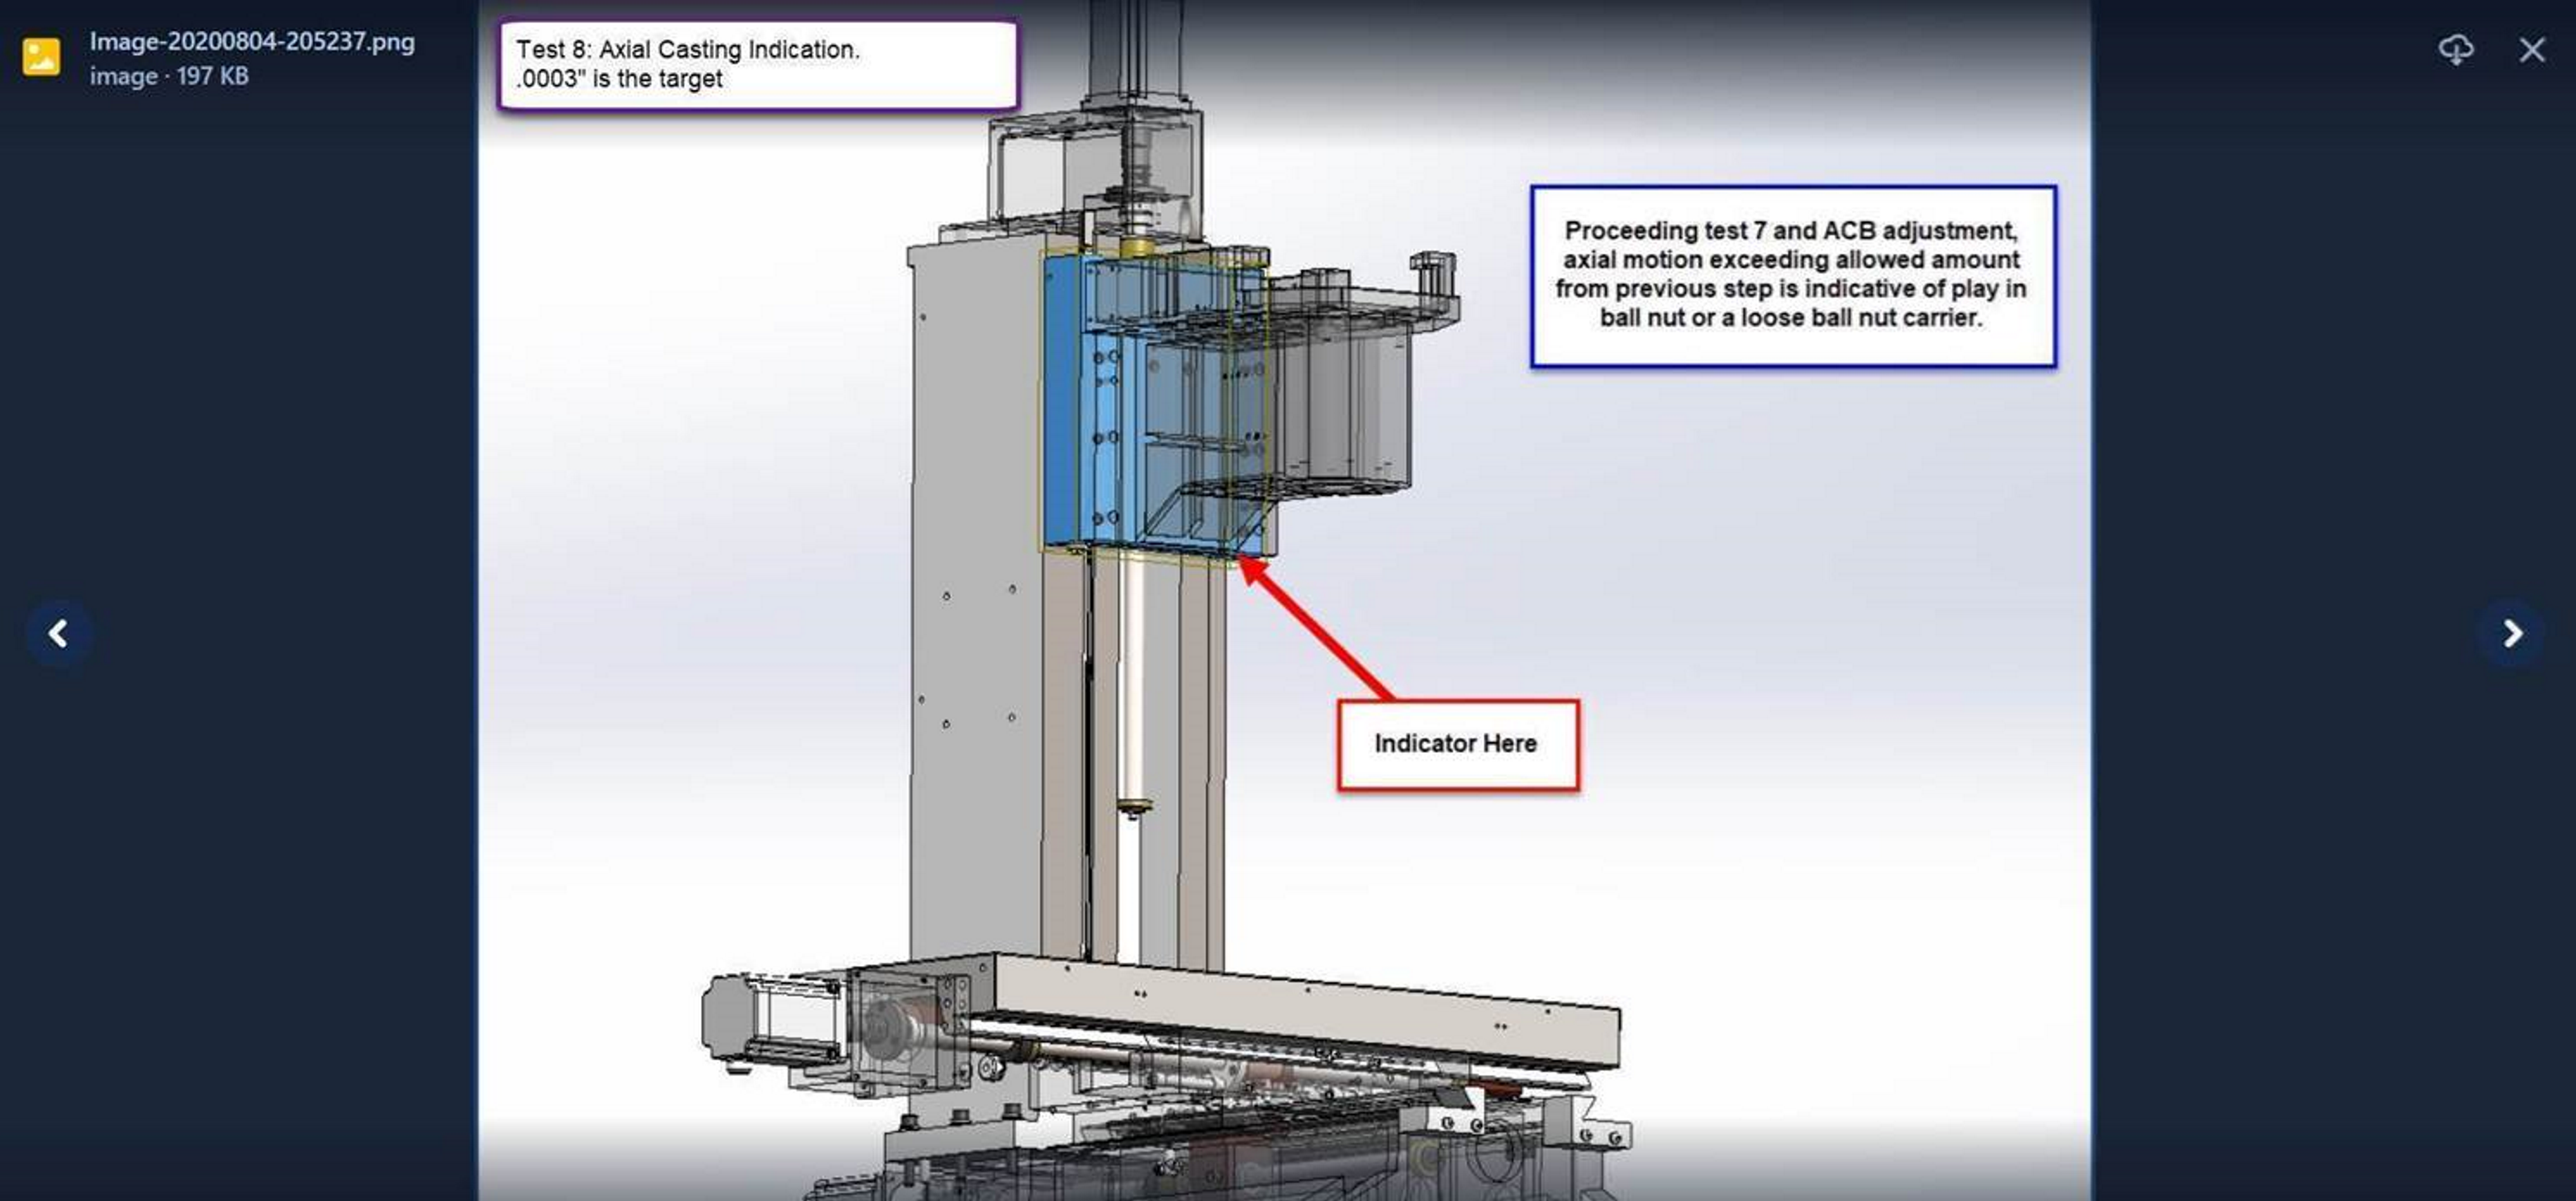
Test 8 - Z Axis Casting Axial Test
Move Dial Travel Indicator to bottom of Z axis saddle casting. Push and Pull up and down. If test exceeds .001” - you could have an excessive amount of play that could be coming from the ball nut or carriage. (Depending on how worn your ball screw is or how close you are to .001 - you could comp this if it is consistent.)
Test 9 - Radial Play in Z Axis Saddle
Move Indicator to spindle head and rock. Follow Gib adjustment procedure to get to the .0007 – .001” range. (Accumulative/Stacked Tolerance is factored in here - assuming .0005” per previous two steps.)
