Purpose
This document gives instructions on installing the v2.x ATC Control Board Kit for M/MX Mills.
Product Information
Product: v2.x ATC Control Board Kit for M/MX Mills (PN 51086)
|
Quantity |
Description |
|
1 |
ATC Control Board v2.x (PN 51023) |
NOTE: If any items are missing, we can help. Create a support ticket with Tormach Technical Support at tormach.com/how-to-submit-a-support-ticket for guidance on how to proceed.
Before You Begin
-
Update PathPilot. If you haven't yet done so, update to the latest version of PathPilot. You can either:
-
Download and install the update file from your controller by selecting the Update button on the Status tab.
-
Download the update file to a USB drive from the PathPilot support center and transfer it to your controller.
-
Disassembly
The ATC Control Board v2.x (PN 51023) replaces the following products:
-
ATC Control Board v1.6 or v1.7 (PN 39121)
-
ATC Control Board v1.10 (PN 50690)
-
Stepper Driver (PN 32793)
NOTE: The replacement ATC control board (v2.x) has an on-board stepper driver, so you'll no longer need PN 32793.
To disassemble the old control board:
-
Power off the machine and the PathPilot controller.
-
Push in the machine's red Emergency Stop button, which removes power to motion control.
-
From the PathPilot interface, select Exit.
-
Turn the Main Disconnect switch to OFF on the side of the electrical cabinet.
-
Follow correct lockout/tagout procedures.
-
-
Open the panel on your ATC.
-
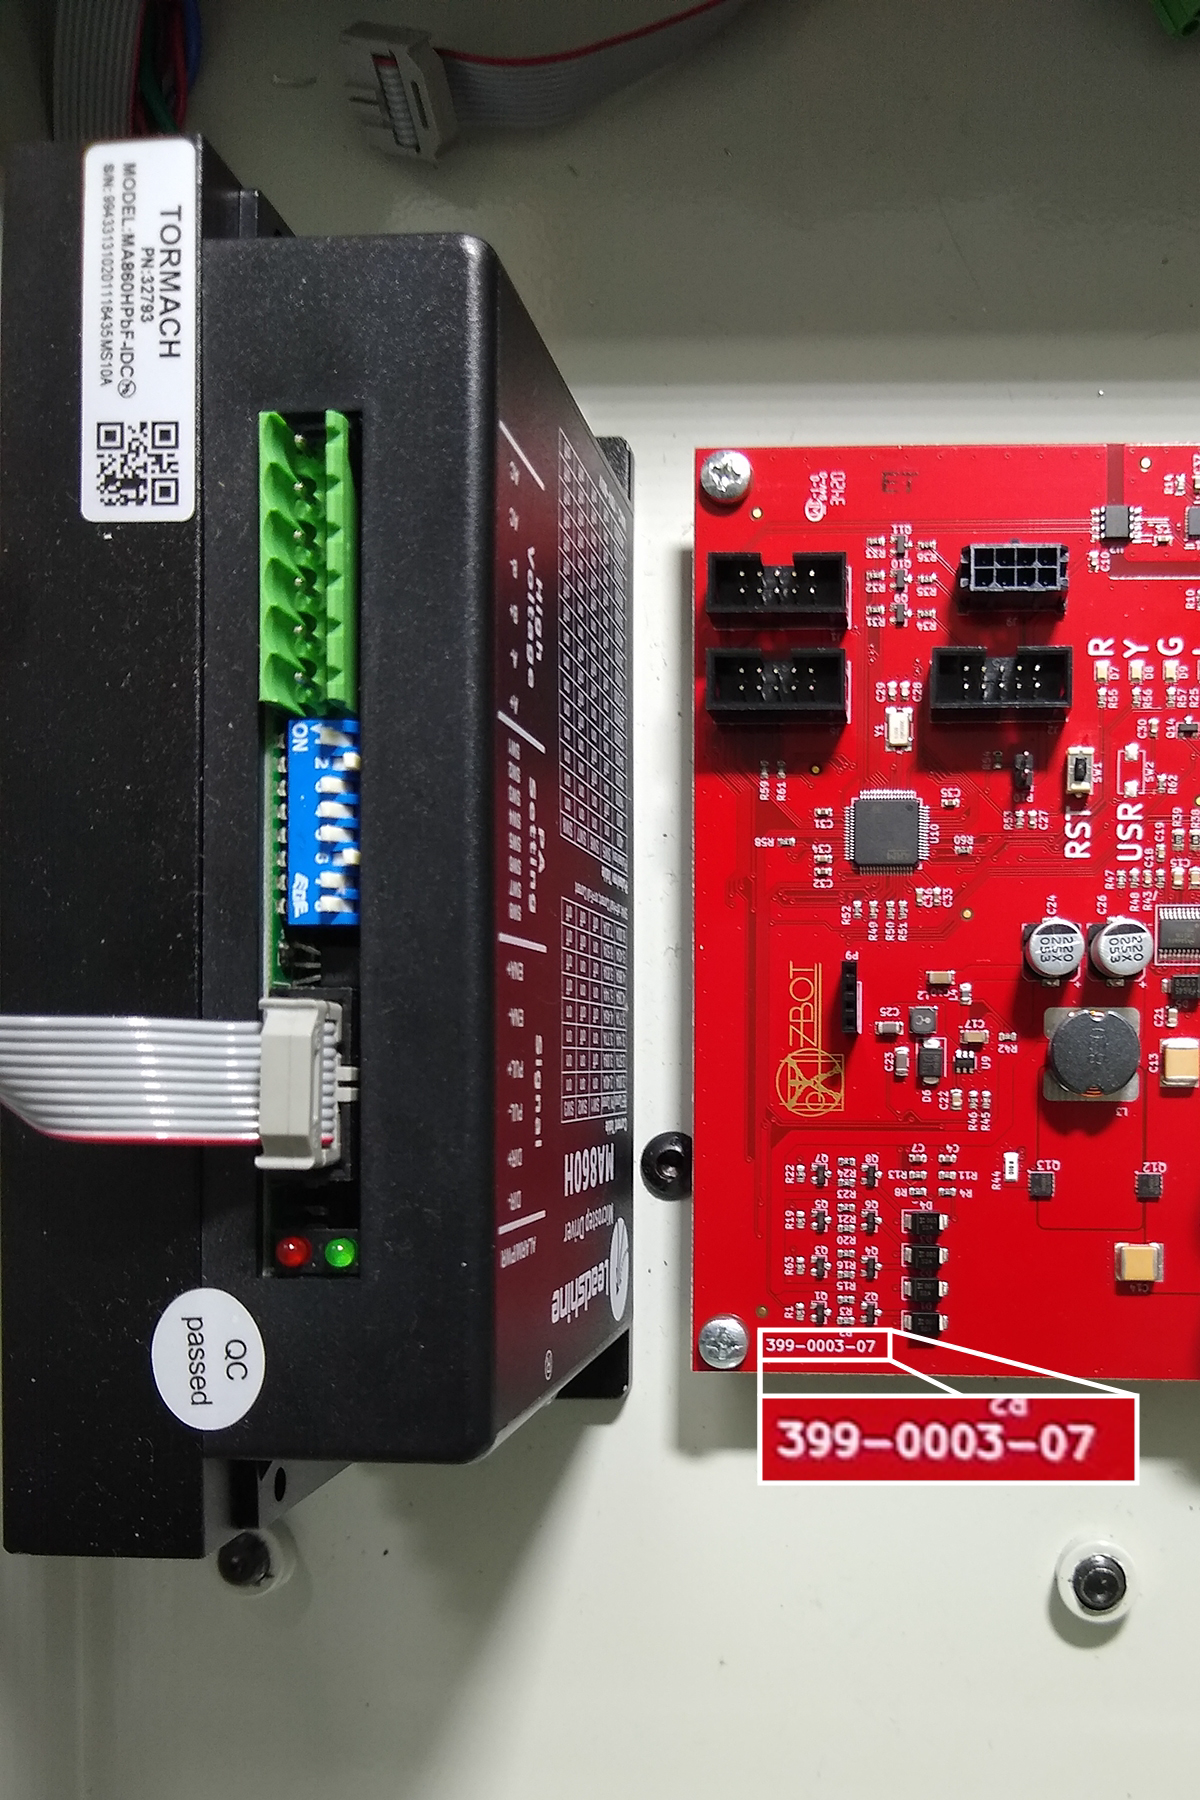
Identify the current ATC board's version number. Find the number printed on the bottom left-hand corner of the control board (as shown in the following image).
-
Depending on the number that you identified in Step 3, do one of the following:
-
399-0003-06 (ATC control board v1.6) or 399-0003-07 (ATC control board v1.7) Go to Step 5.
-
399-0003-10 (ATC control board v1.10) Go to Step 7.
-
-
Disconnect and remove the two cables connected to both the stepper driver and the control board.
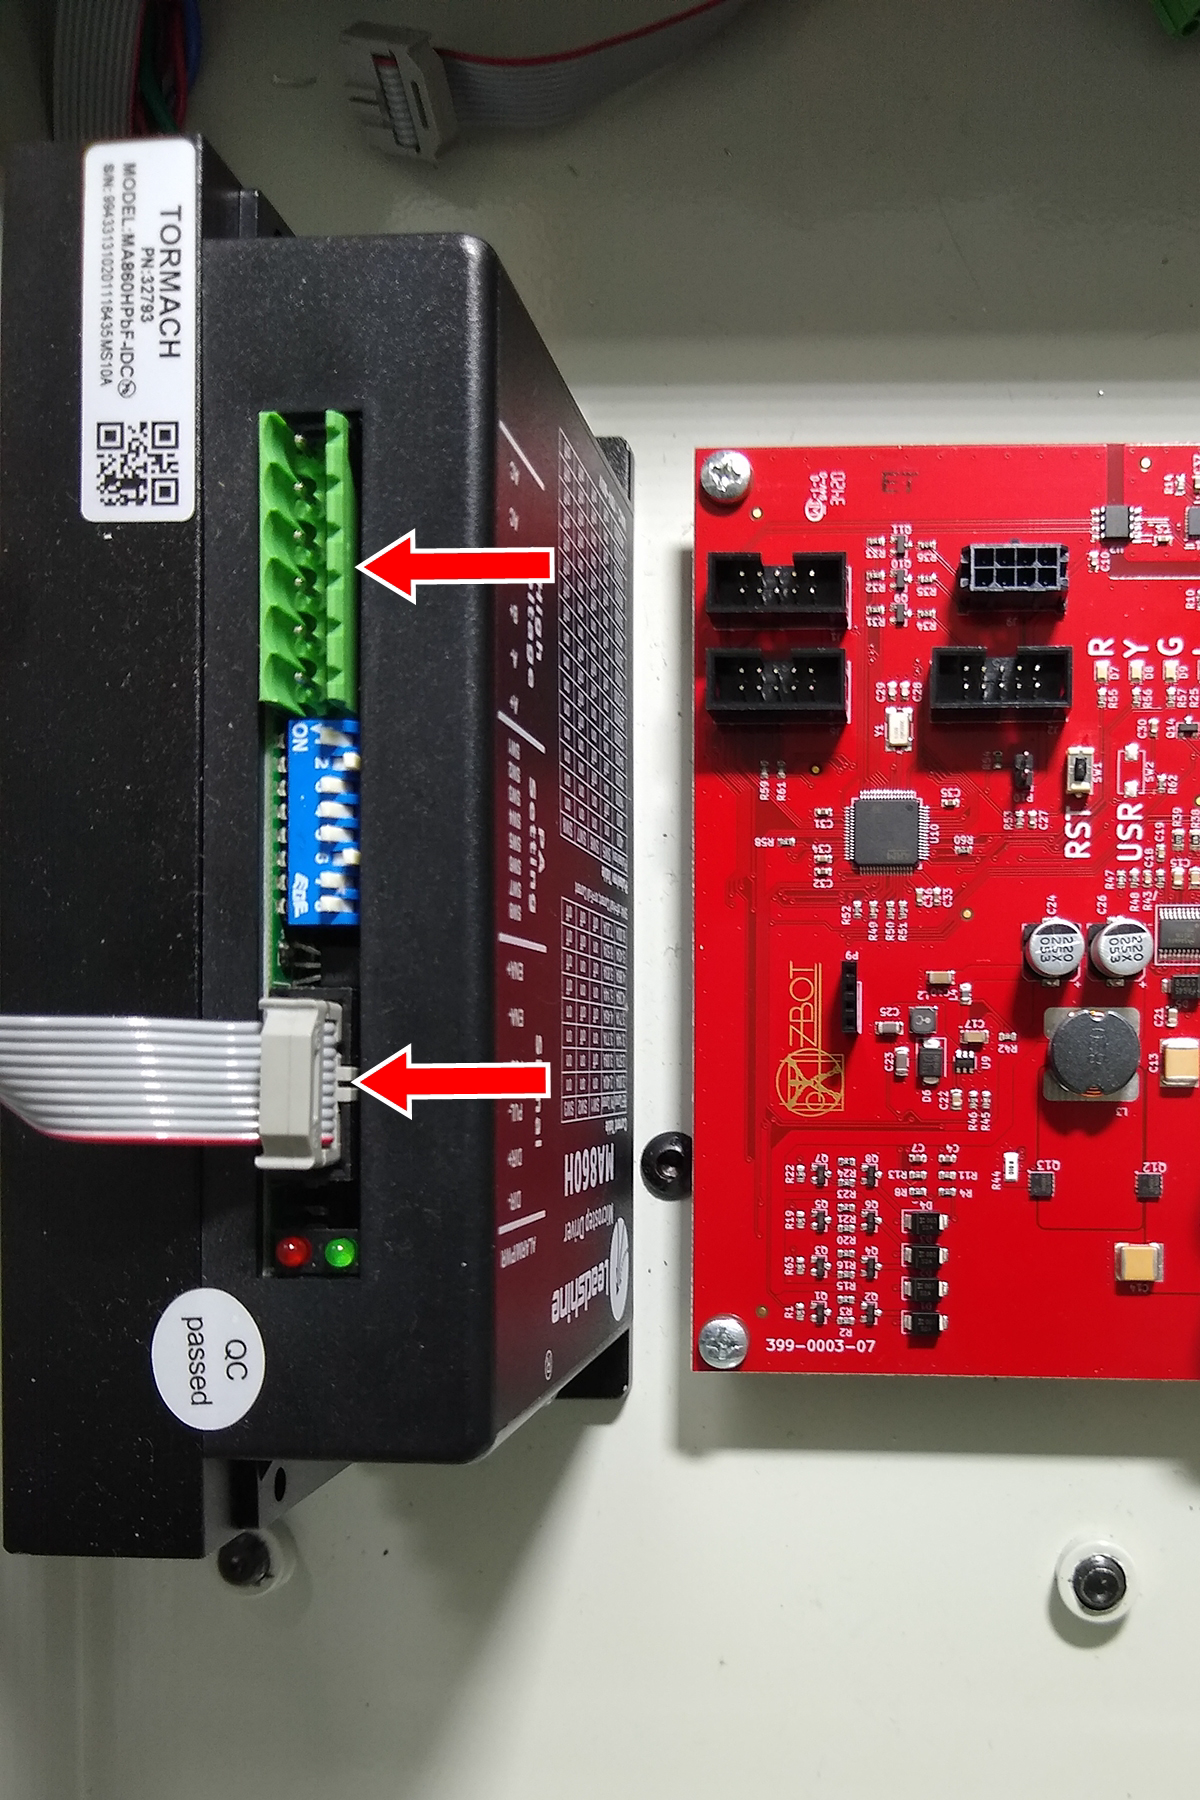
-
Remove the stepper driver from the ATC.
-
Disconnect all cabling from the control board.
-
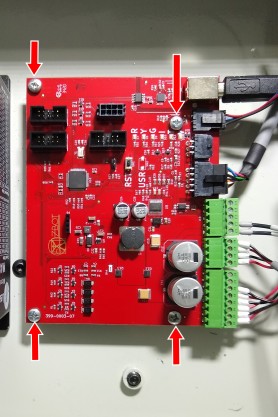
Remove the old control board from the ATC. Set aside its four screws for reuse later in this procedure.
Install the New Control Board
NOTICE! You must take care to keep the control board clean. Before you install the new control board, make sure that the ATC enclosure is free of chips or debris. The presence of chips could cause damage to the control board.
-
Install the new ATC module into the enclosure using the four screws that you set aside in "Disassembly".
-
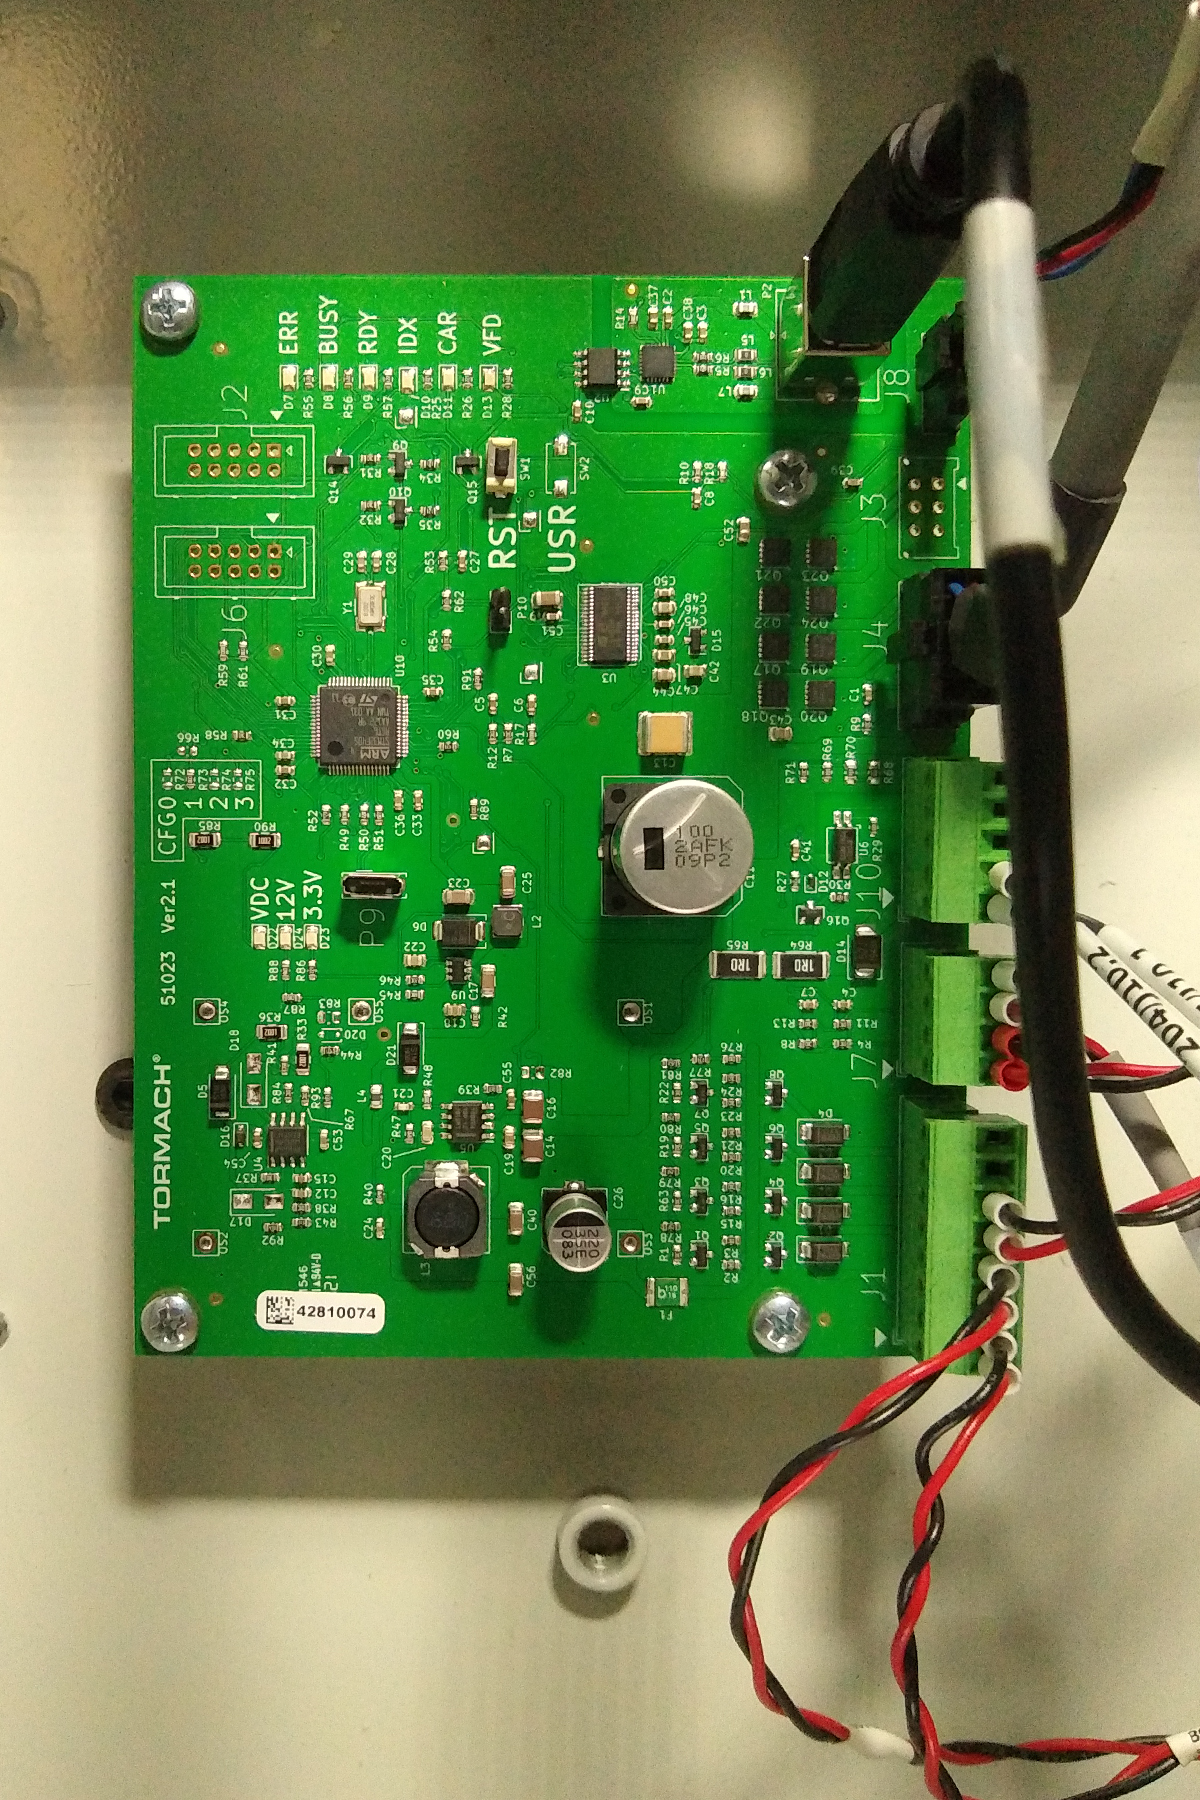
Make all connections to the ATC control board as shown in the following image.
-
Close the panel on your ATC.
-
Power on the machine and the PathPilot controller.
-
Turn the Main Disconnect switch to ON on the side of the electrical cabinet.
-
Twist out the machine's red Emergency Stop button, which enables movement to the machine axes and the spindle.
-
Press the machine's Reset button (next to the Emergency Stop button).
-
Bring the machine out of reset and reference it.
-
-
Verify the alignment of the ATC tool tray. If required, use the ++ and -- buttons on the ATC tab to realign the tool tray. For information, see the documentation for the ATC.
NOTE: The tool tray position is stored as a setting on the control board. However, the settings from your original control board aren't transferred to new (replacement) control boards. This means that you may need to realign the tool tray after installing this kit.
To view a PDF version of your manual, go to Tormach document TD10793.
If you have additional questions, we can help. Create a support ticket with Tormach Technical Support at tormach.com/how-to-submit-a-support-ticket for guidance on how to proceed.